FeedMyFurBabies – Event-Sourcing using Amazon EventBridge

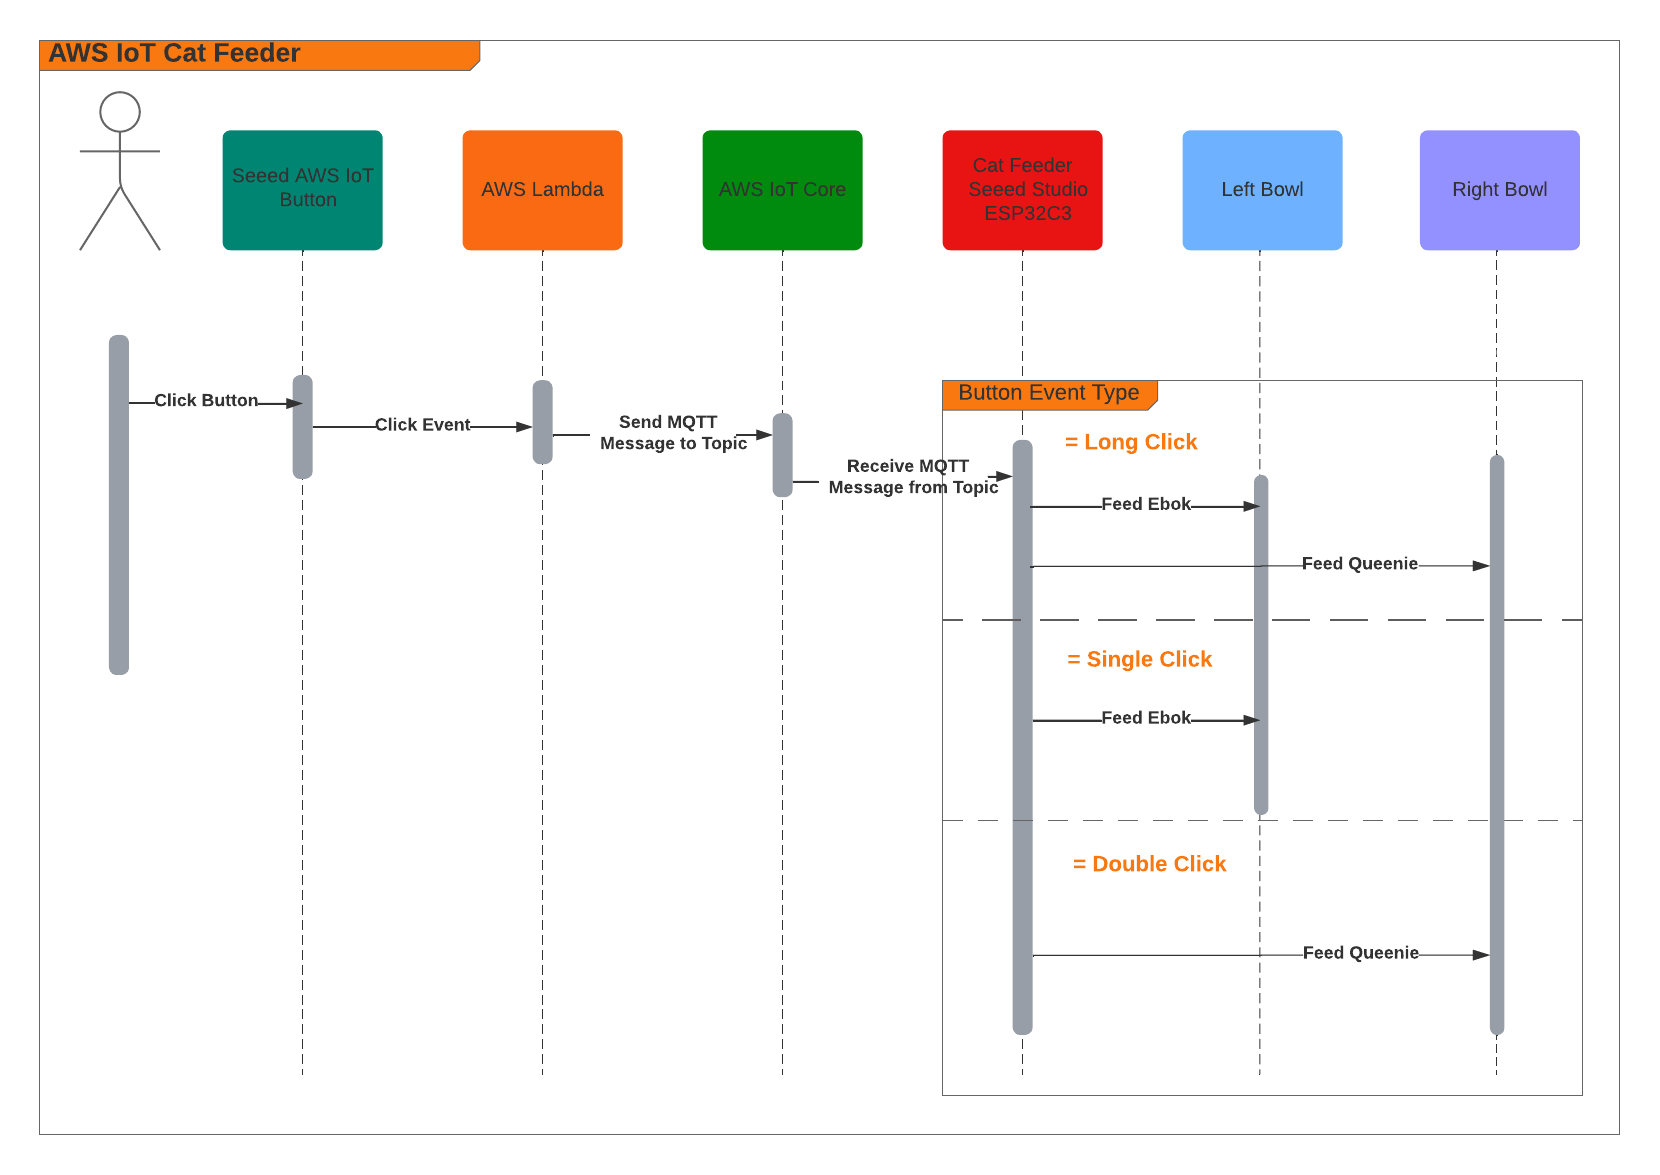
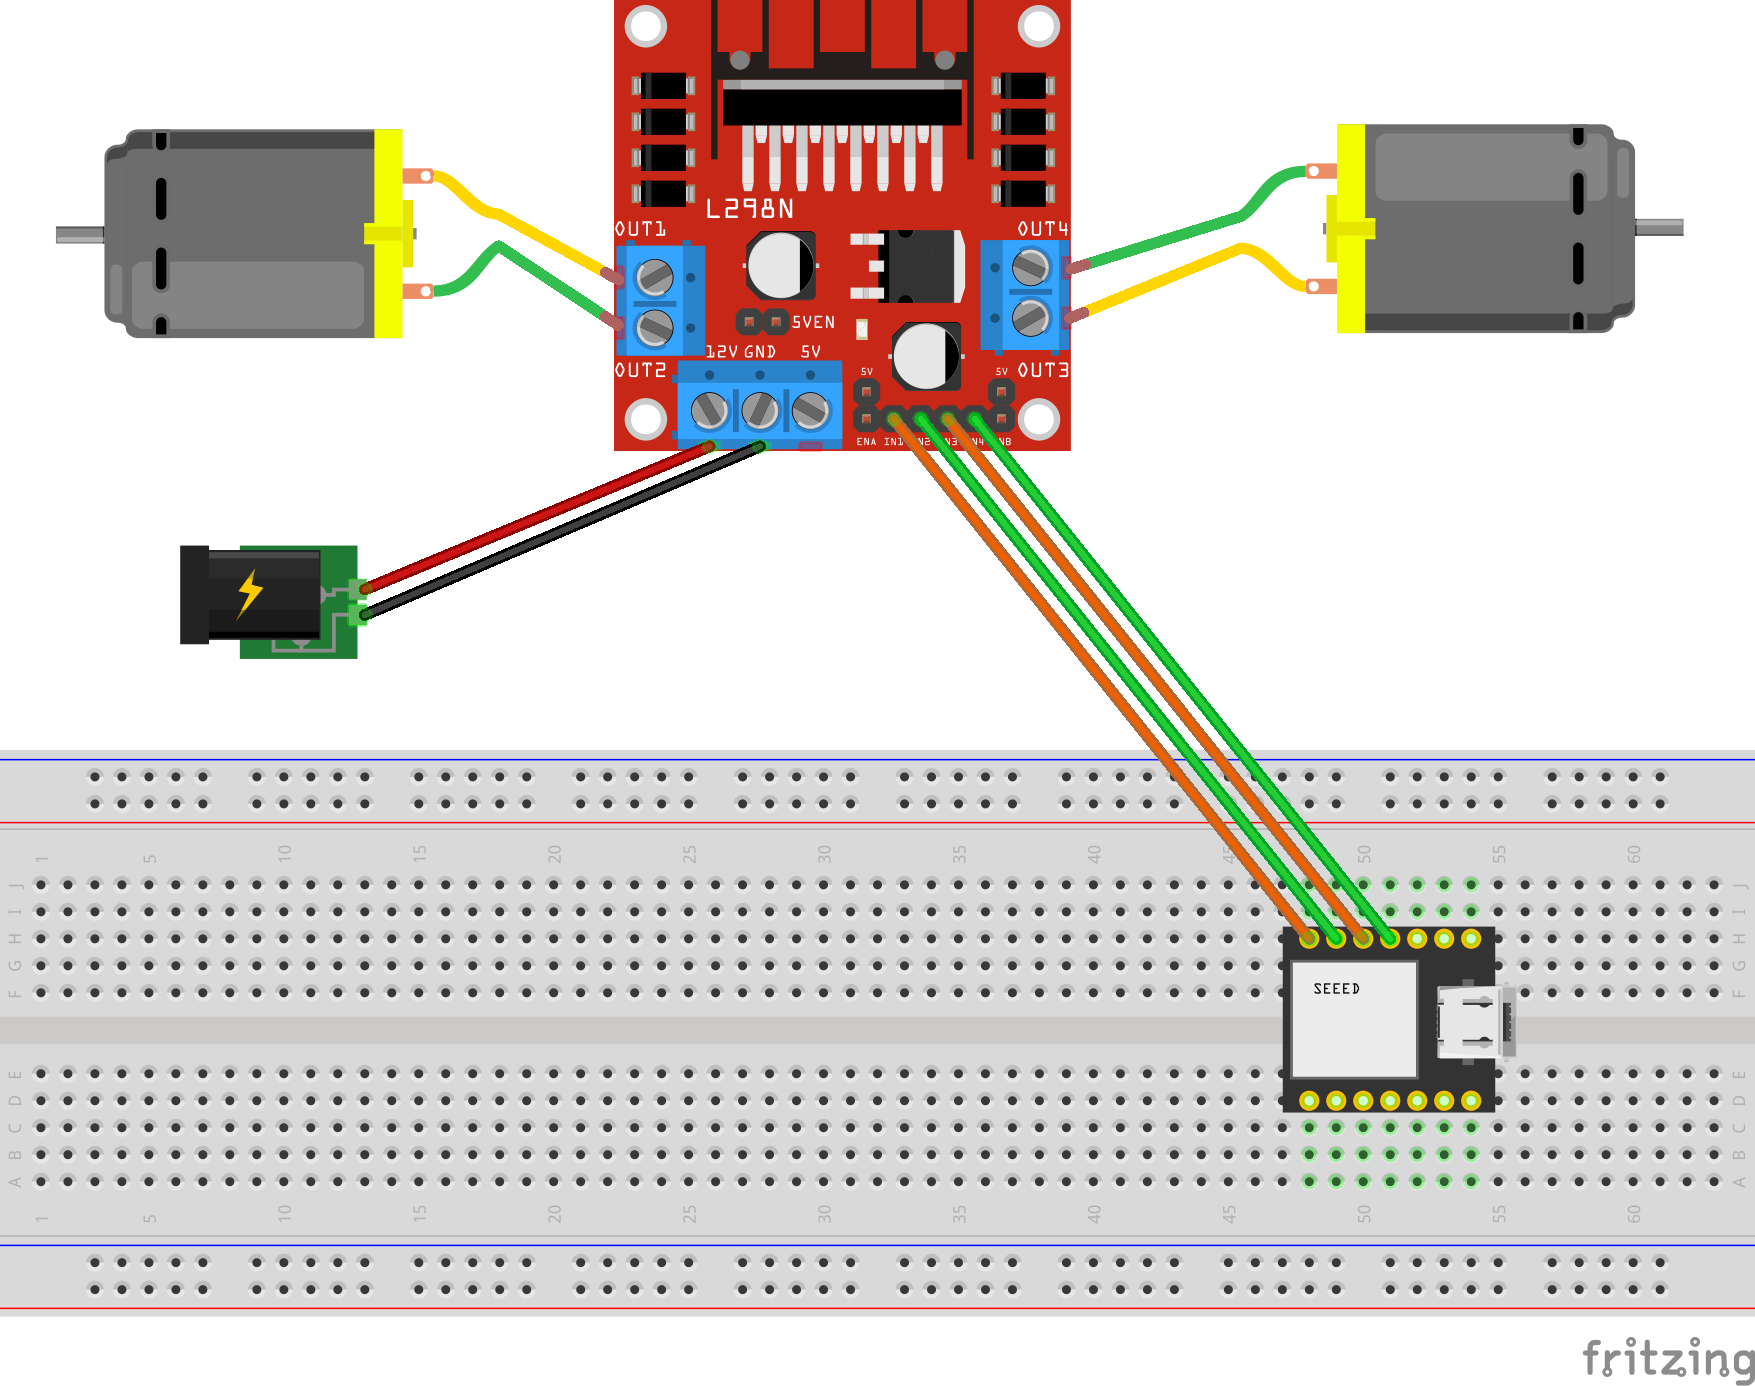
In my previous AWS IoT Cat feeder project I used a Lambda function as the event handler each time the Seeed Studio AWS IoT 1-click button was pressed, the Lambda function in turn published an MQTT message to AWS Iot Core which is received by the Cat Feeder (via a Seeed Studio XIAO ESP32C3 micro-controller) to dispense food into either one of the cat bowls or both (depending on the type of press performed on the IoT button). The long term goal is to integrate the AWS IoT Cat Feeder with the Feed My Fur Babies project.
In this Part 2 of the Feed My Fur Babies blog series, I will be introducing the Event-Sourcing pattern to the https://www.feedmyfurbabies.com architecture; describe the benefits of designing an architecture around Event-Souring and an example implemented using Terraform. I recently learnt Terraform and I now prefer it over the native IaC.
Current state architecture
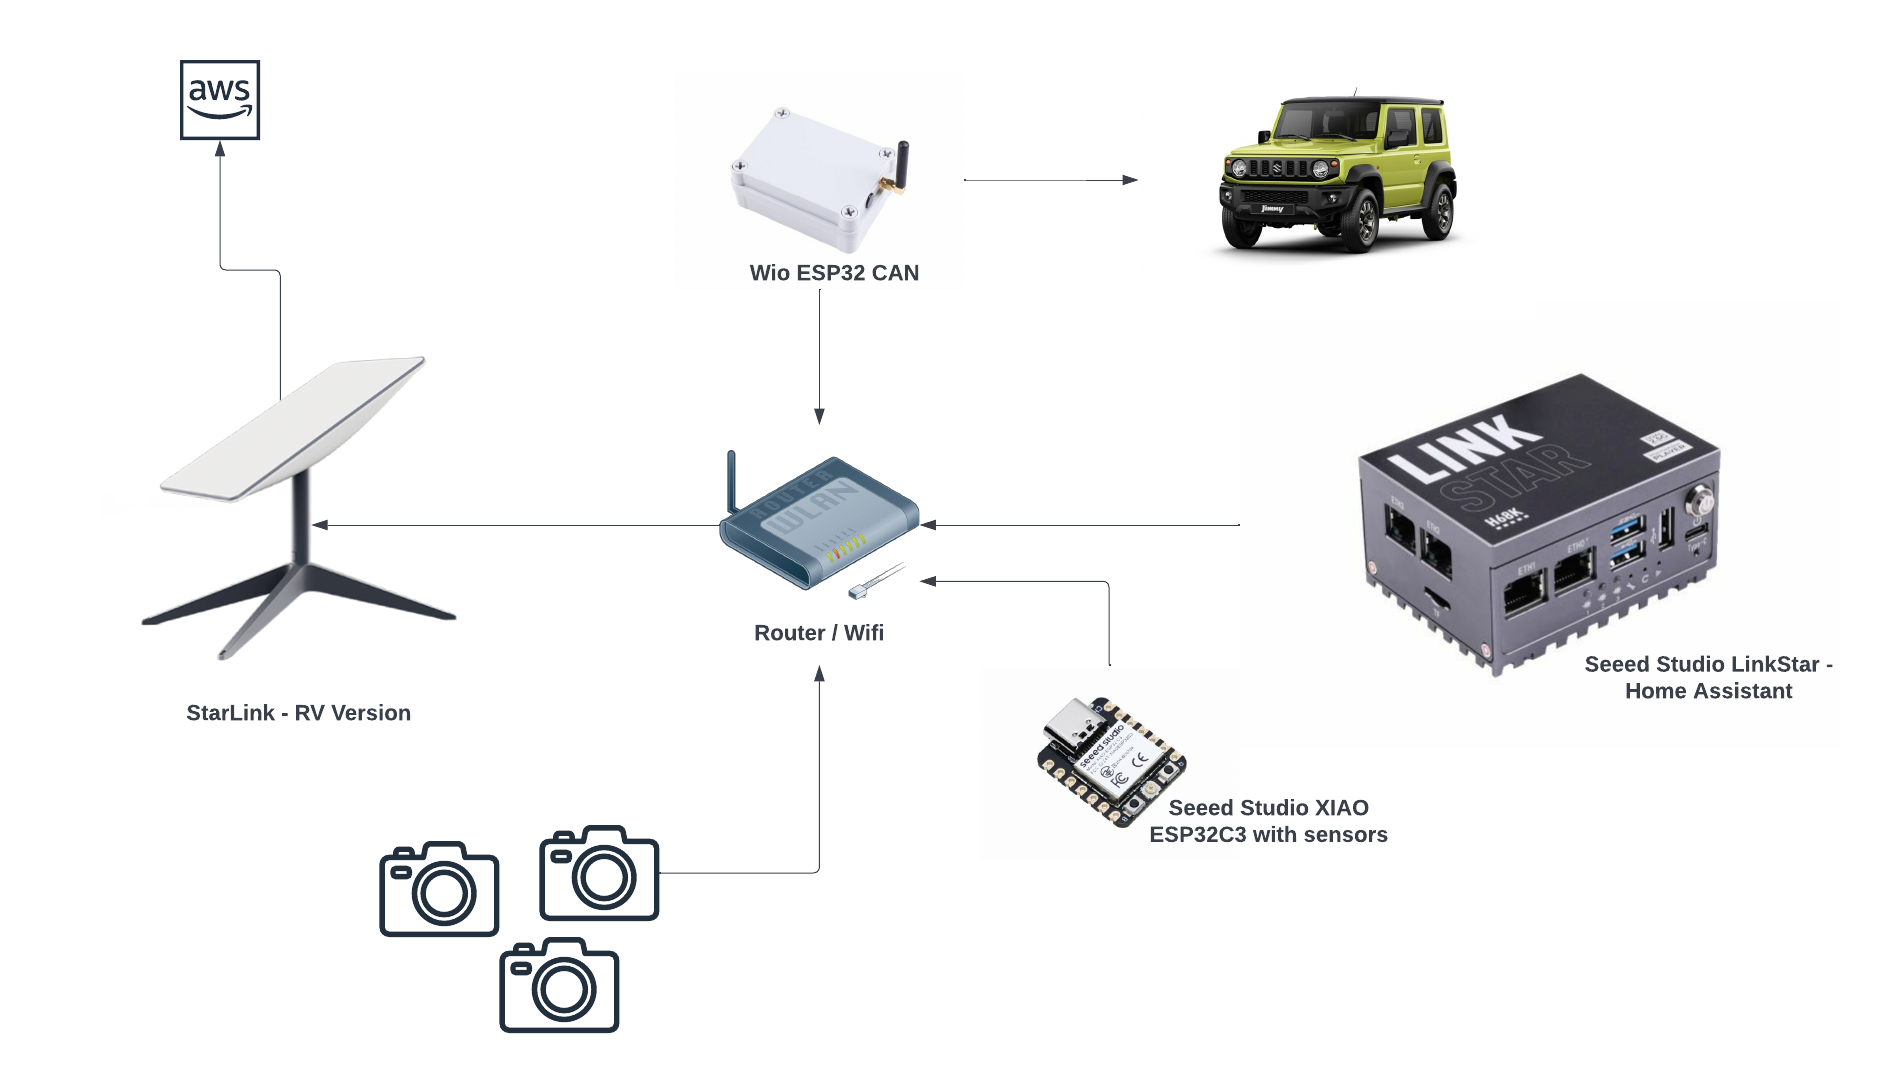
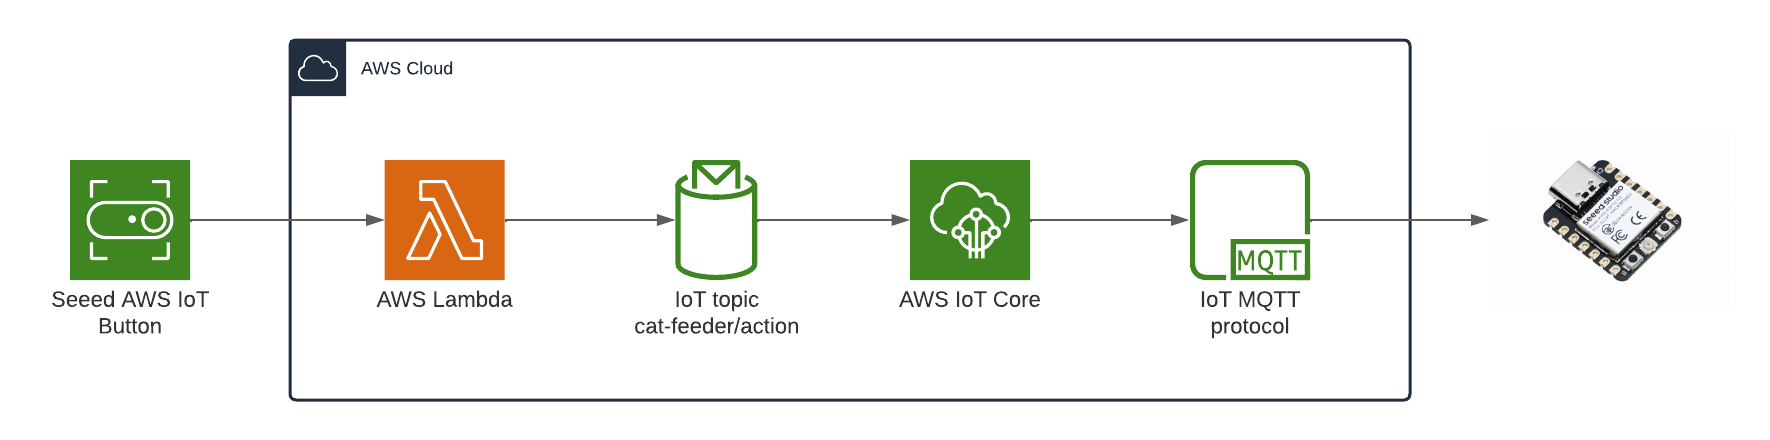
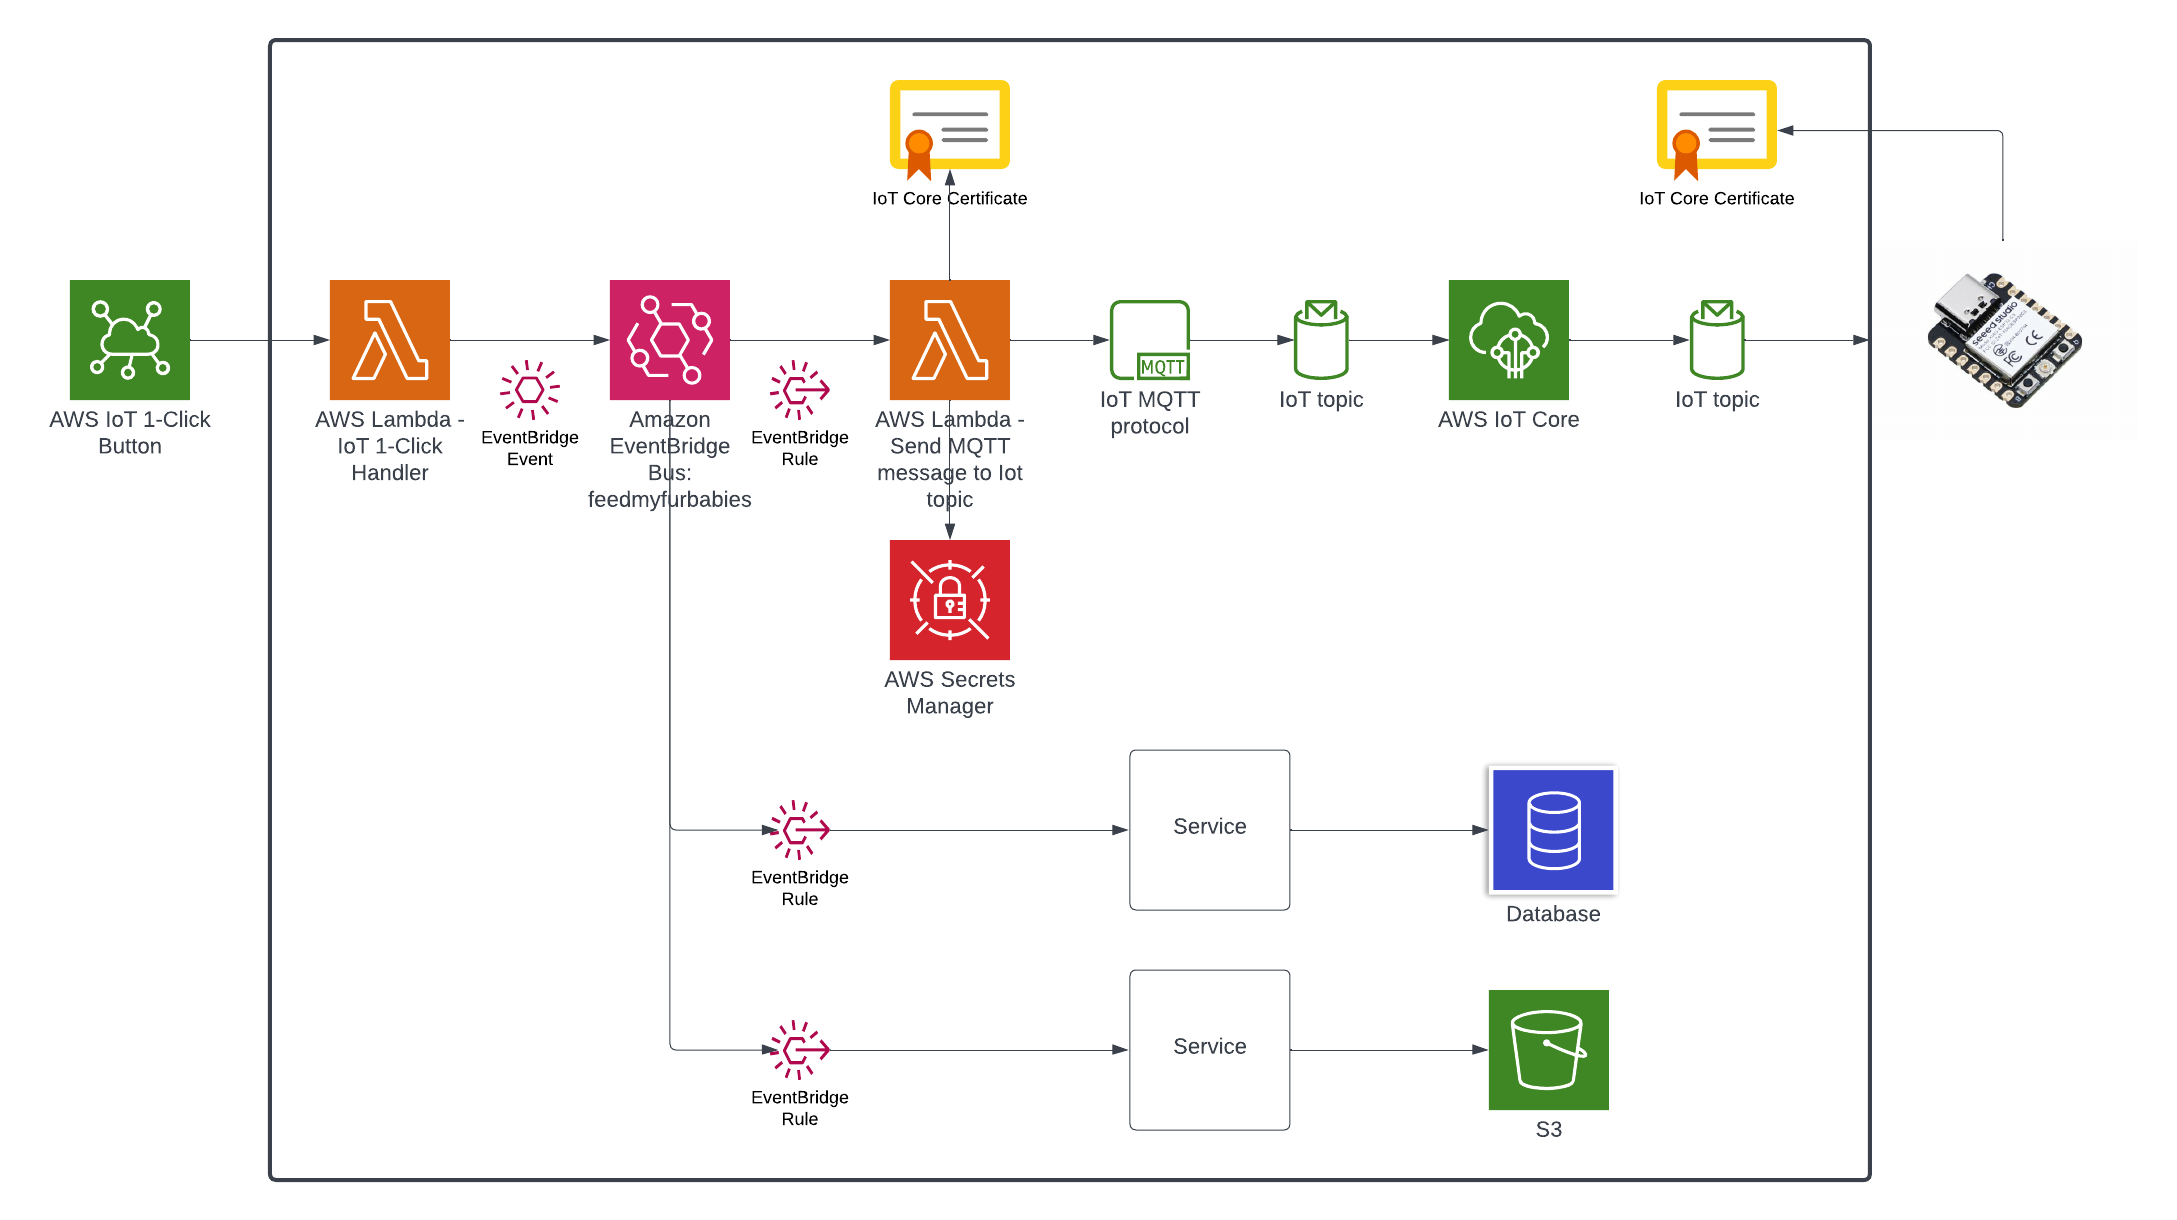
Here is the current state of the Cat Feeder architecture amd the IoT related resources previously deployed in AWS using CloudFormation:
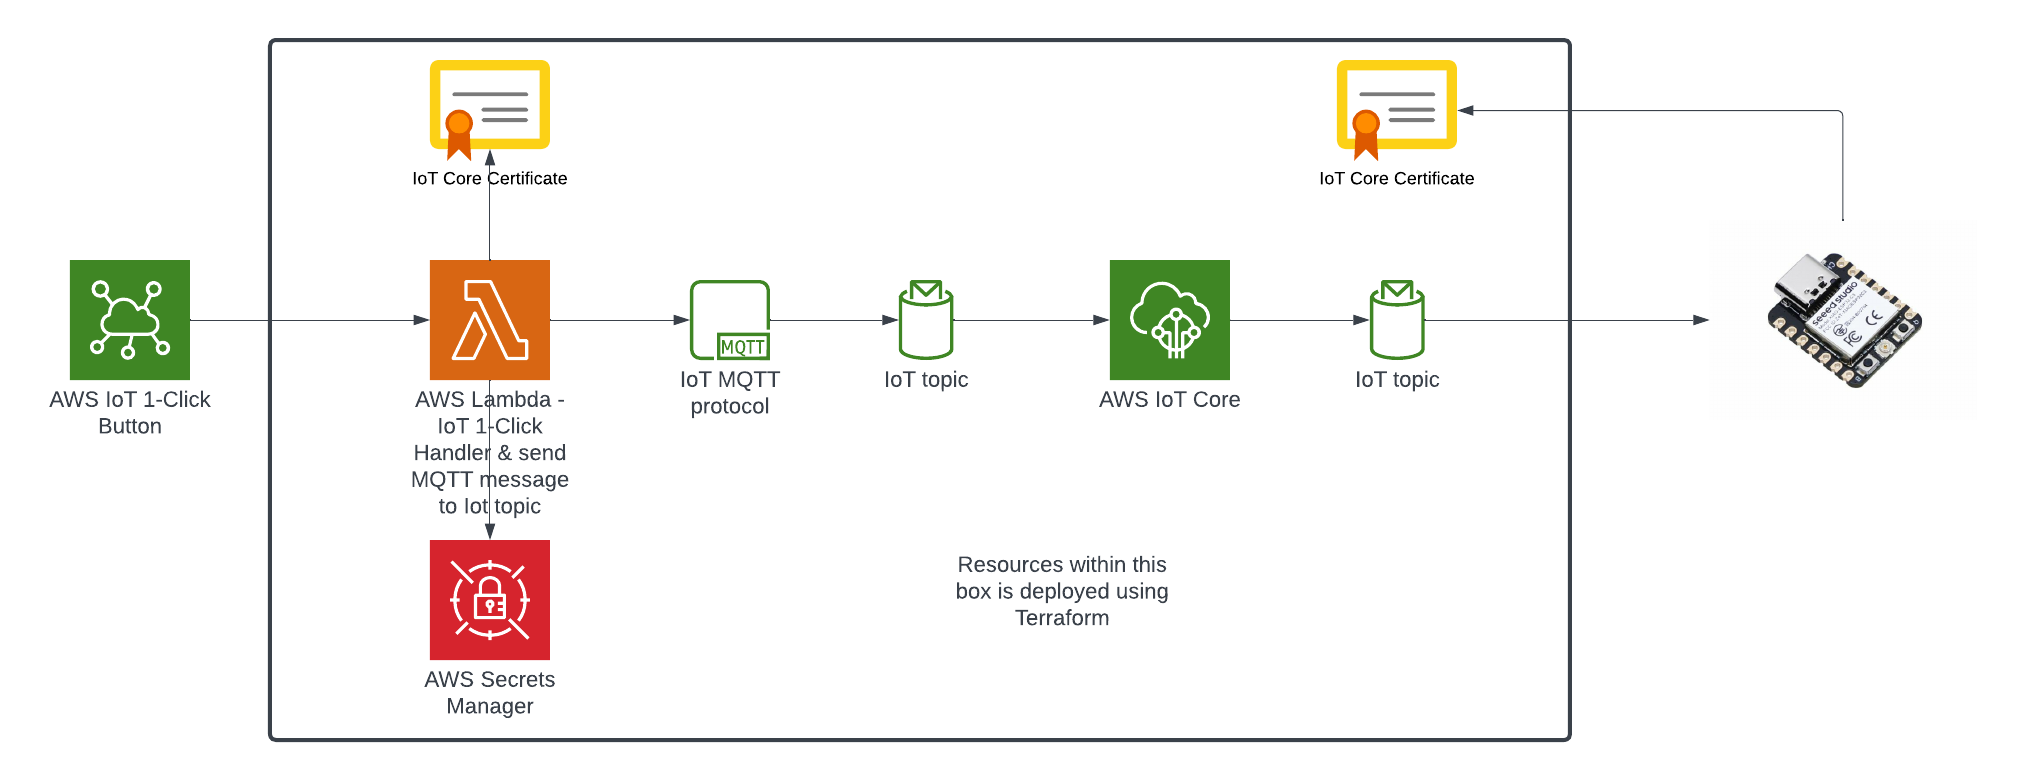
The responsibilities of each of the resources deployed in the diagram prior to the introduction of the Event-Sourcing pattern into the architecture are:
- AWS IoT 1-Click Button: This is an IoT button I physically press to emit an event to dispense food into one or both of the cat bowls, this button can be used anywhere where there is a WIFI connection
- AWS IoT Core Certificates: Certificates are associated with resources and devices that interacts with the AWS IoT Core Service, either publishing an MQTT message to an AWS IoT Topic, or receiving an MQTT message from a Topic
- AWS Lambda - IoT 1-Click Event Handler & sends an MQTT message to an Iot topic: This Lambda function is responsible for handling incoming events created by the AWS IoT 1-Click Button, as well as translating the event into an MQTT message before sending it to an AWS IoT Core Topic. This is the component in the architecture that is the main focus of this blog post, we will describe how this component will be re-architectured and decomposed to work in conjunction with the introduction of the Event-Sourcing pattern.
- AWS IoT Core: This is the IoT service that manages the IoT Topics and Subcriptions to said Topics
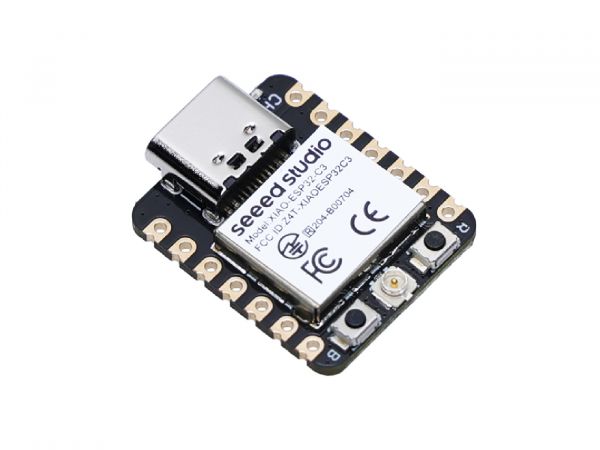
- Seeed Studio XIAO ESP32C3: a micro-controller subscribed to the IoT Topic (the one the Lambda sent MQTT messages to) that will dispense food into 1 or 2 cat bowls when it receives an MQTT message from the Topic
For further details on what role this architecture plays in the Smart IoT Cat Feeder, visit Part 2 of the Smart Cat Feeder Blog Series.
What is Event-Sourcing?
The idea of Event-Sourcing is to capture all events that occurs within a system during its lifetime, these events are stored in an immutable ledger in the sequence in which they occurred in.
One of the biggest benefits of capturing all the events of a system is that we are able to replay every single event that has ever occured within the system (partially or as a whole) at a later time (lets say 5 years later), and have the ability to selectively replay the 5 years worth of events to one or more specific downstream event bus targets: an event bus target could be a new application that was deployed into your production environment 5 years after the first event was created; what this means is that we could hydrate this new application's datastore with 5 years worth of data as if it existed at the beginning when the first event occured. Also, imagine being able to re-create entire datastores with the full history for 100s of applications (where each application has its own datastore) within your system landscape, these datastores could be hydrated with the full history of events stored in the immutable Event-Sourcing ledger, or even replay the events that occur from the very first event and up to a specific event at a given point in time (e.g. half of the entire ledge) - effectively providing you with the ability to create any datastore in any datastore engine with the data inside in a state to any given point in time.
How do we introduce Event-Sourcing into the architecture?

We start off with the AWS Lambda function shown in the current state architecture where its responsibilites is to handle the events received from the AWS IoT 1-Click Button each time it is pressed, as well as sending an MQTT message to an AWS Iot Core Topic in response to each incoming event; essentially it has 2 distinct responsibilities

Next, we decompose the single Lambda function into 2 separate distinct Lambda functions based on its 2 responsibilities, then we chain the 2 Lambda functions together to preserve its functionality - what we have effectively achieved by doing this is decoupling the 2 responsibilities as 2 separate units of work - resulting in 2 separate compute resources.
The benefits by a decoupled architecture are:
- Each of the Lambda functions can be implemented in different languages - e.g. one in Python and the other can be in Java
- Independent release cycles for each of the Lambda functions
- Changes to either one of the 2 responsibilities can be made independently of each other
- Each Lambda function can be scaled independently of another
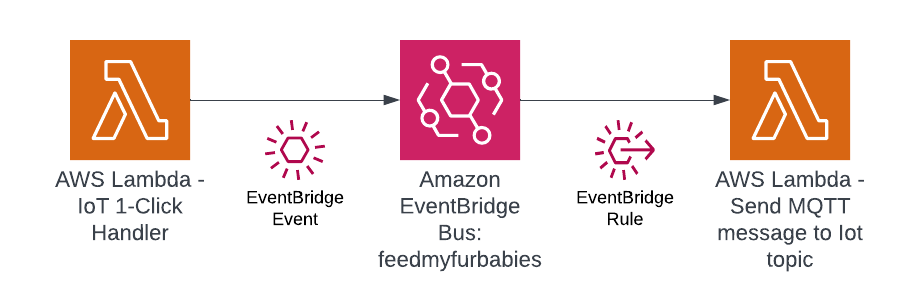
In this step we use Amazon EventBridge as the Event-Sourcing store - known as the immutable ledger we described earlier, we will also leverage EventBridge as a serverless event bus to help us receive, filter, transform, route and deliver events to downstream services (event bus targets). In this instance we will slip EventBridge in between the 2 Lambda functions and we will be storing every single IoT event sent by the IoT Button into the immutable ledge,
Benefits of adding EventBridge to the architecture:
- The IoT 1-Click Lambda handler no longer directly calls the downstream Lambda function - so it is unaware of the downstream targets
- The IoT events are stored in an immutable ledger in the sequence in which they occurred in
- Prepare the system landscape with the ability to more easily develop micro-services in an Event-Driven architecture using the orchestration pattern
Target State Architecture
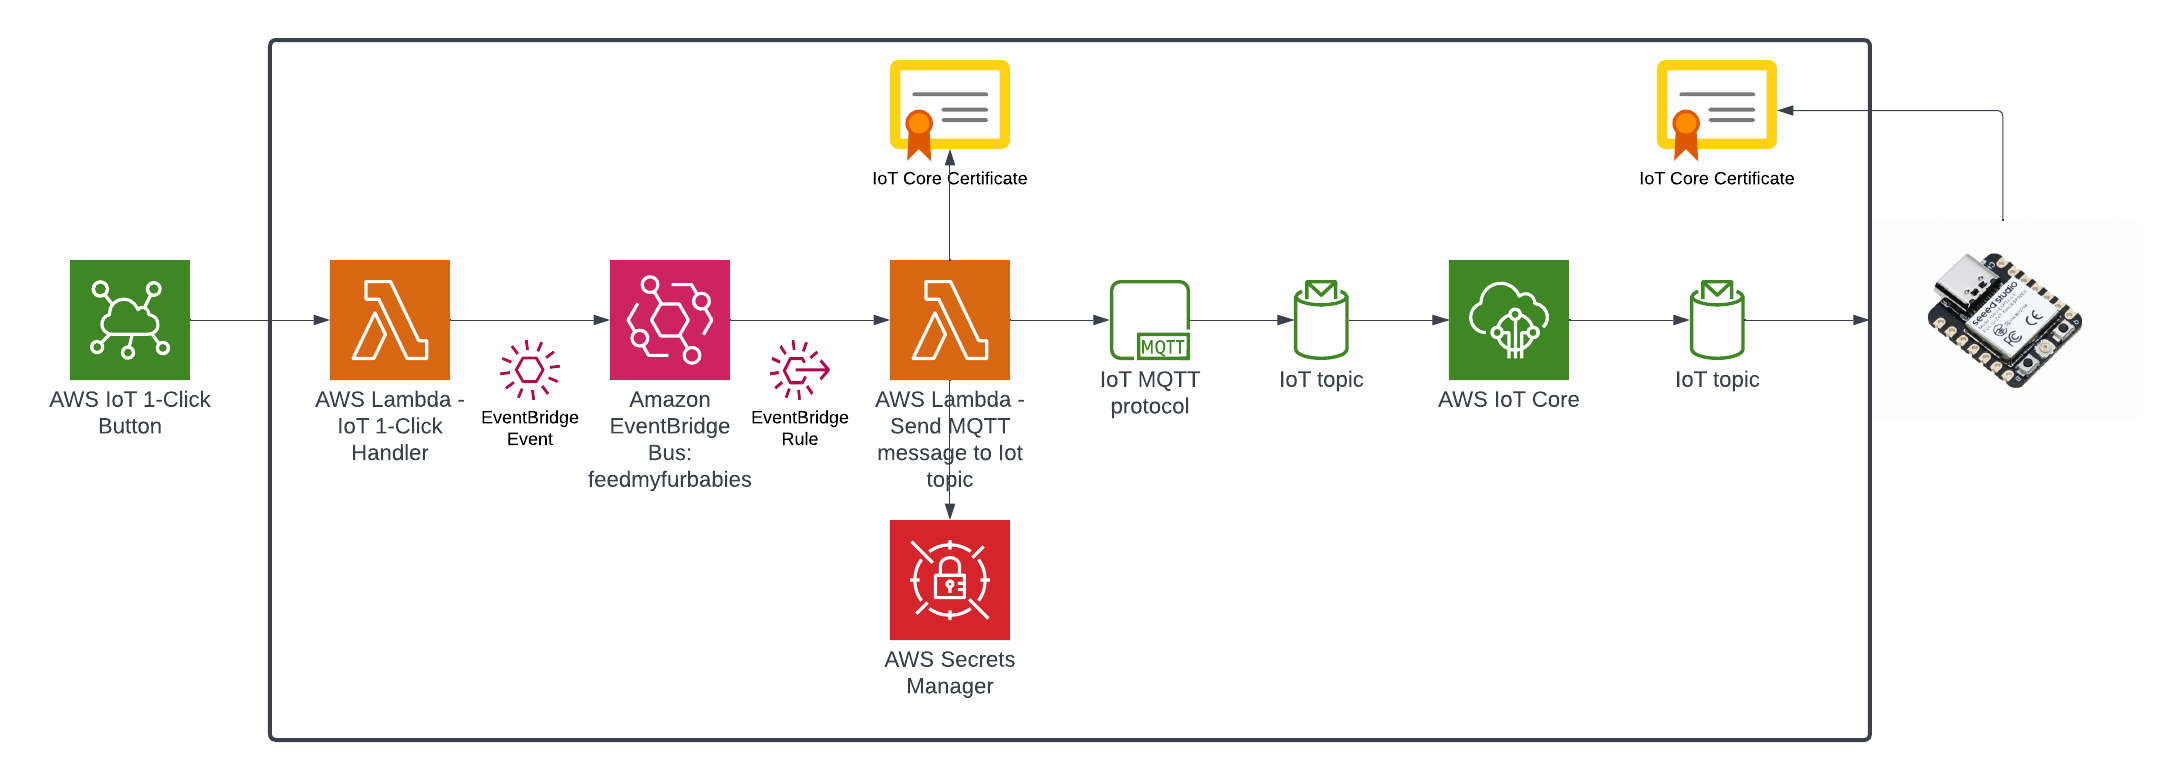
This is the end result of introducing Event-Sourcing to the architecture; it may not look like much benefits has been gained from adding Amazon EventBridge - in fact one might think that we've added more components and in effect created more moving parts and complexity. But I have decided to specifically introduce this very early into the architecture as an investment so that I am in a position to rapdily build out my micro-service architecture - reaping the rewards from the get go.
Try it out for yourself
I have created a GitHub Repository to deploy a complete working example of the resources shown in the Target State Architecture using Terraform.
I suggest you deploy this to have a play for yourself:
- Clone the repository: "git clone git@github.com:chiwaichan/feedmyfurbabies-202303-eventsourcing-using-eventbridge.git"
- Setup your Terraform environment
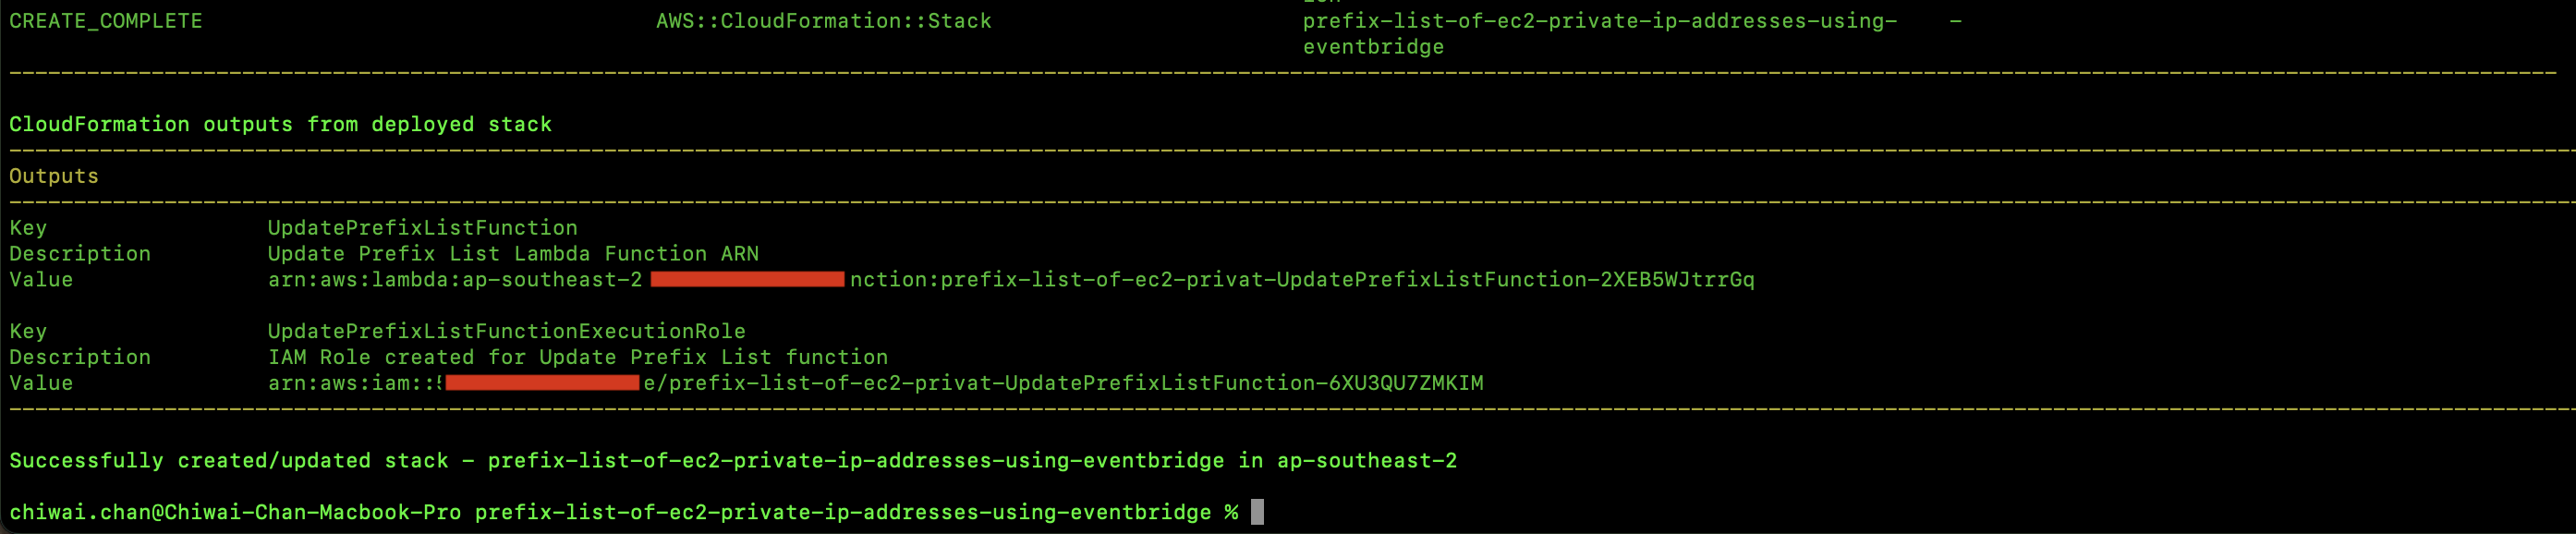
- Run: "terraform init && terraform apply"
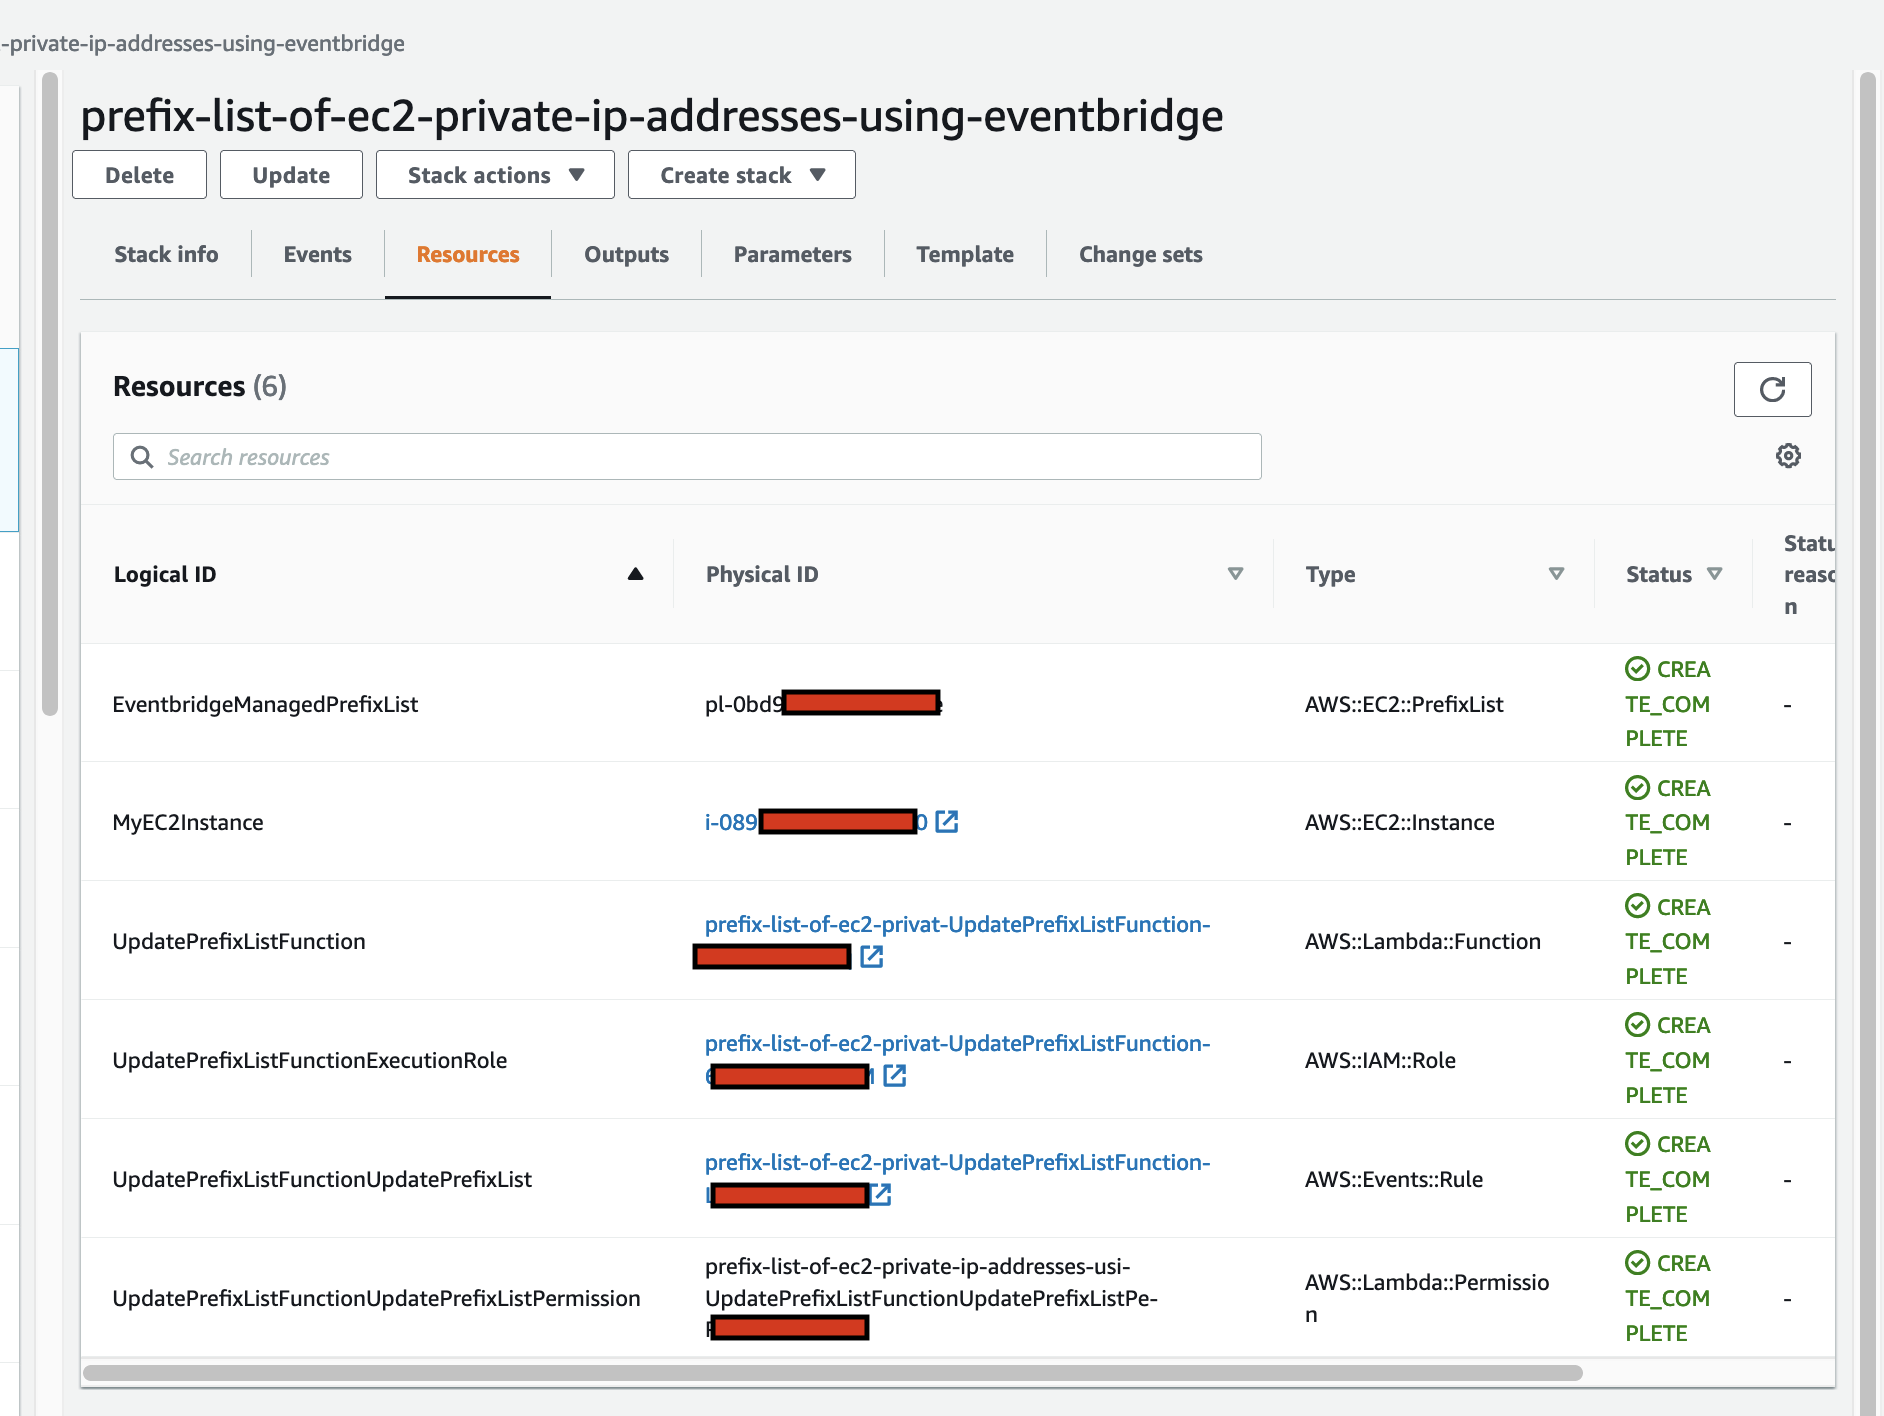
Also, check out each individual resource deployed by this Terrafrom code.
Create a test IoT 1-Click event to pass the event end-to-end through all the deployed resources
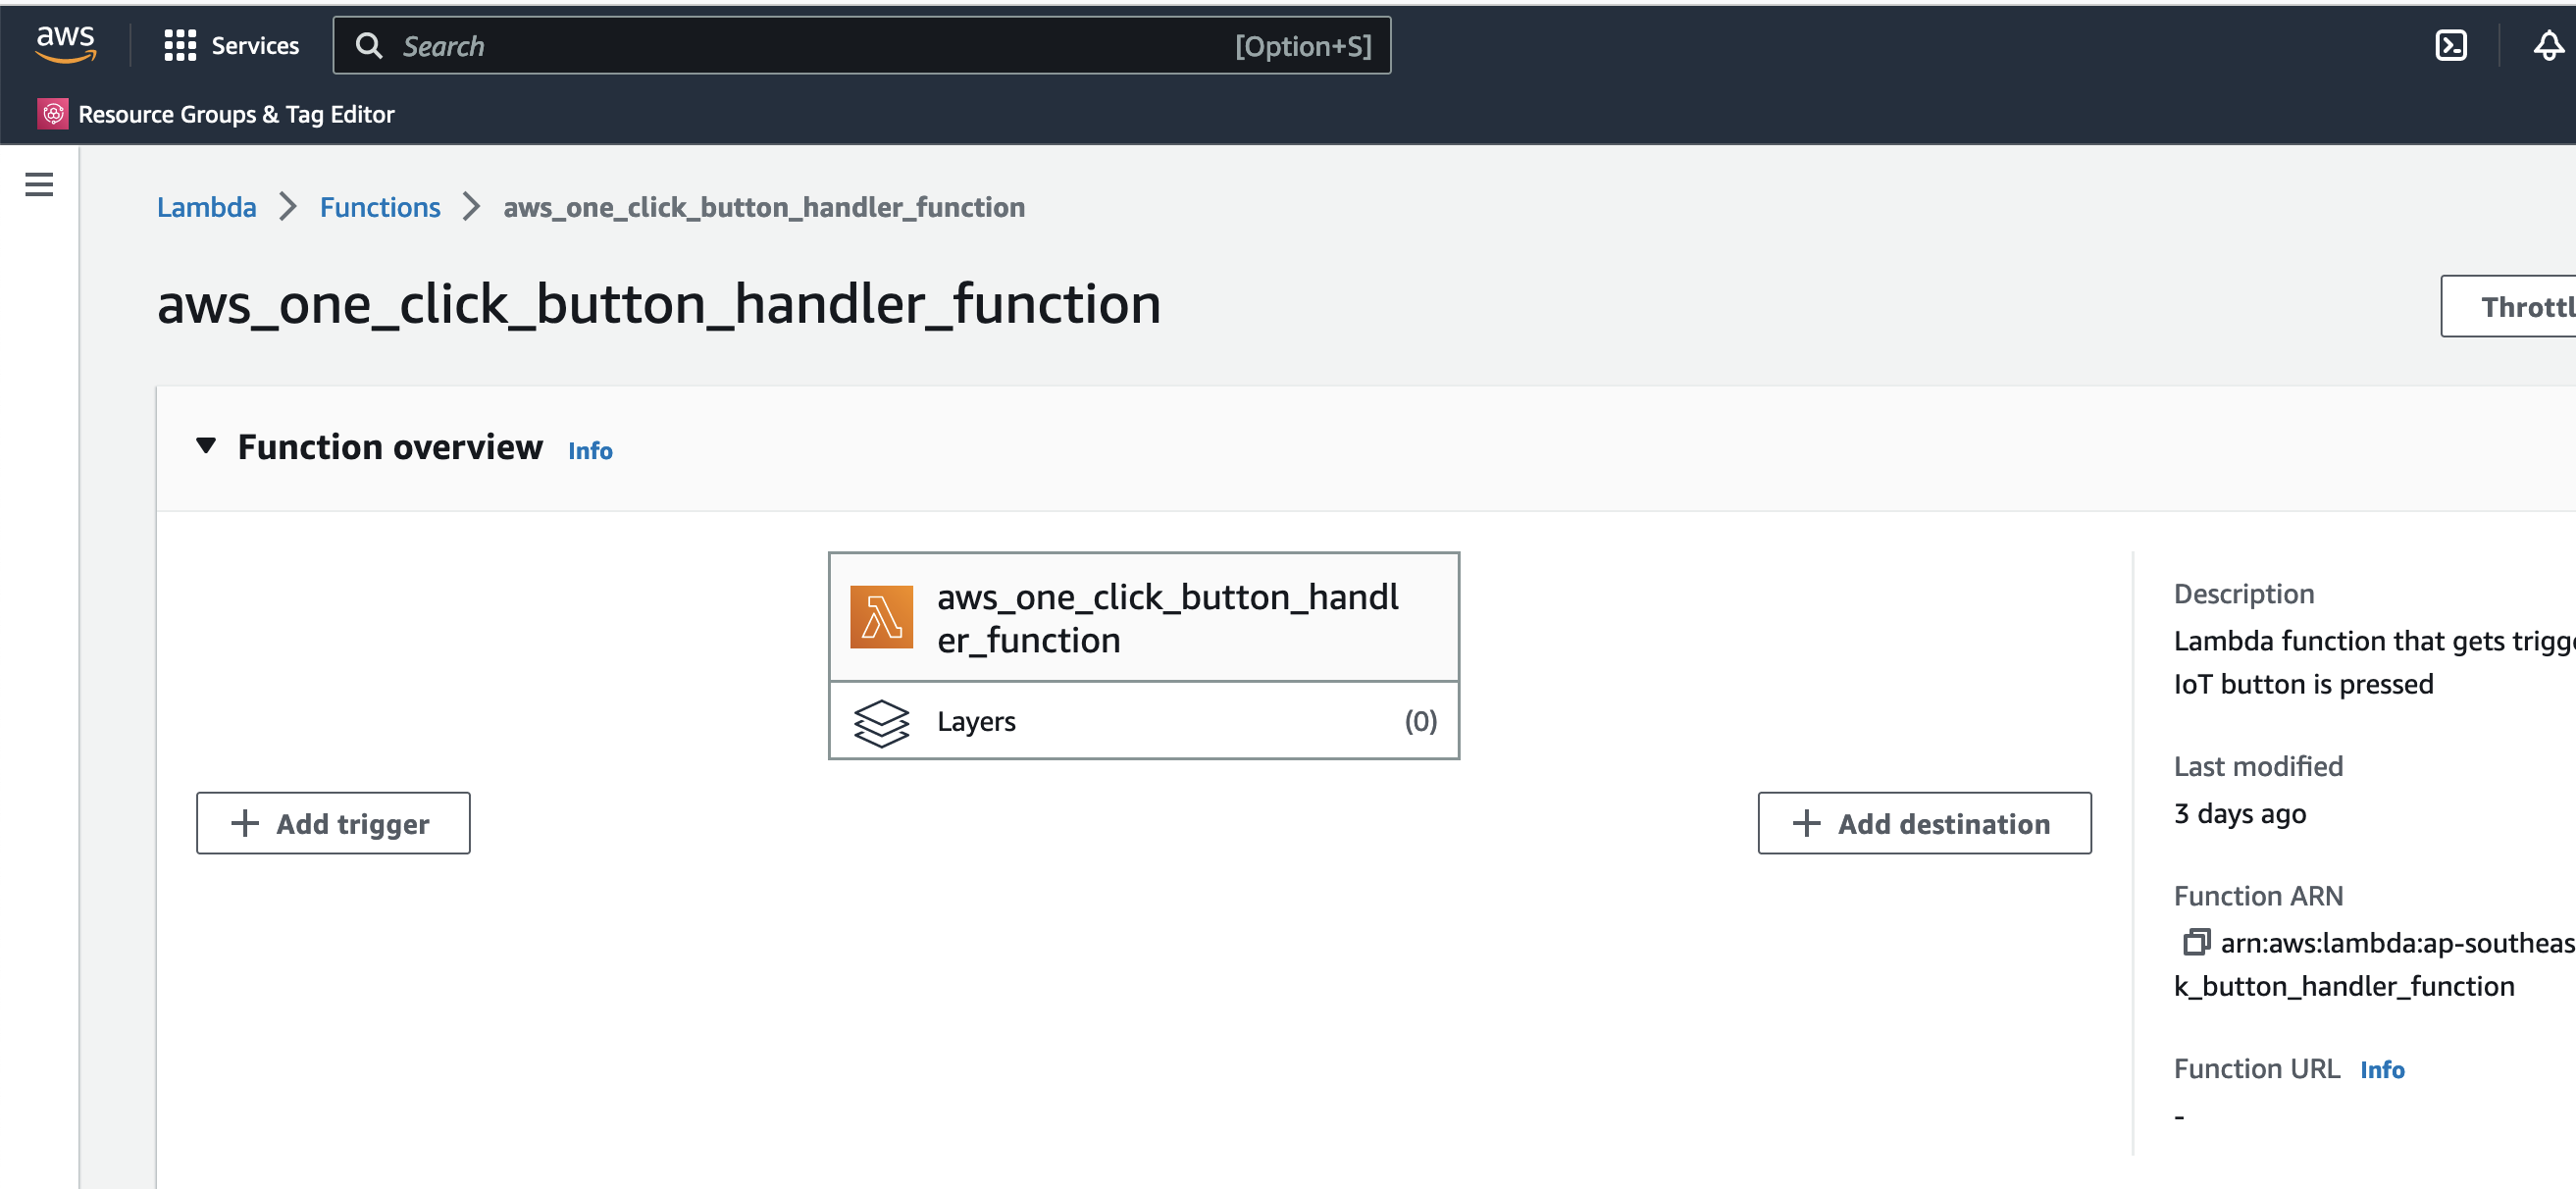
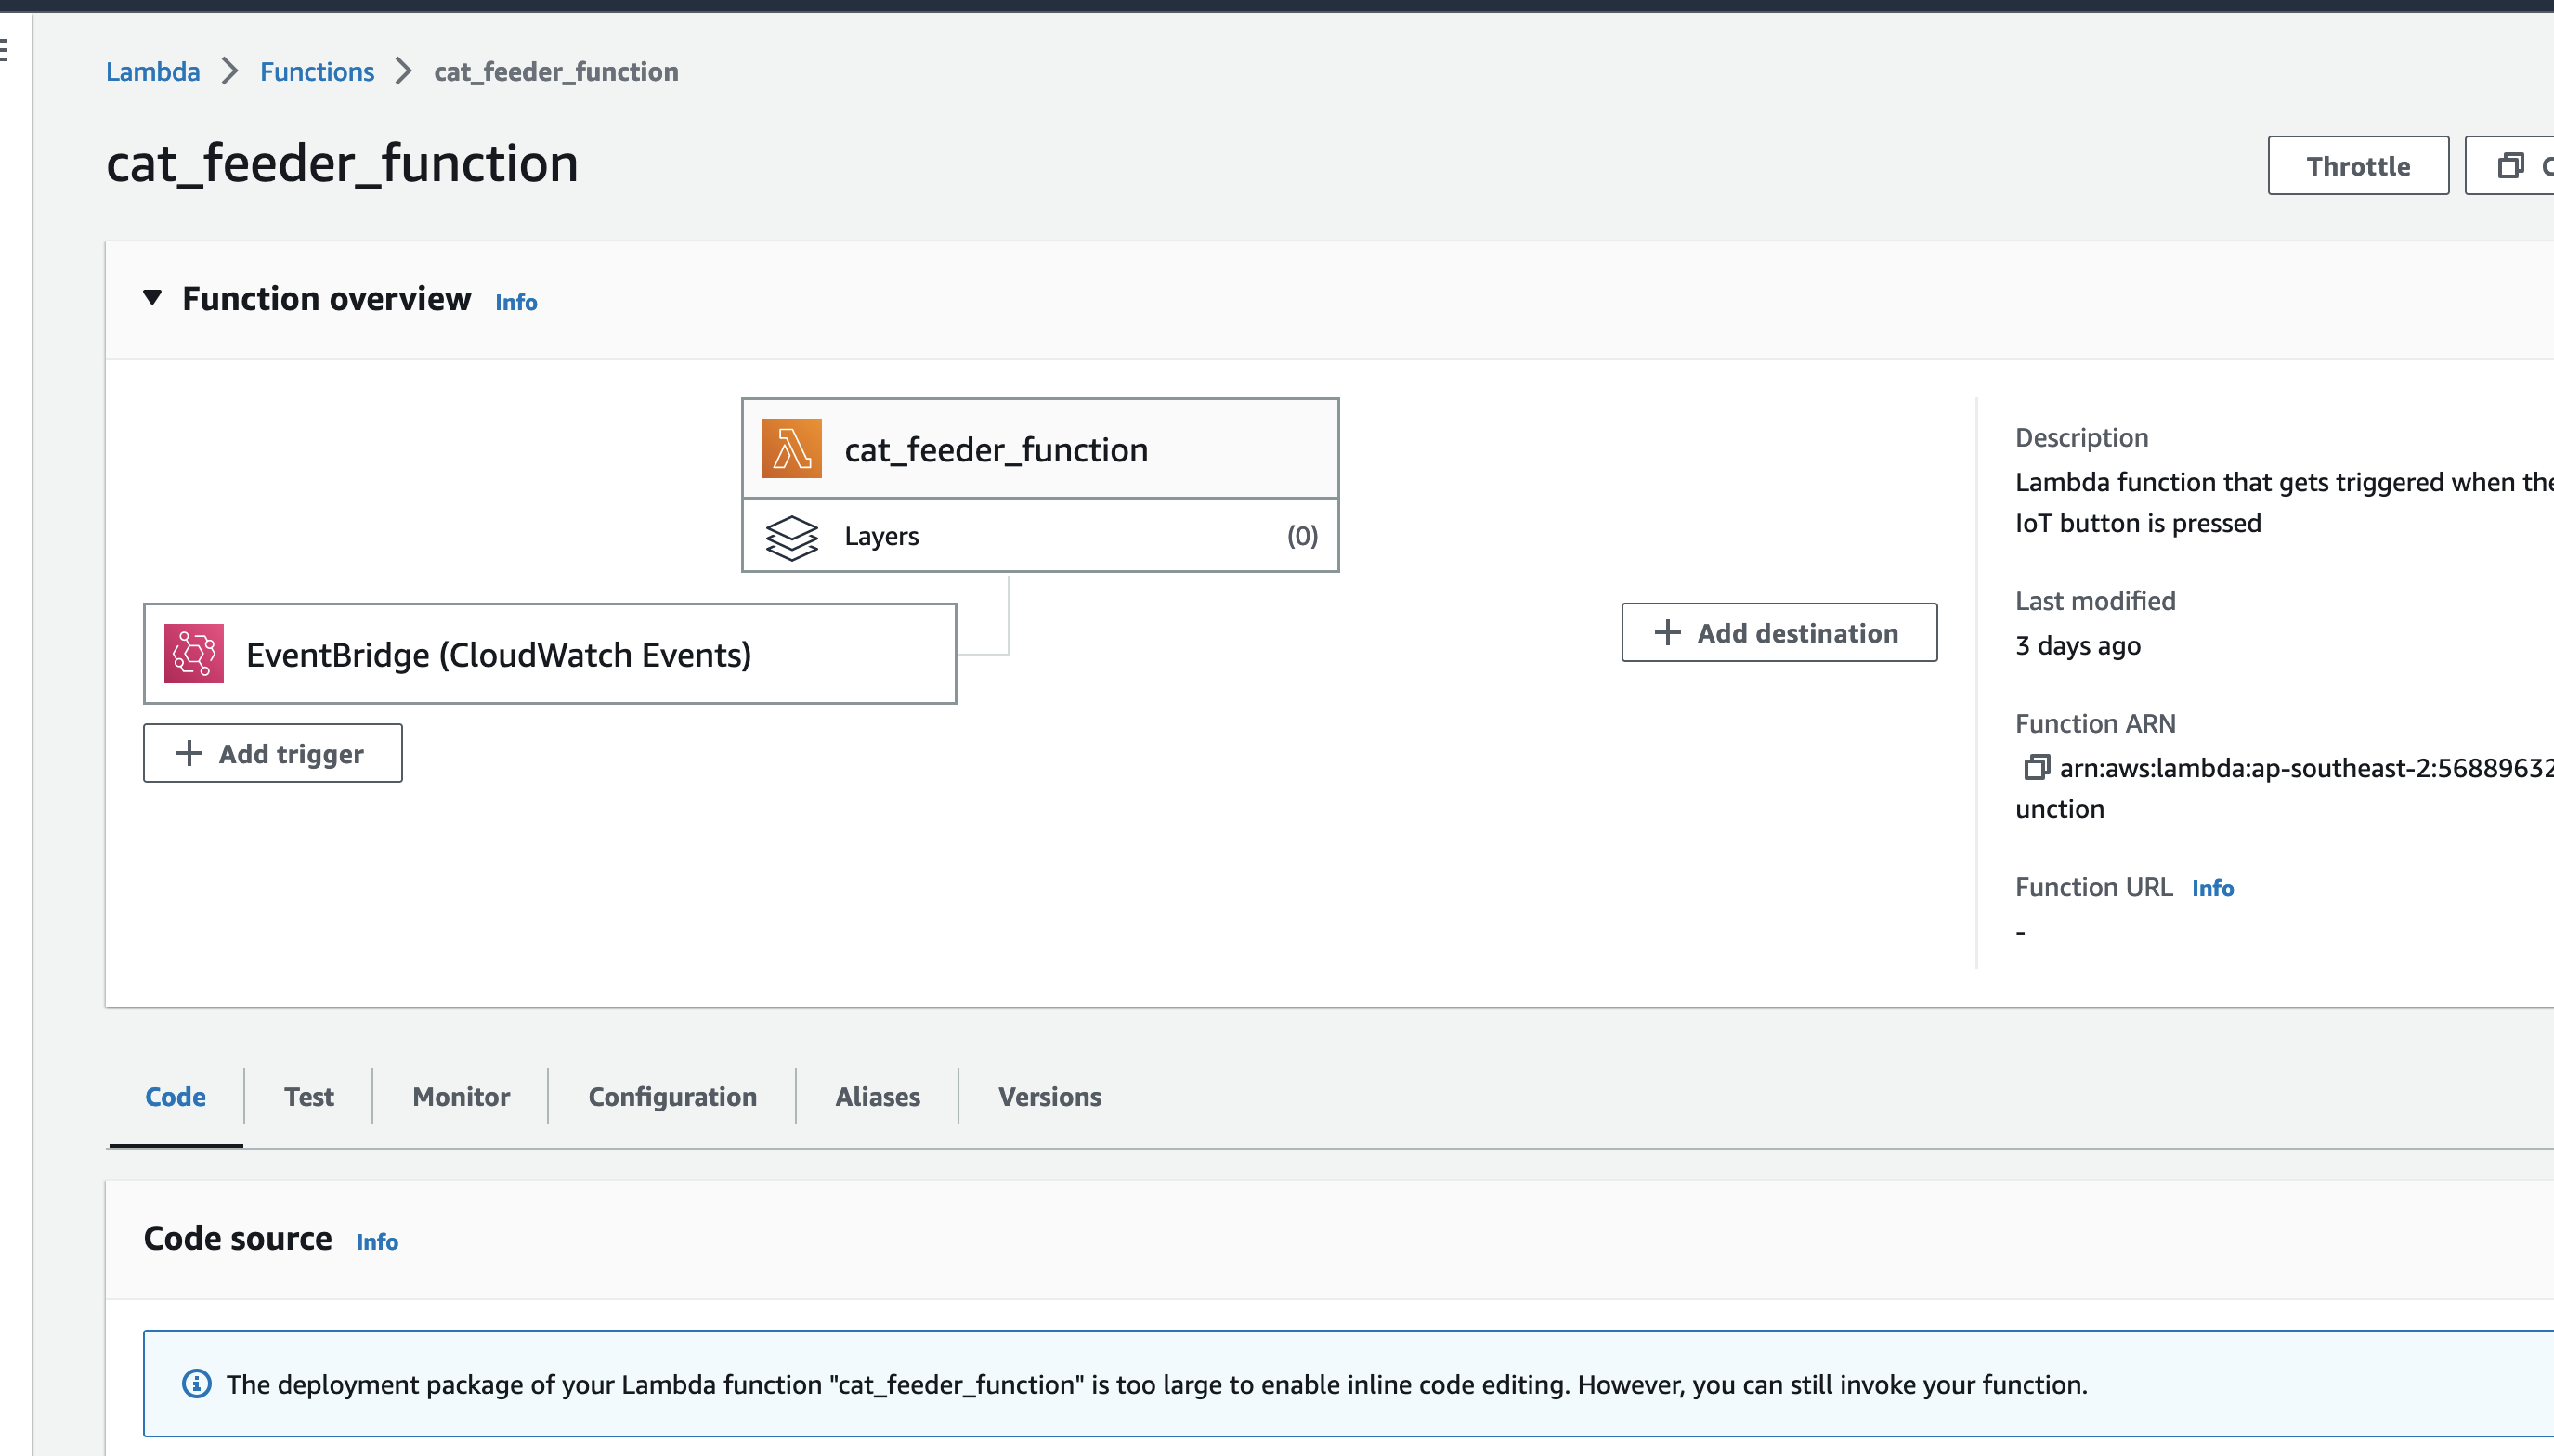
This is the IoT 1-Click Lambda function handler shown in the AWS Console
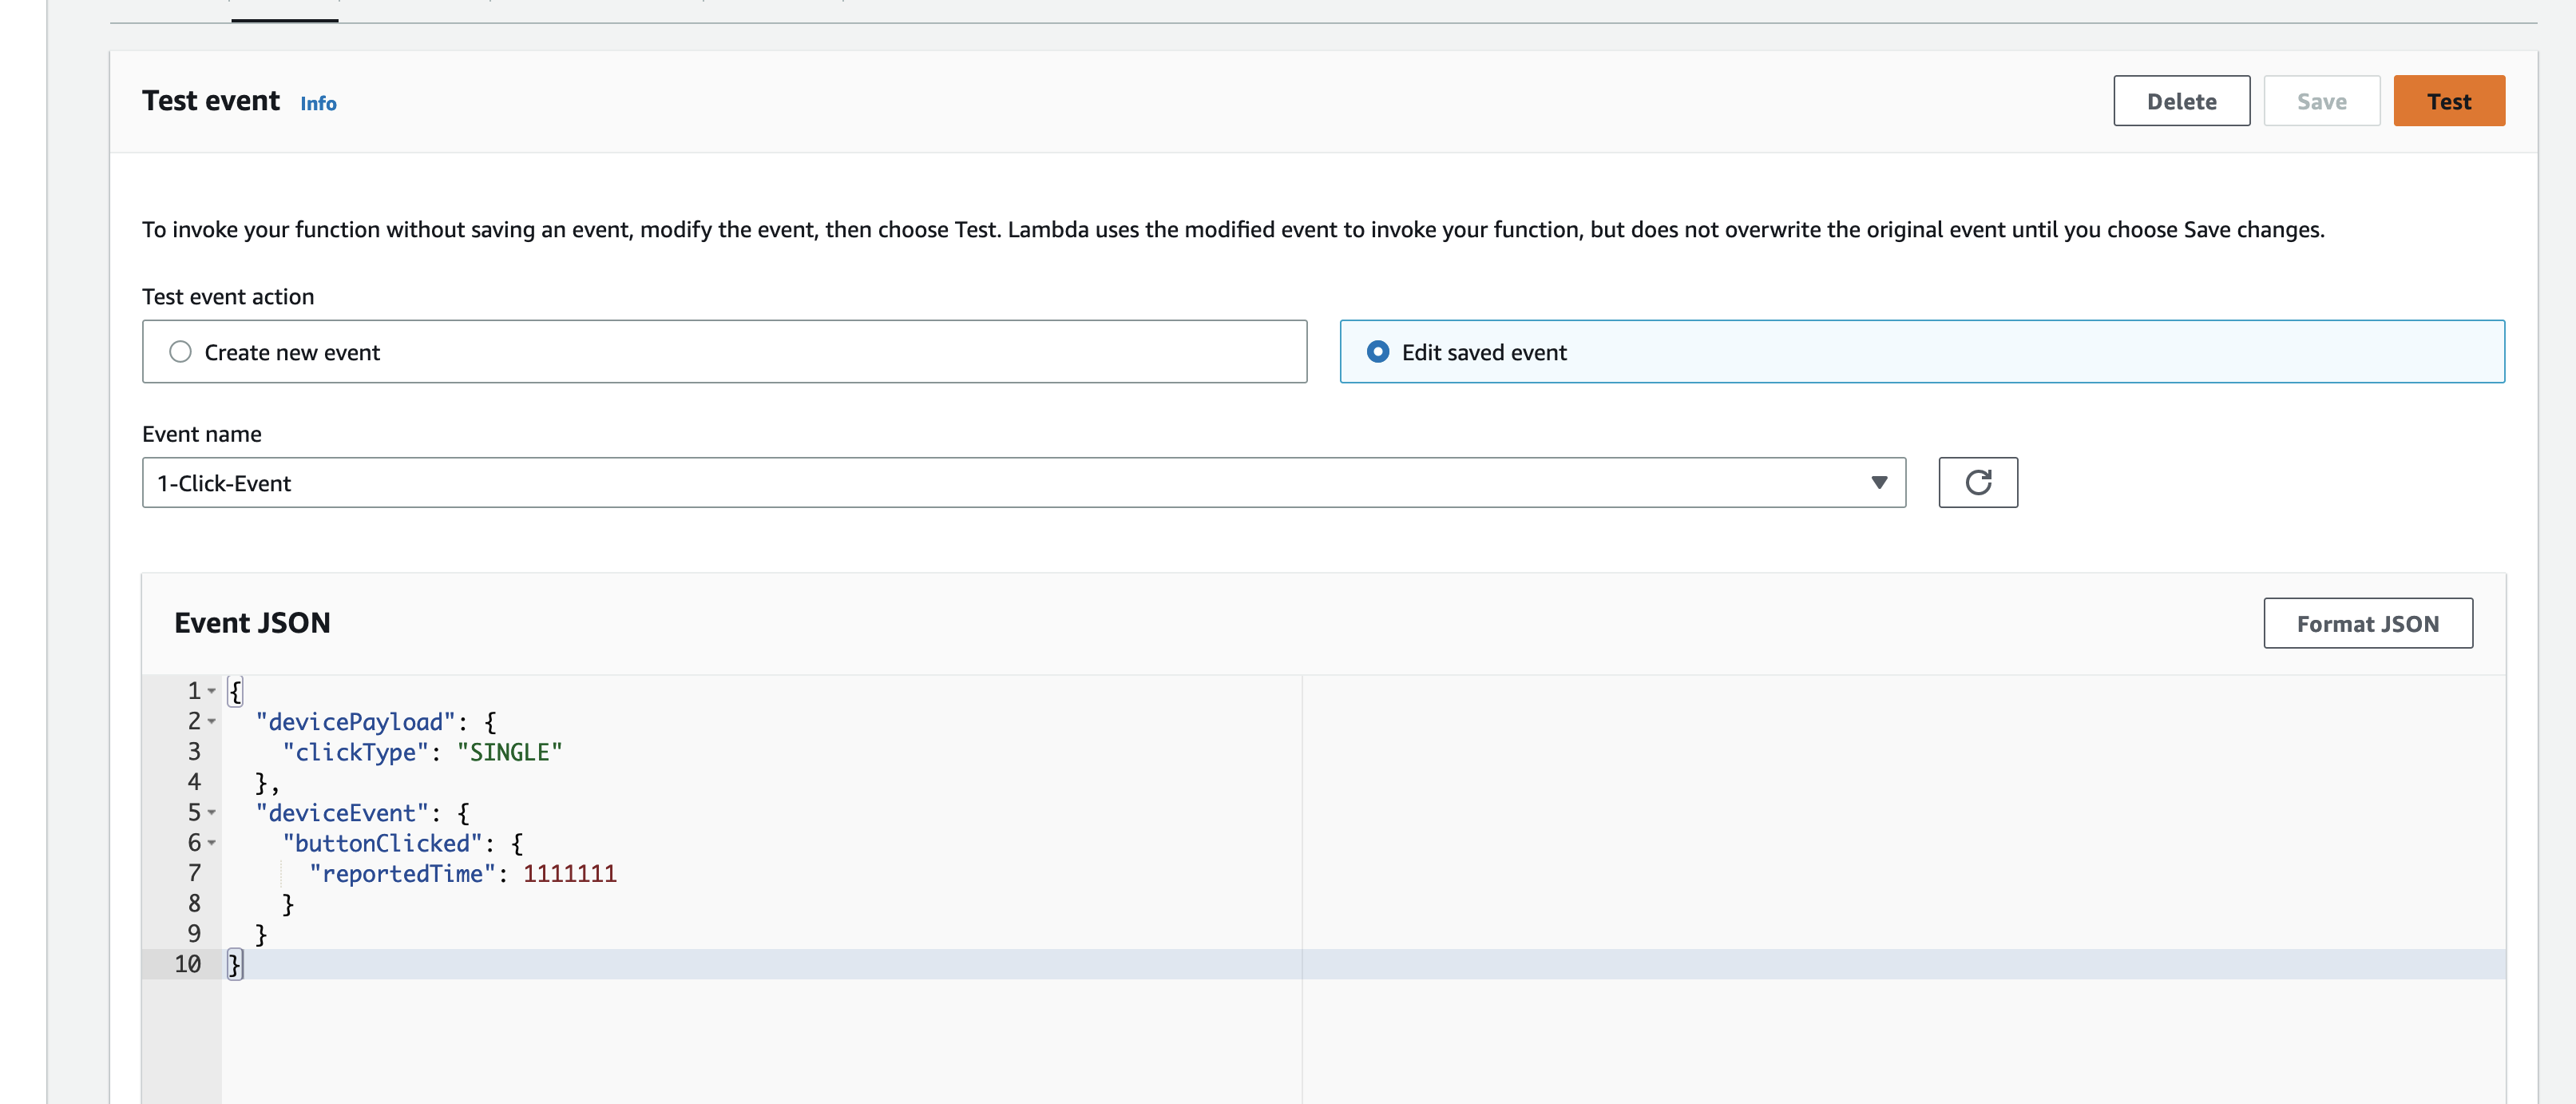
Create a test event so we can invoke the Lambda function to simulate an event as if a physical IoT Button is pressed
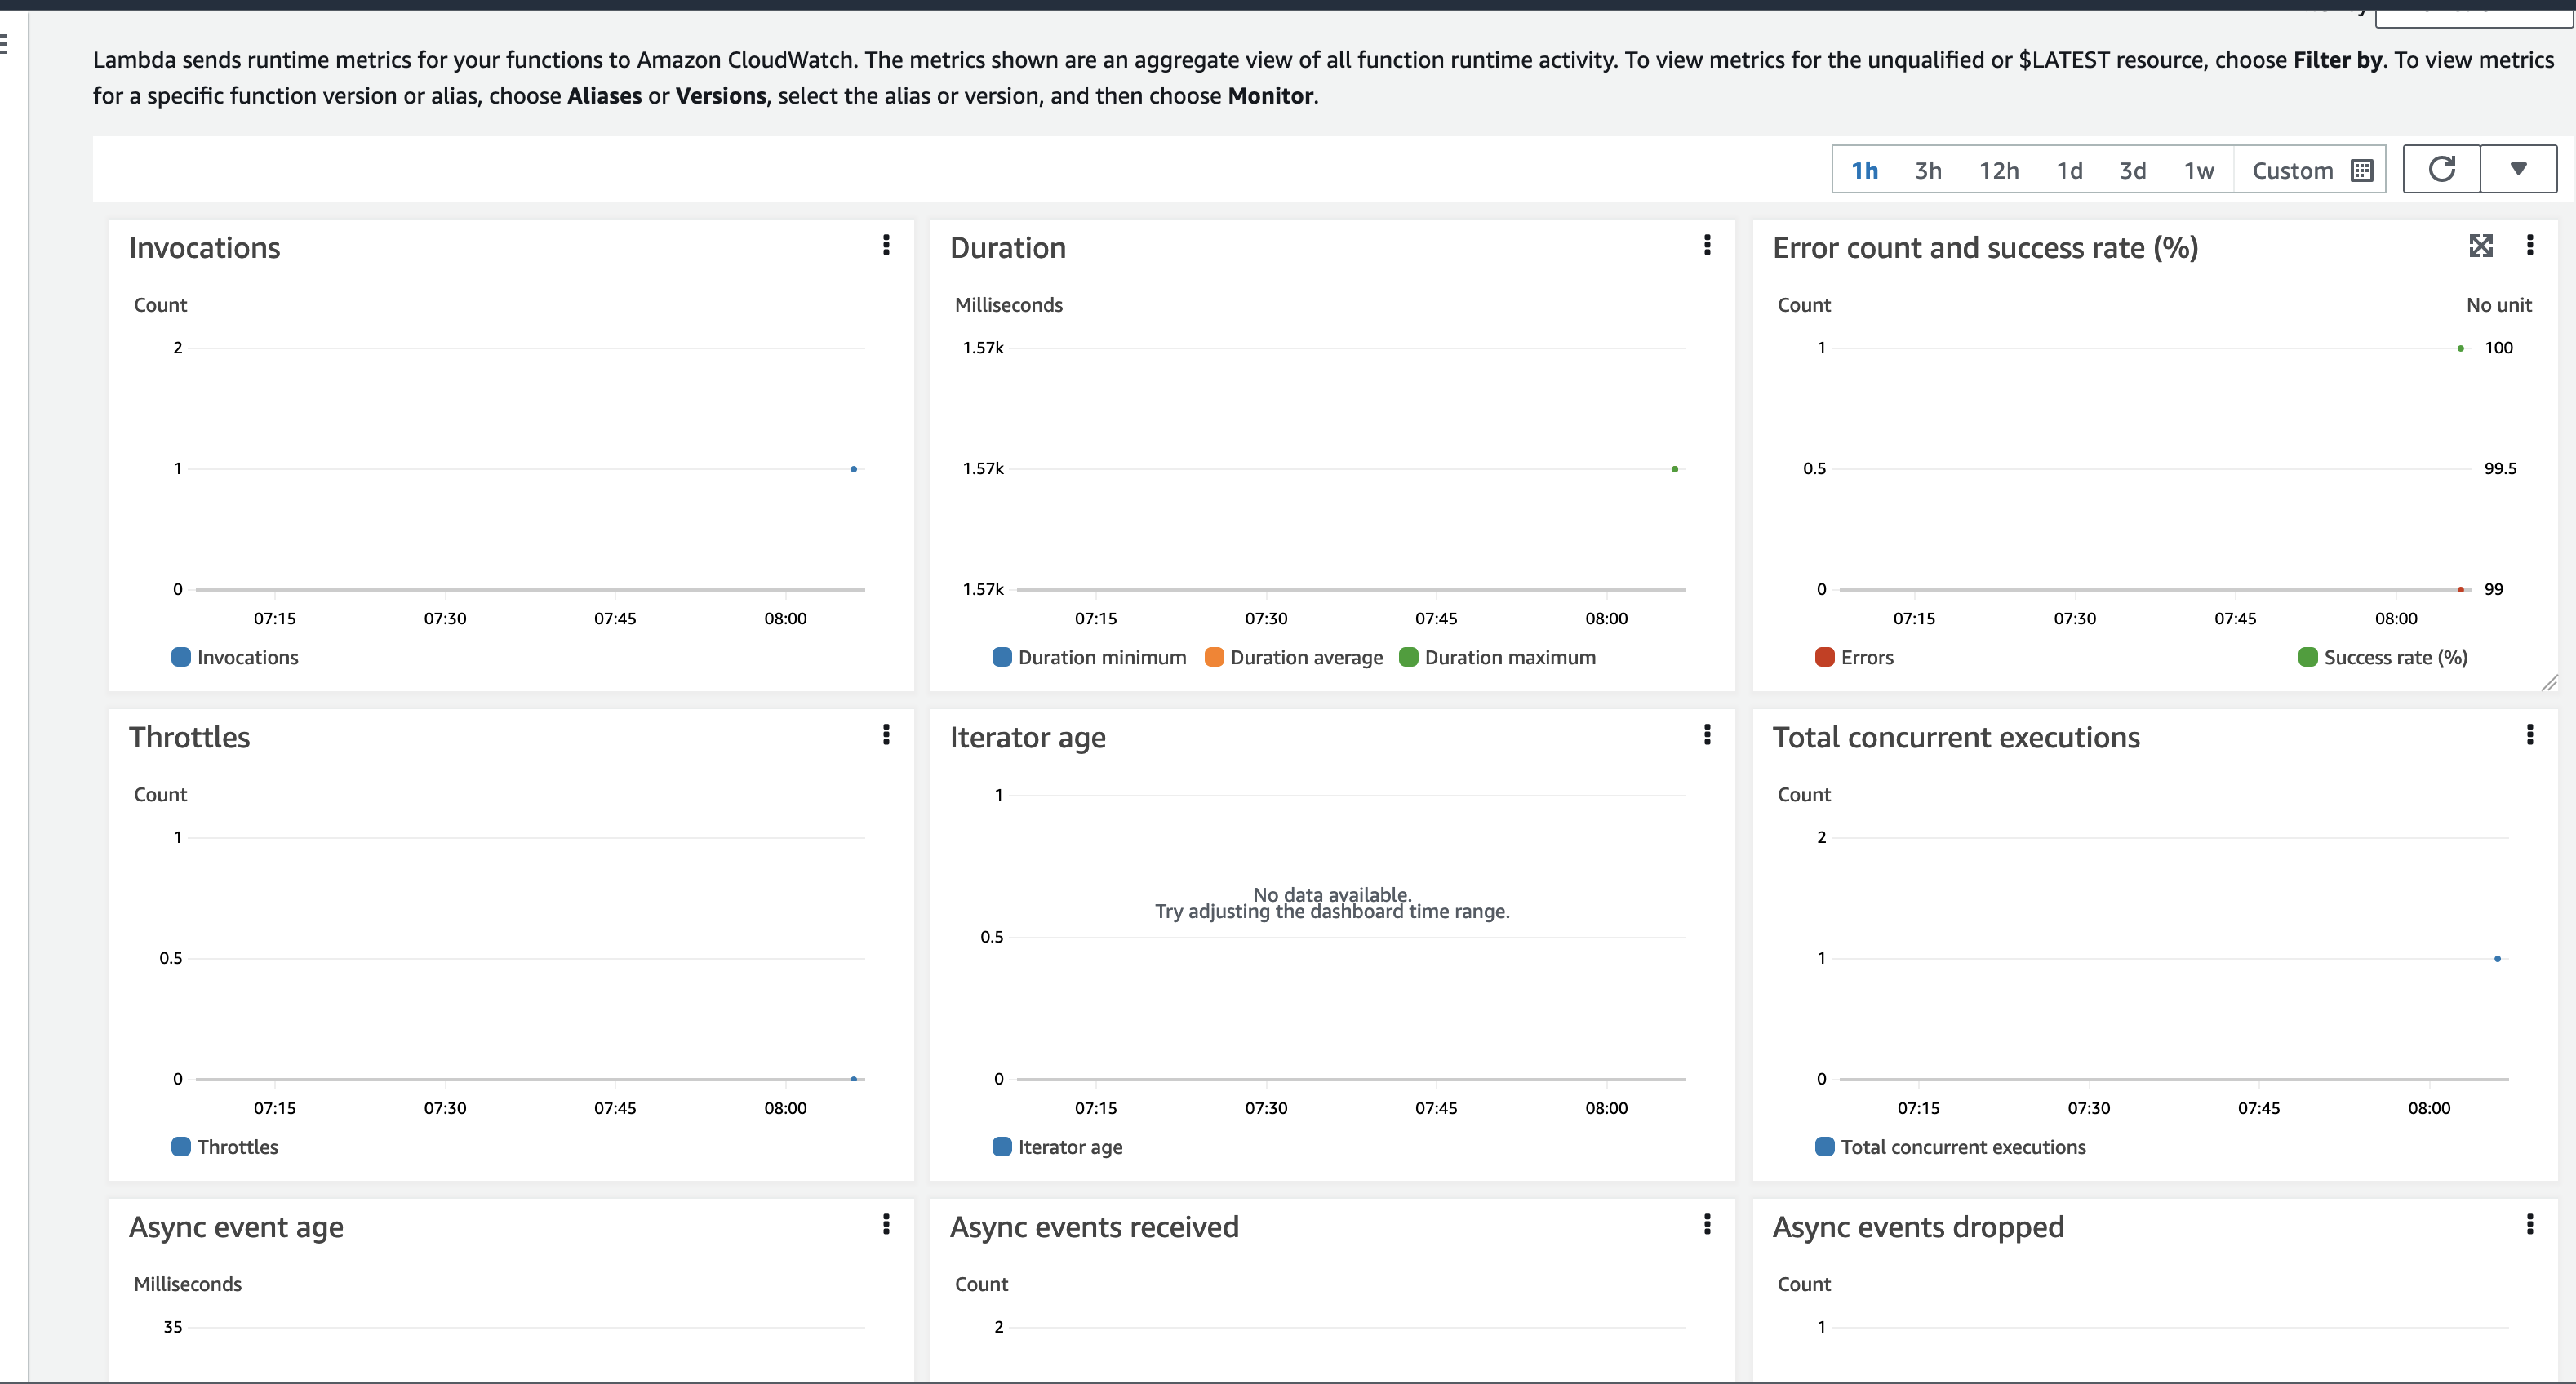
Here we can view the logs for this Lambda function Test invocation
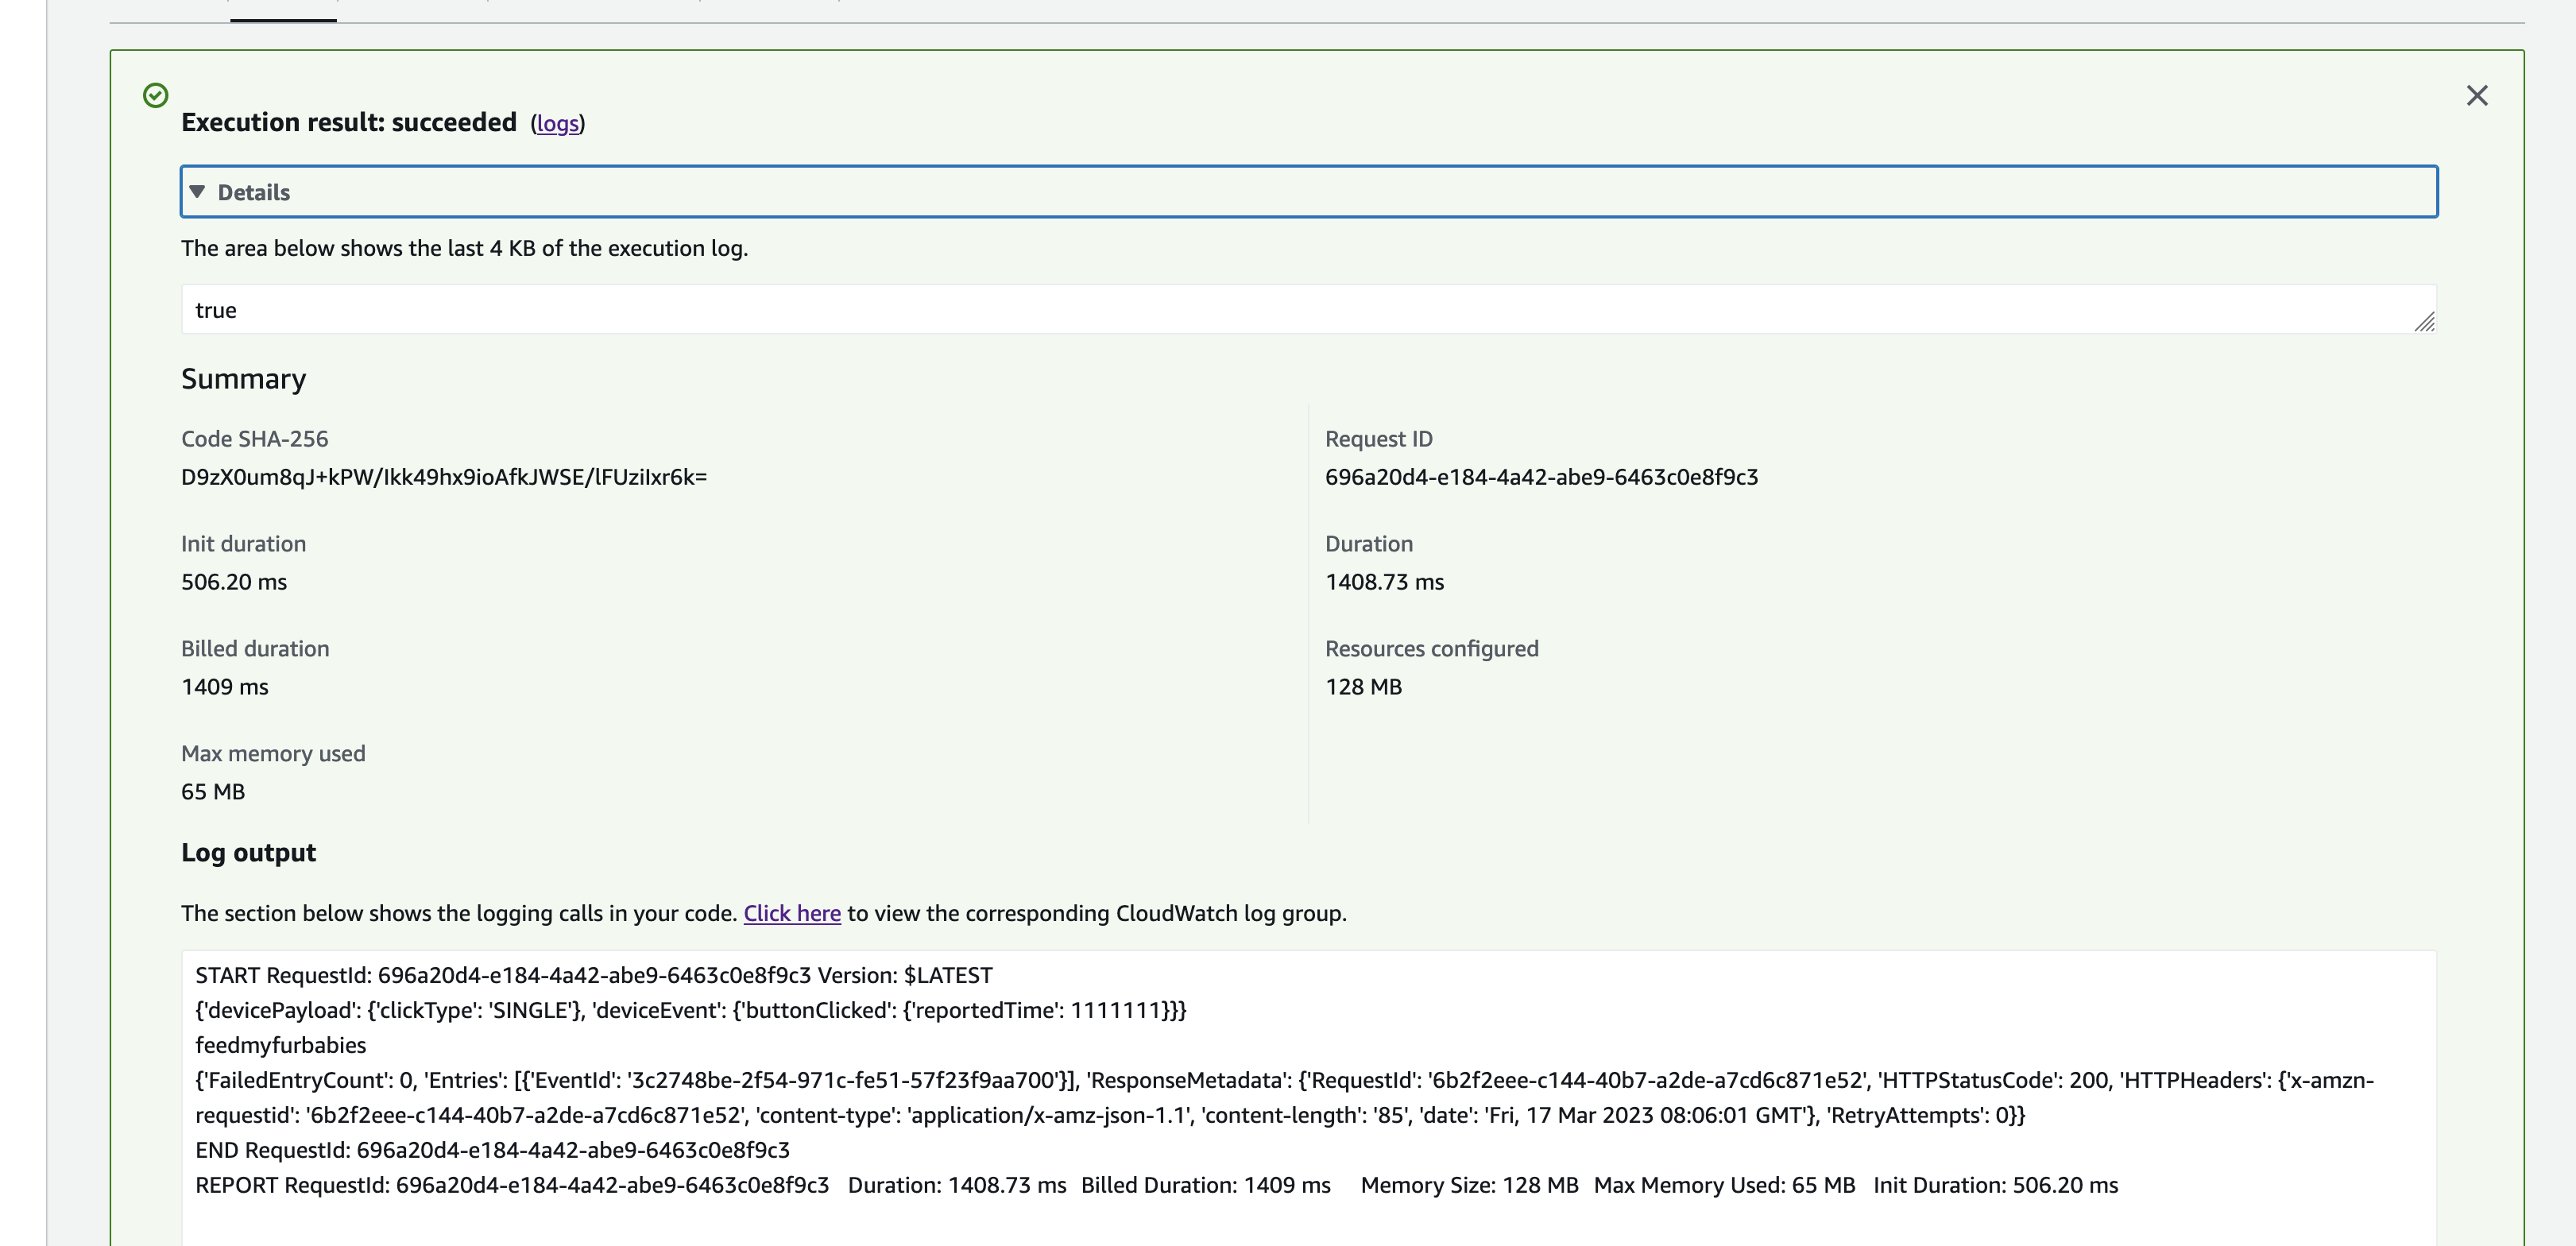
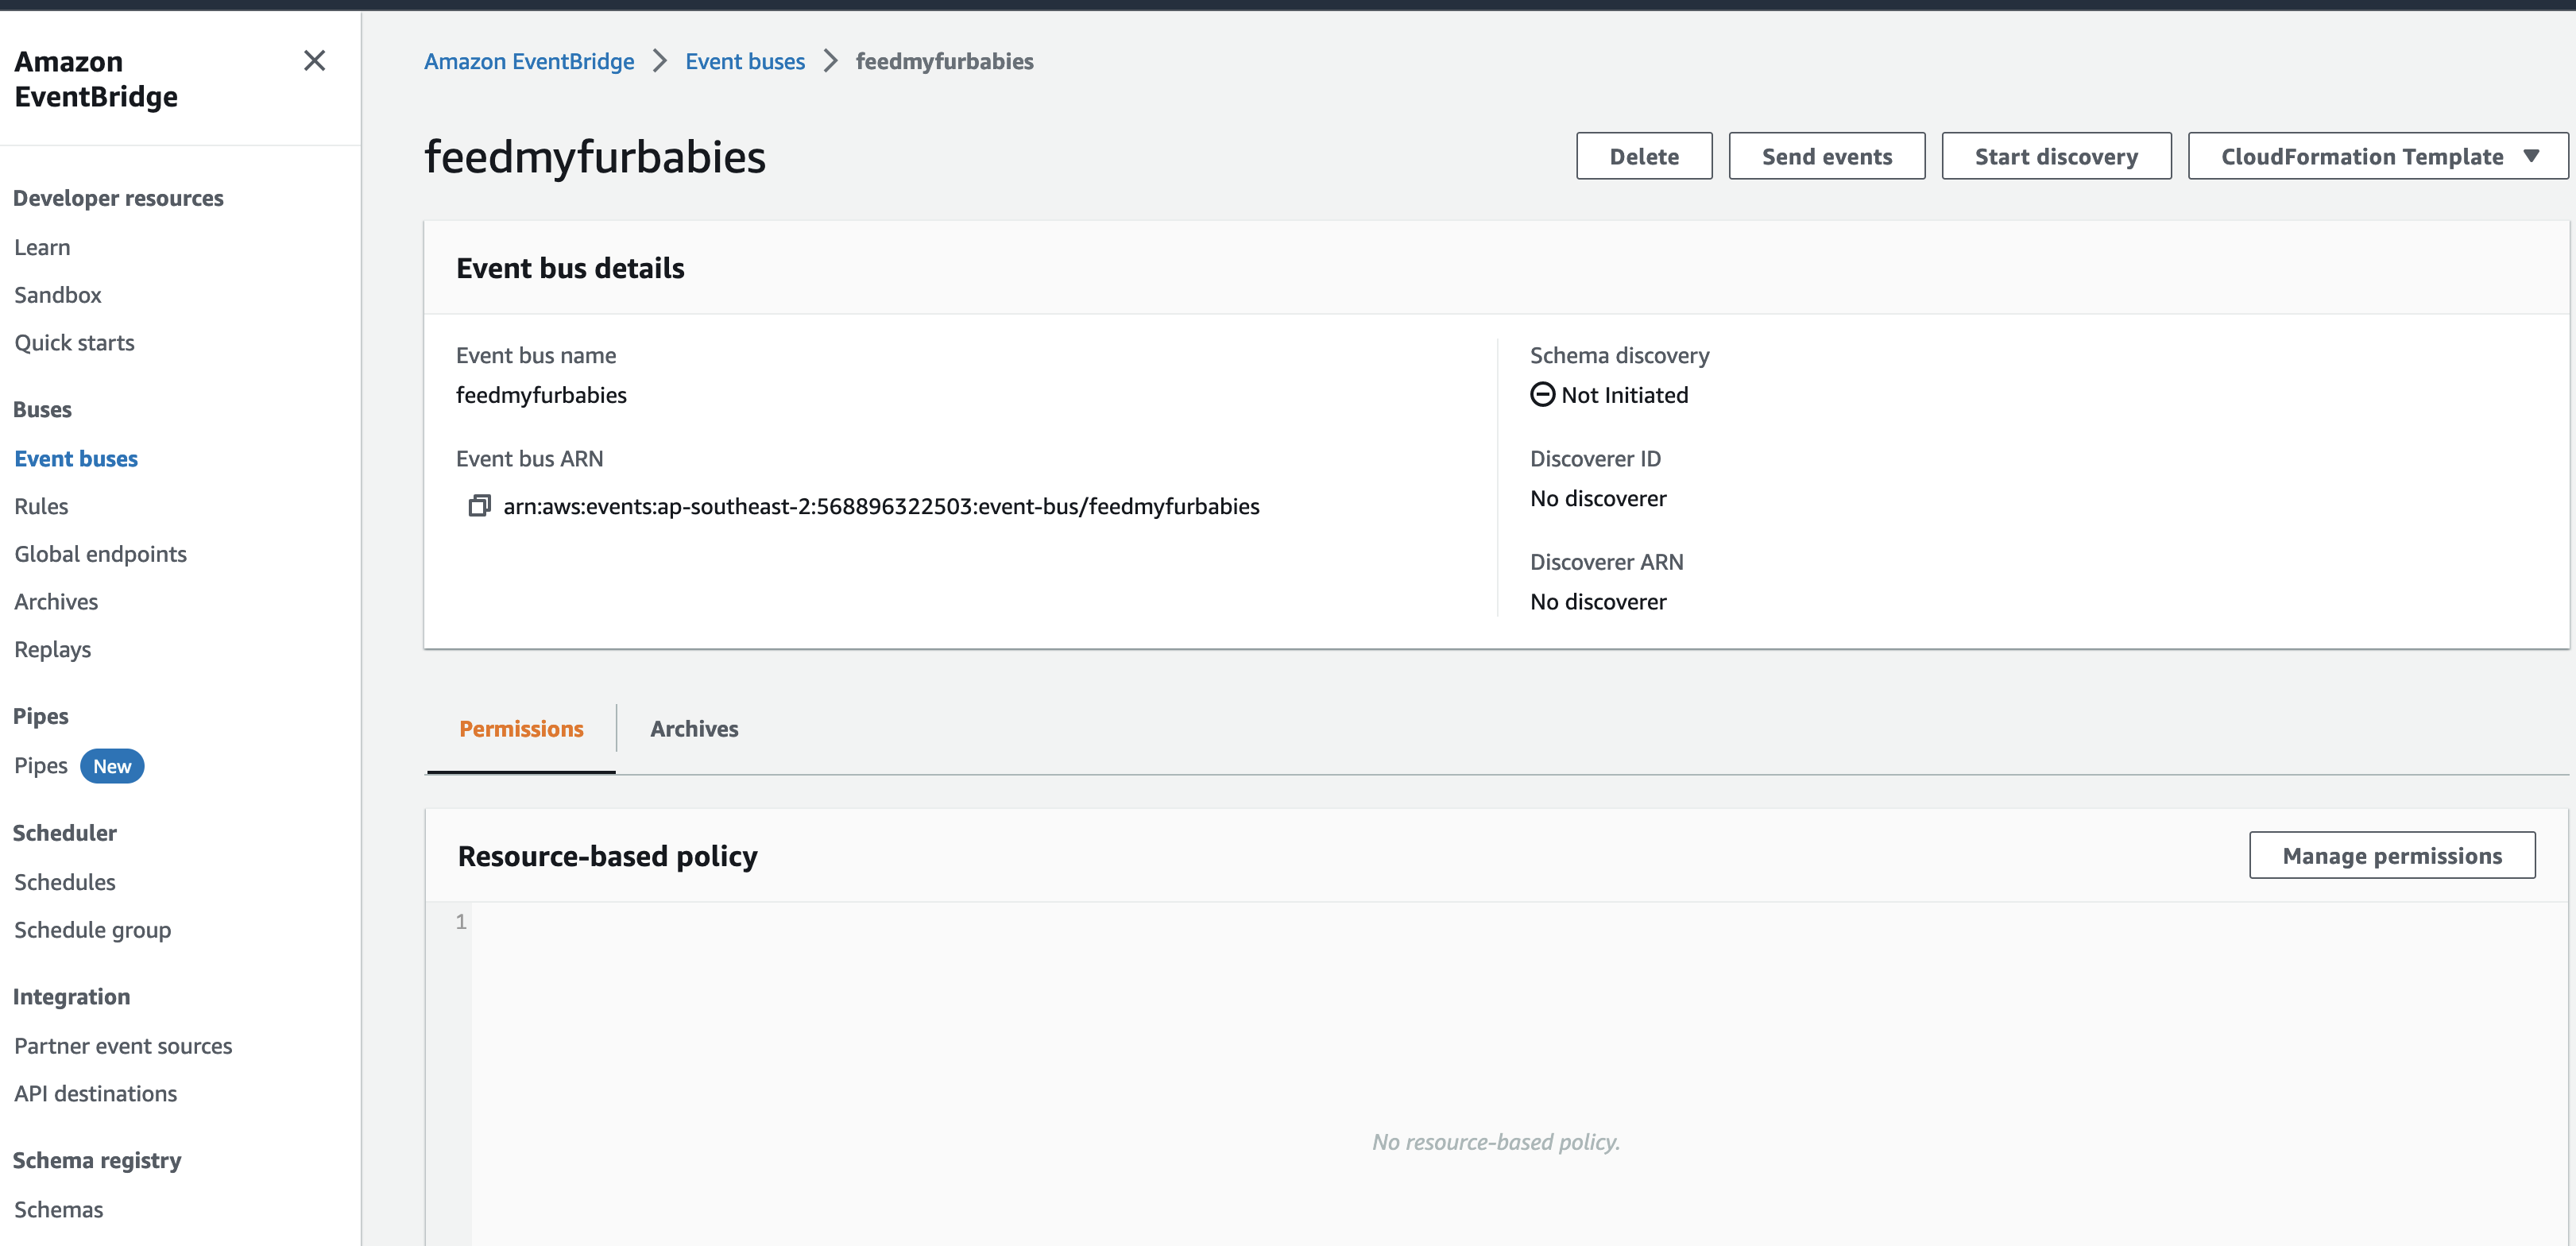
The IoT 1-Click Lambda function handler sends an Event to the Custom EventBridge Event Bus named "feedmyfurbabies"
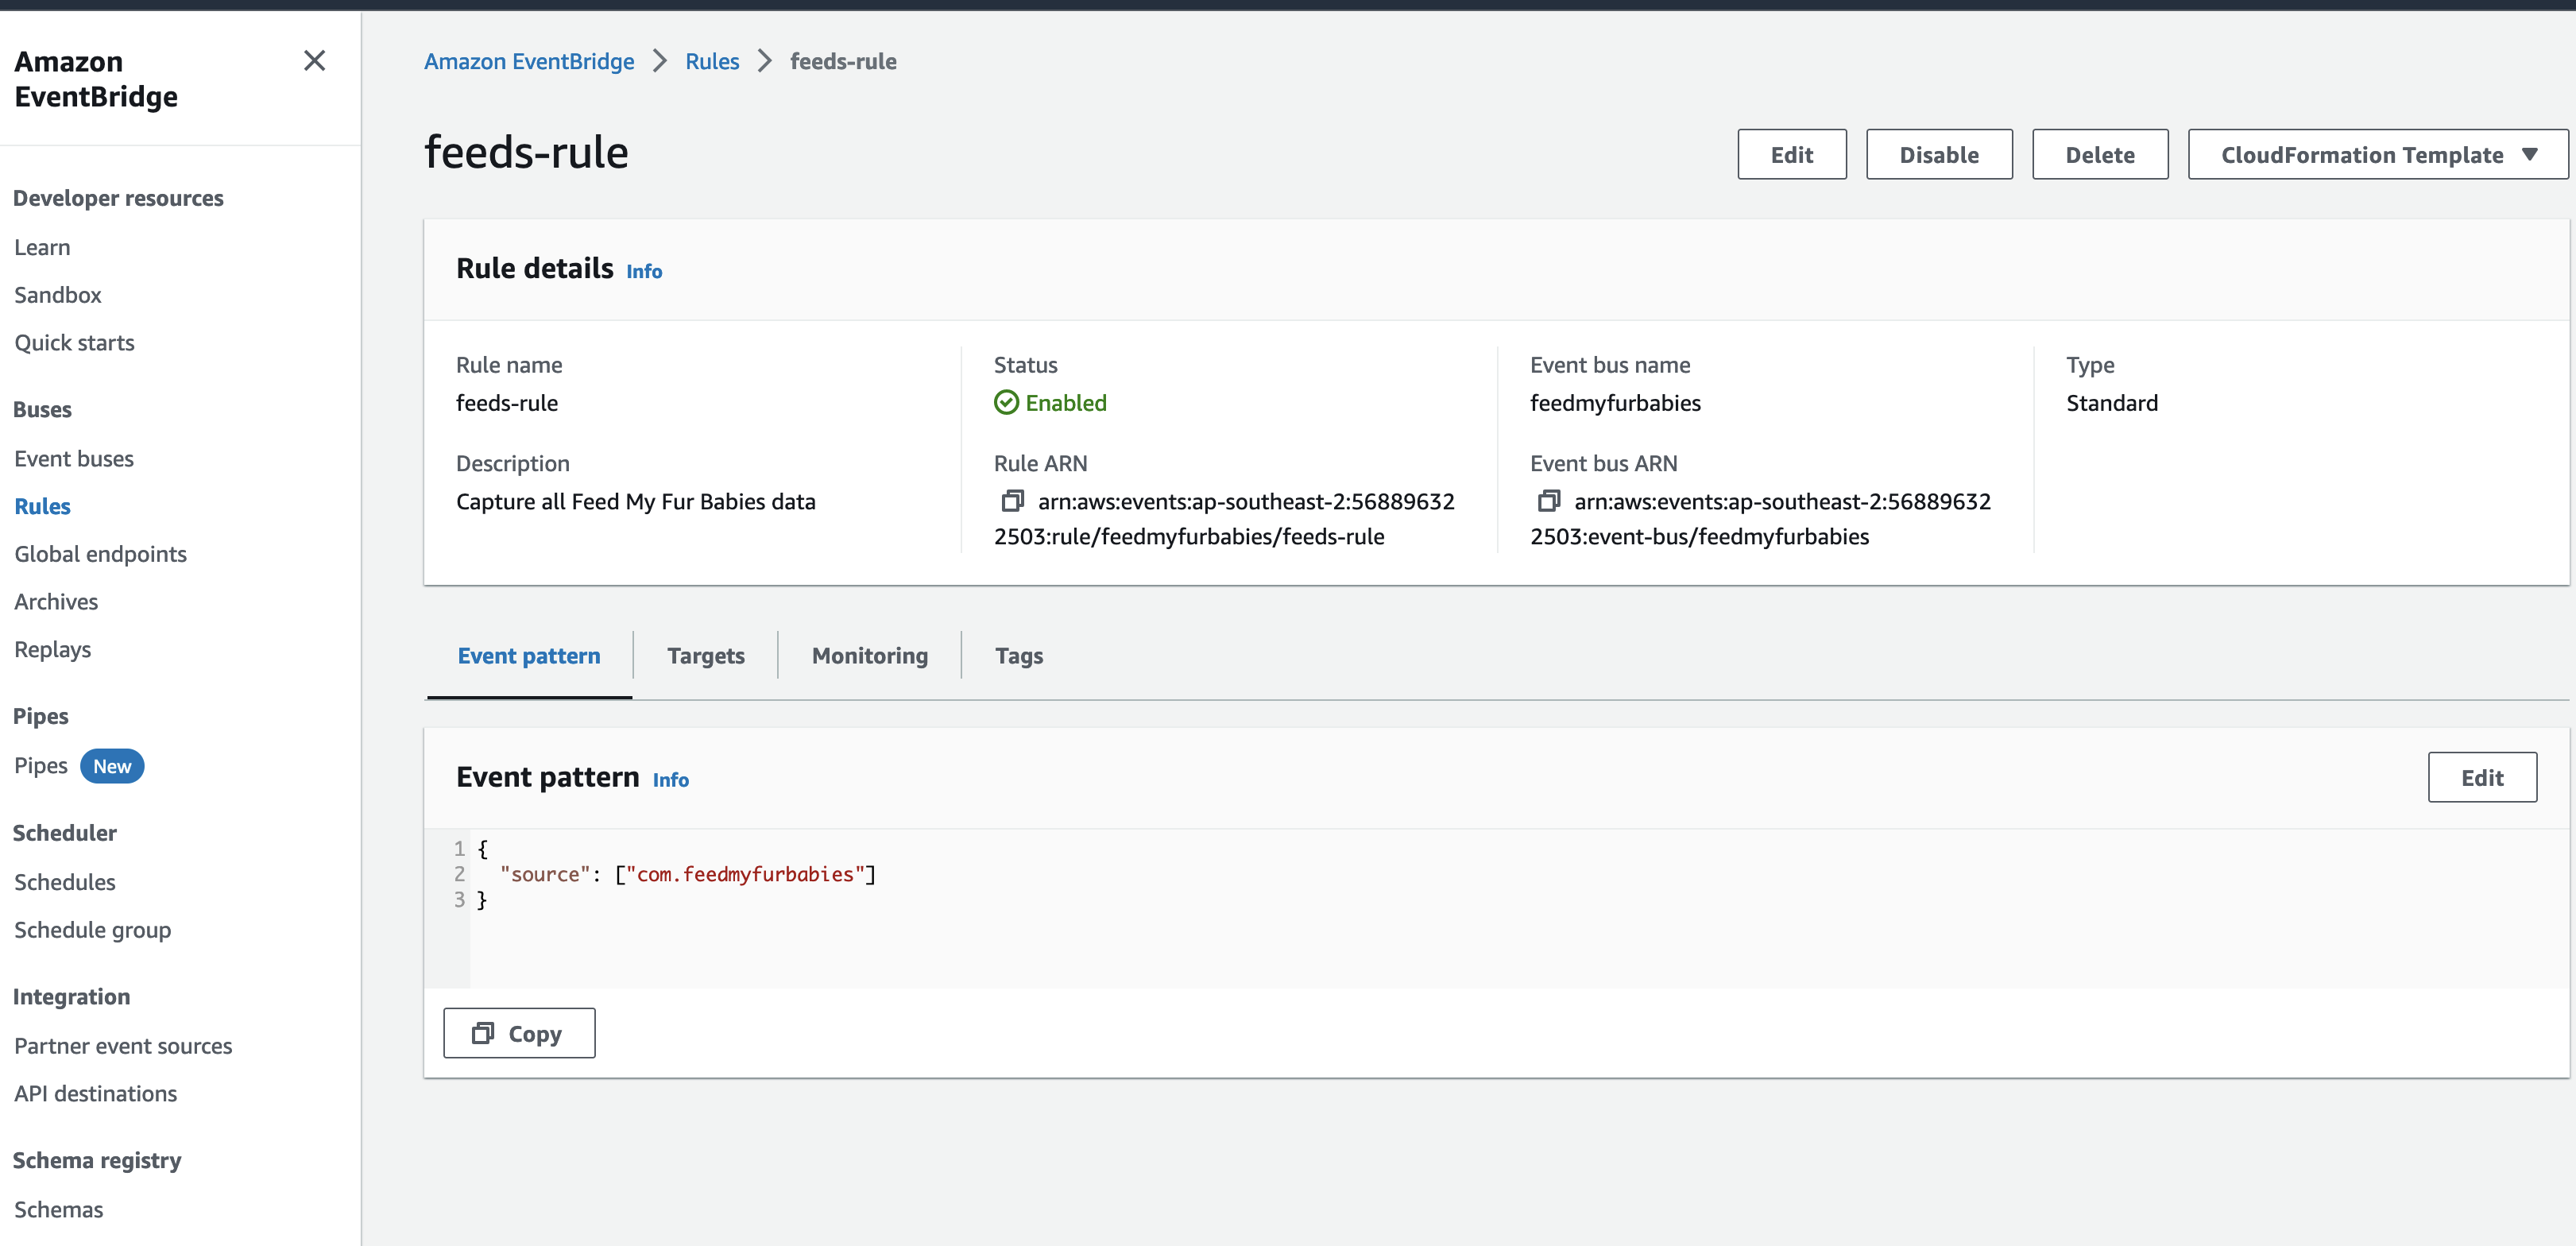
The event sent to the Custom Event Bus matches on the "source" attribute with a value of "com.feedmyfurbabies" with the Custom Event Bus Rule named "feeds-rule"
This Lambda function is the downstream target of the Custom Event Bus Rule that was mactched by the event and is responsible for interpreting the event message and translate it into an MQTT message, then in turn sends it to the AWS IoT Core Topic "cat-feeder/action" that you can subscribe to using a micro-controller, e.g. Seeed Studio XIAO ESP32C3.
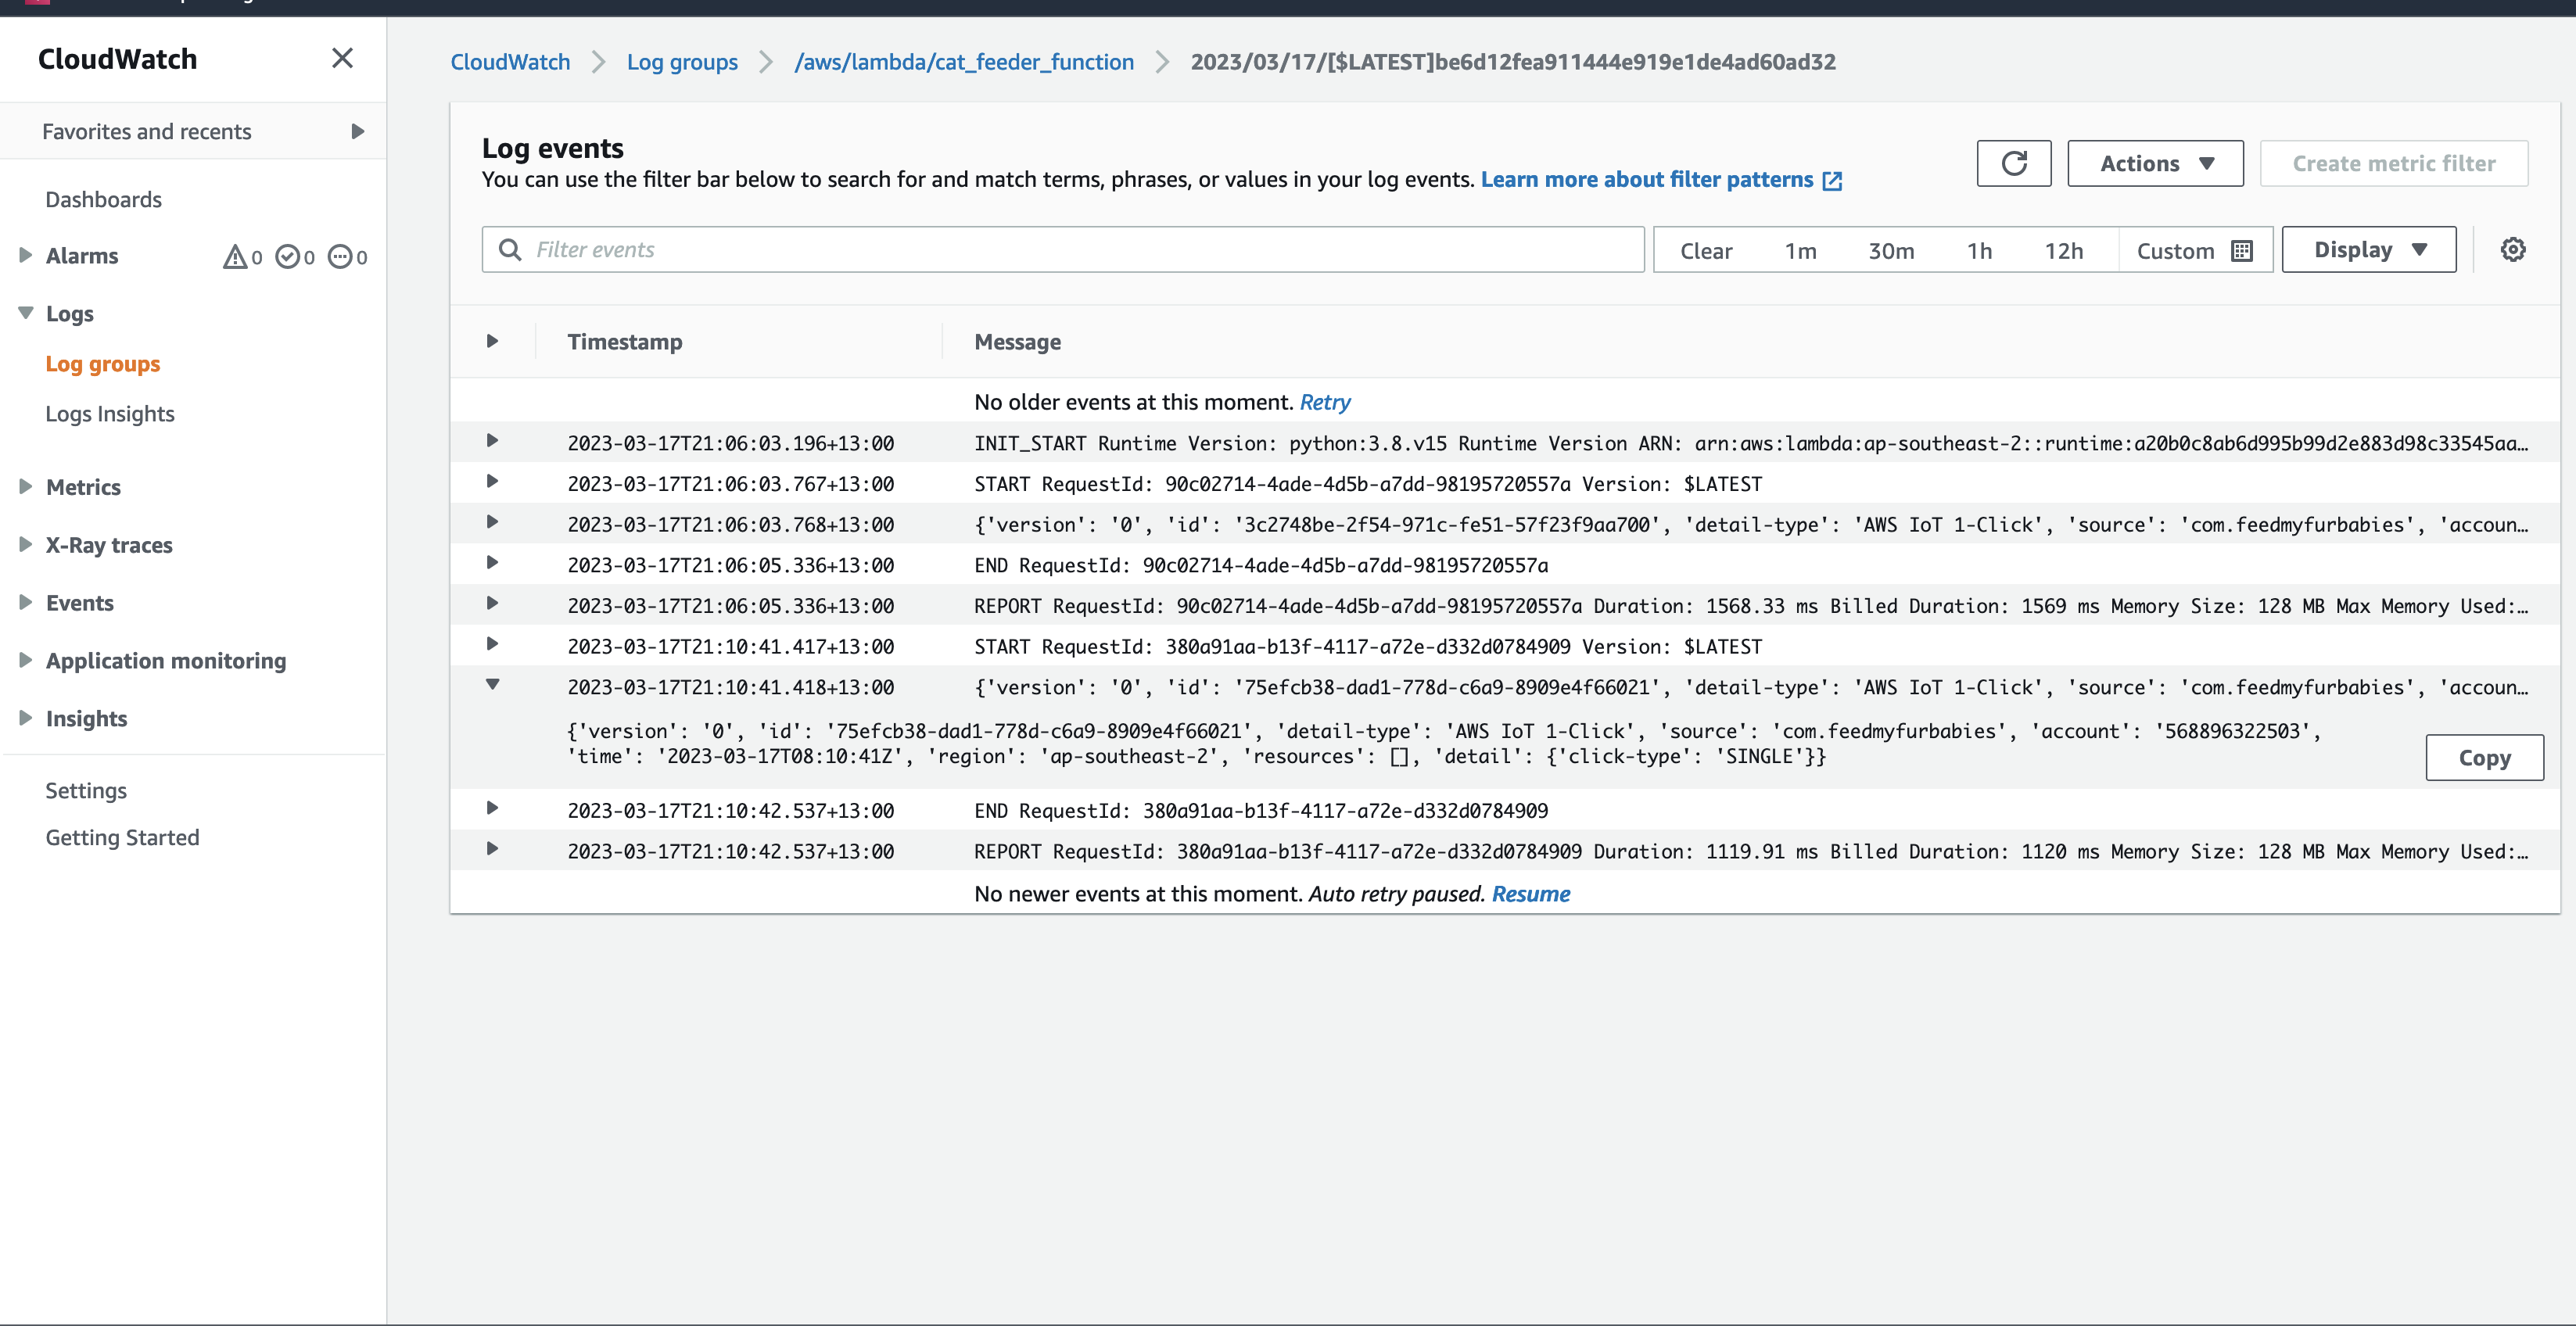
Here we can see the logs of the event received by the EventBridge Custom Bus Rule
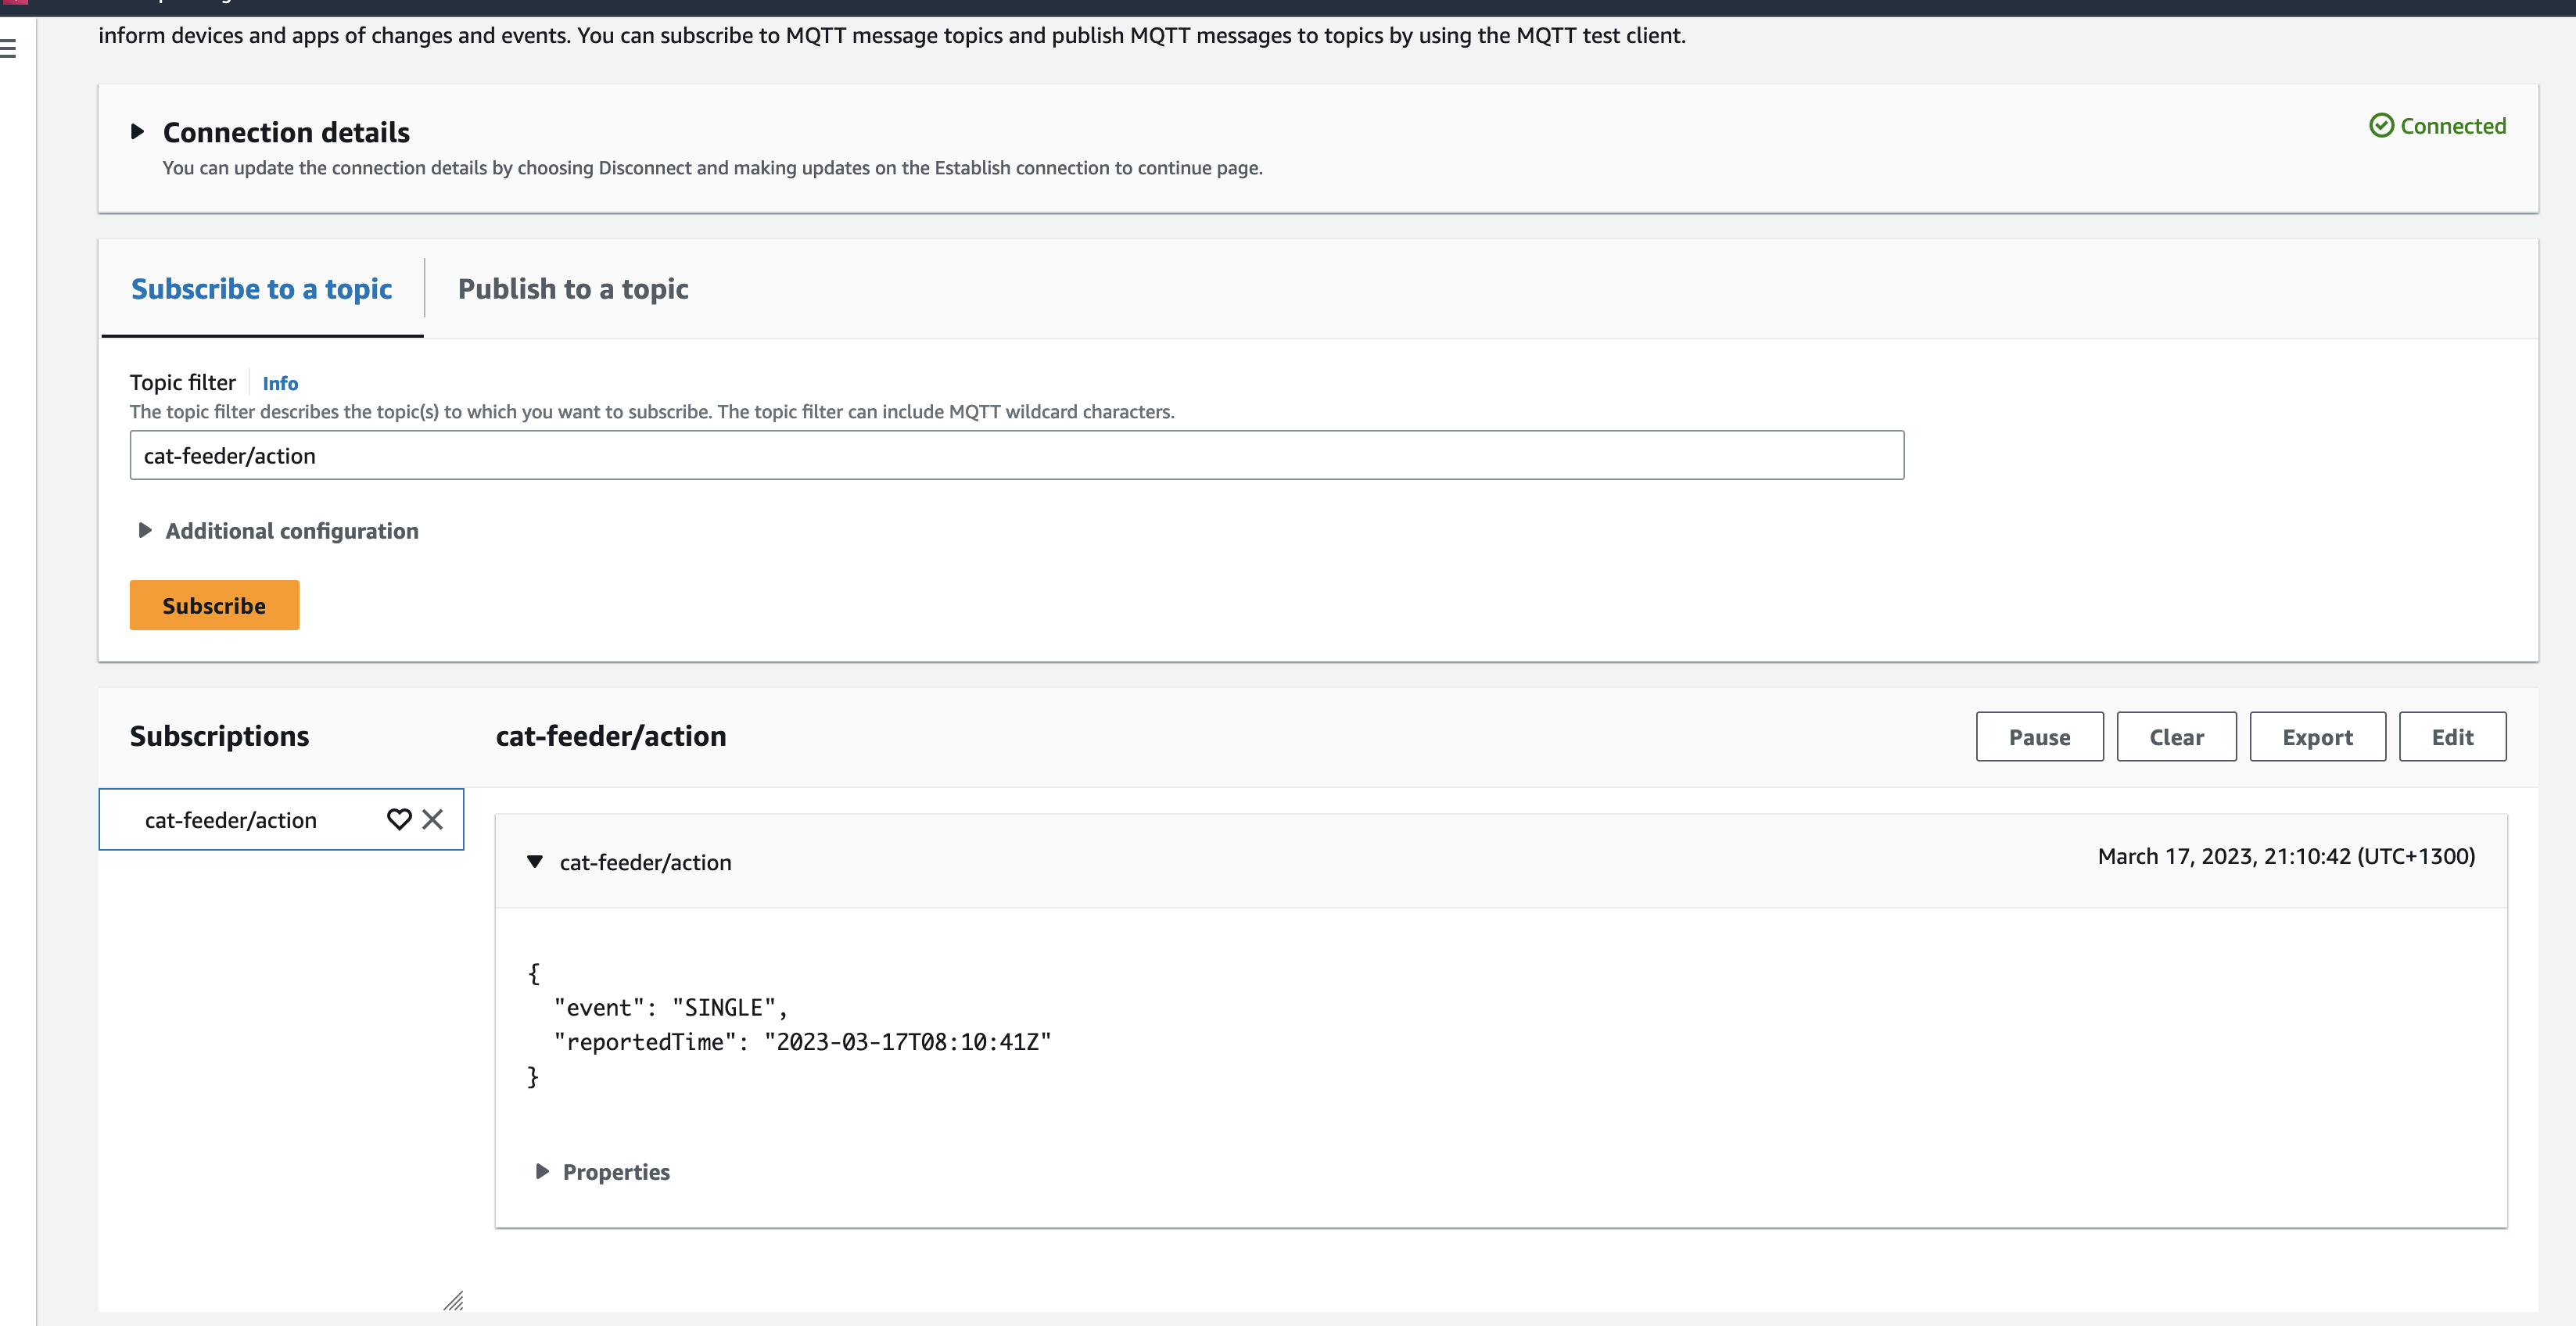
In the AWS Console for the AWS Iot Core Service, we can subscribe to Topics to receive an MQTT message right at the end of the downstream services - this is useful if you don't use a micro-controller
Future State Architecture
We end up with an architecture that will enable us to easily add targets to consume events managed by the EventBridge Custom Event Bus, doing so in a way where the IoT 1-Click Lambda function has no knowledge of any newly created subscribers of the Custom Event Bus.
In a future blog I will demonstrate this.