Real-Time Voice to Sign Language Translation - Part 3: Edge AI Agent with Strands Agents on NVIDIA Jetson

This is Part 3 of a 3-part series covering a real-time voice-to-sign-language translation system. In Part 1, I covered the React frontend that captures speech, processes it with Amazon Nova 2 Sonic, and publishes cleaned sentence text via MQTT. In Part 2, I covered the AWS CDK stack that routes IoT Core messages through Lambda to AppSync for real-time GraphQL subscriptions.
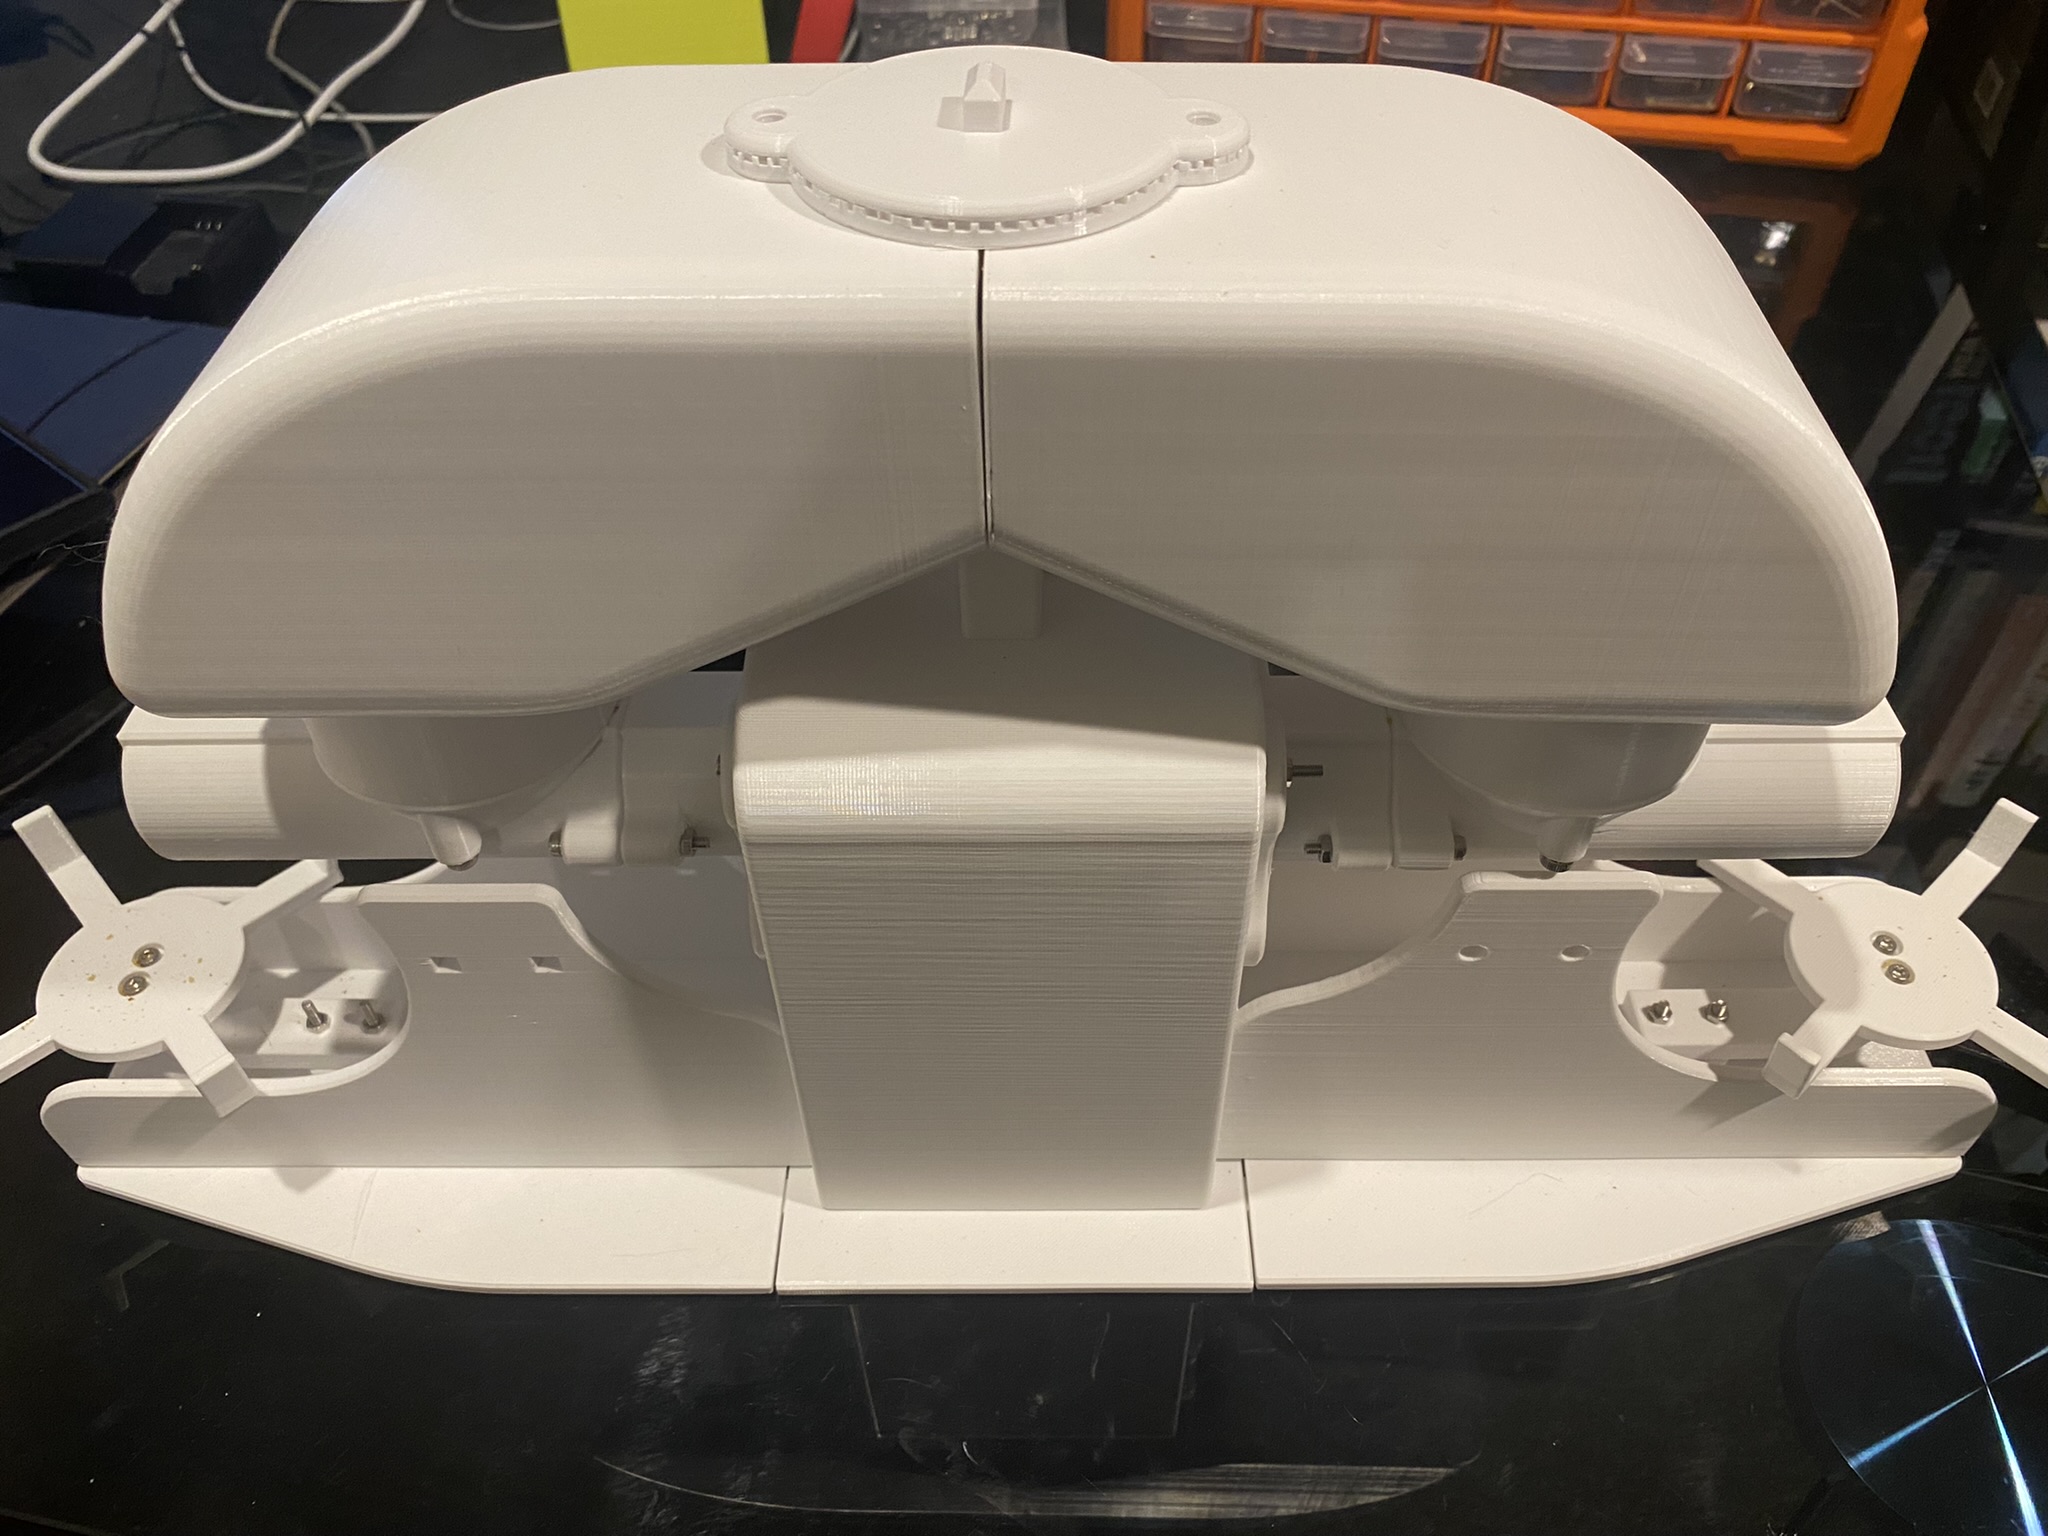
This post covers the final piece — the edge AI agent that actually makes the physical hand move. It is a Strands Agent running on an NVIDIA Jetson that subscribes to MQTT commands from the frontend, uses Amazon Nova 2 Lite to invoke the fingerspell tool, drives the Pollen Robotics Amazing Hand's Feetech SCS0009 servos for ASL fingerspelling letter by letter, records video of the hand in action, uploads it to S3, and publishes hand state back to IoT Core — which Part 2's infrastructure routes through to the frontend via AppSync.
The three repositories in the series:
- Part 1 - Frontend and Voice Processing (
amplify-react-nova-sonic-voice-chat-amazing-hand) — React web app that captures speech, streams to Nova 2 Sonic, publishes cleaned sentence text via MQTT - Part 2 - Cloud Infrastructure (
cdk-iot-amazing-hand-streaming) — AWS CDK stack that routes IoT Core messages through Lambda to AppSync - This post (Part 3) - Edge AI Agent (
strands-agents-amazing-hands) — Strands Agent powered by Amazon Nova 2 Lite on NVIDIA Jetson that translates sentence text to ASL servo commands, drives the Amazing Hand, and publishes state back
Goals
- Receive MQTT commands from the React frontend (plain text or JSON with
sentencefield) and drive the Amazing Hand servos for ASL fingerspelling - Use the Strands Agents framework with Amazon Nova 2 Lite (
us.amazon.nova-2-lite-v1:0) to invoke thefingerspelltool — the LLM passes the incoming text verbatim to the tool for letter-by-letter ASL spelling - Fingerspell text using the 26-letter ASL alphabet (A-Z), with each letter held for 0.8 seconds and spaces adding a 0.4-second pause
- Control 8 Feetech SCS0009 servos (4 fingers x 2 joints) on the Pollen Robotics Amazing Hand via serial bus at 1M baud using the
rustypotlibrary - Record video of the hand via OpenCV during each fingerspelling sequence, encode to H.264 MP4 via imageio-ffmpeg, upload to S3, and include a presigned URL in the state message
- Publish real-time hand state (servo angles, letter, video URL) to IoT Core over MQTT — which Part 2's CDK stack routes to AppSync for the frontend to consume
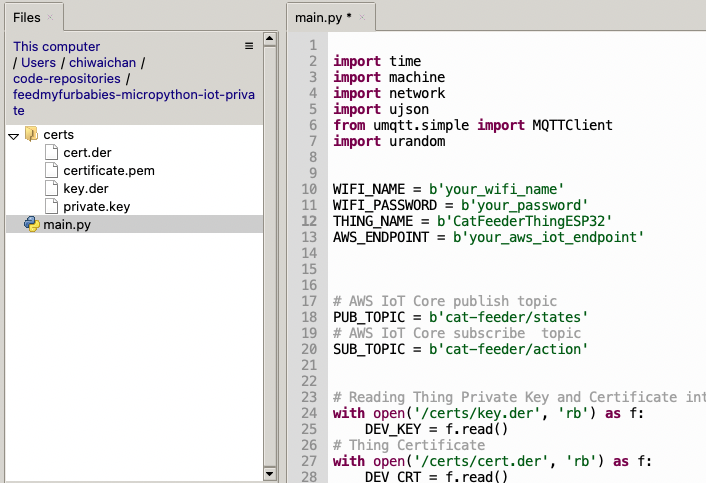
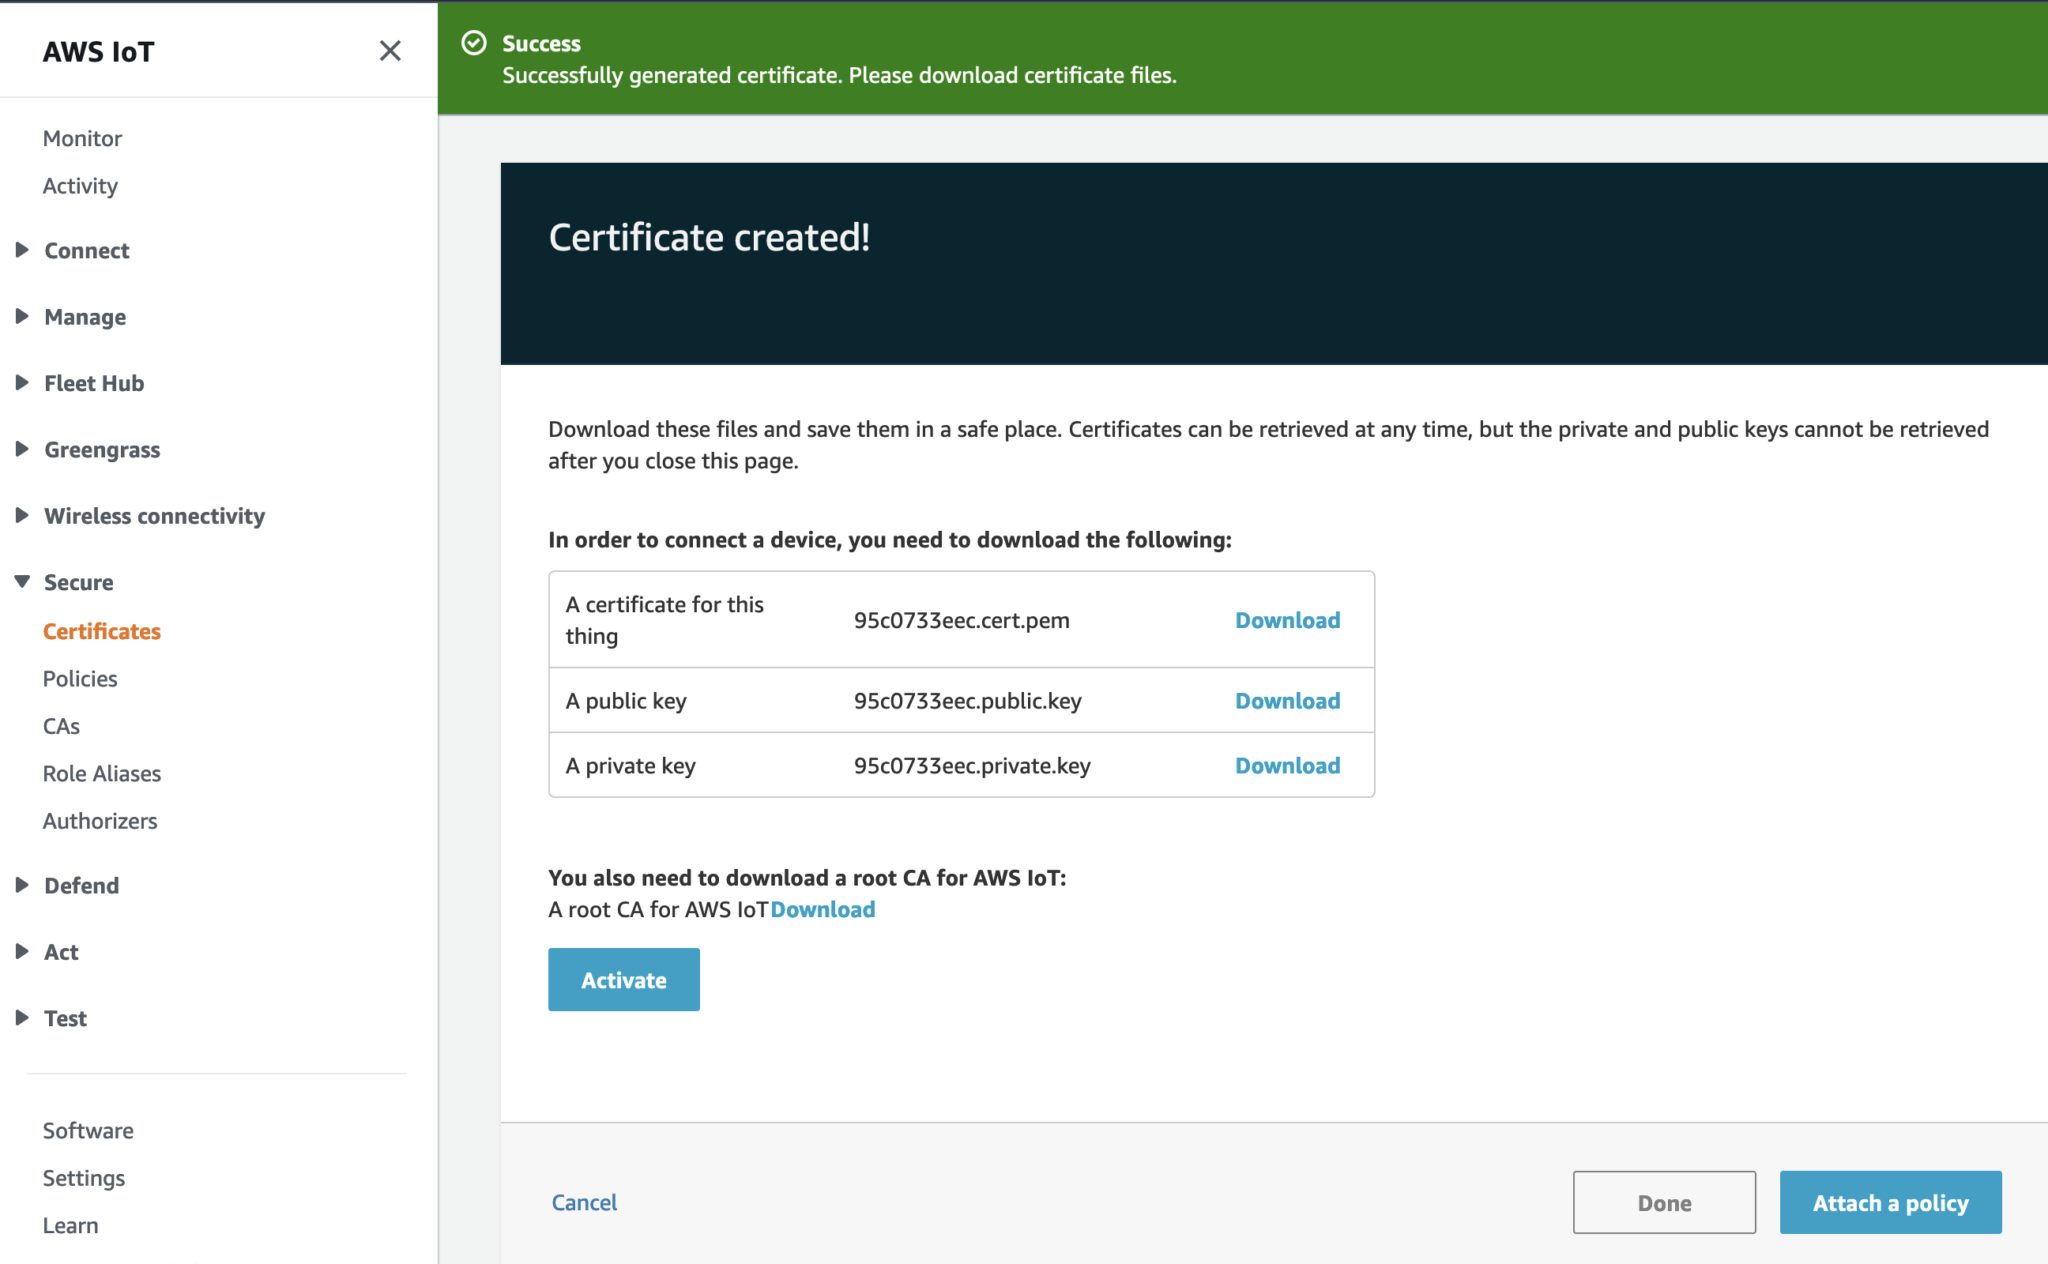
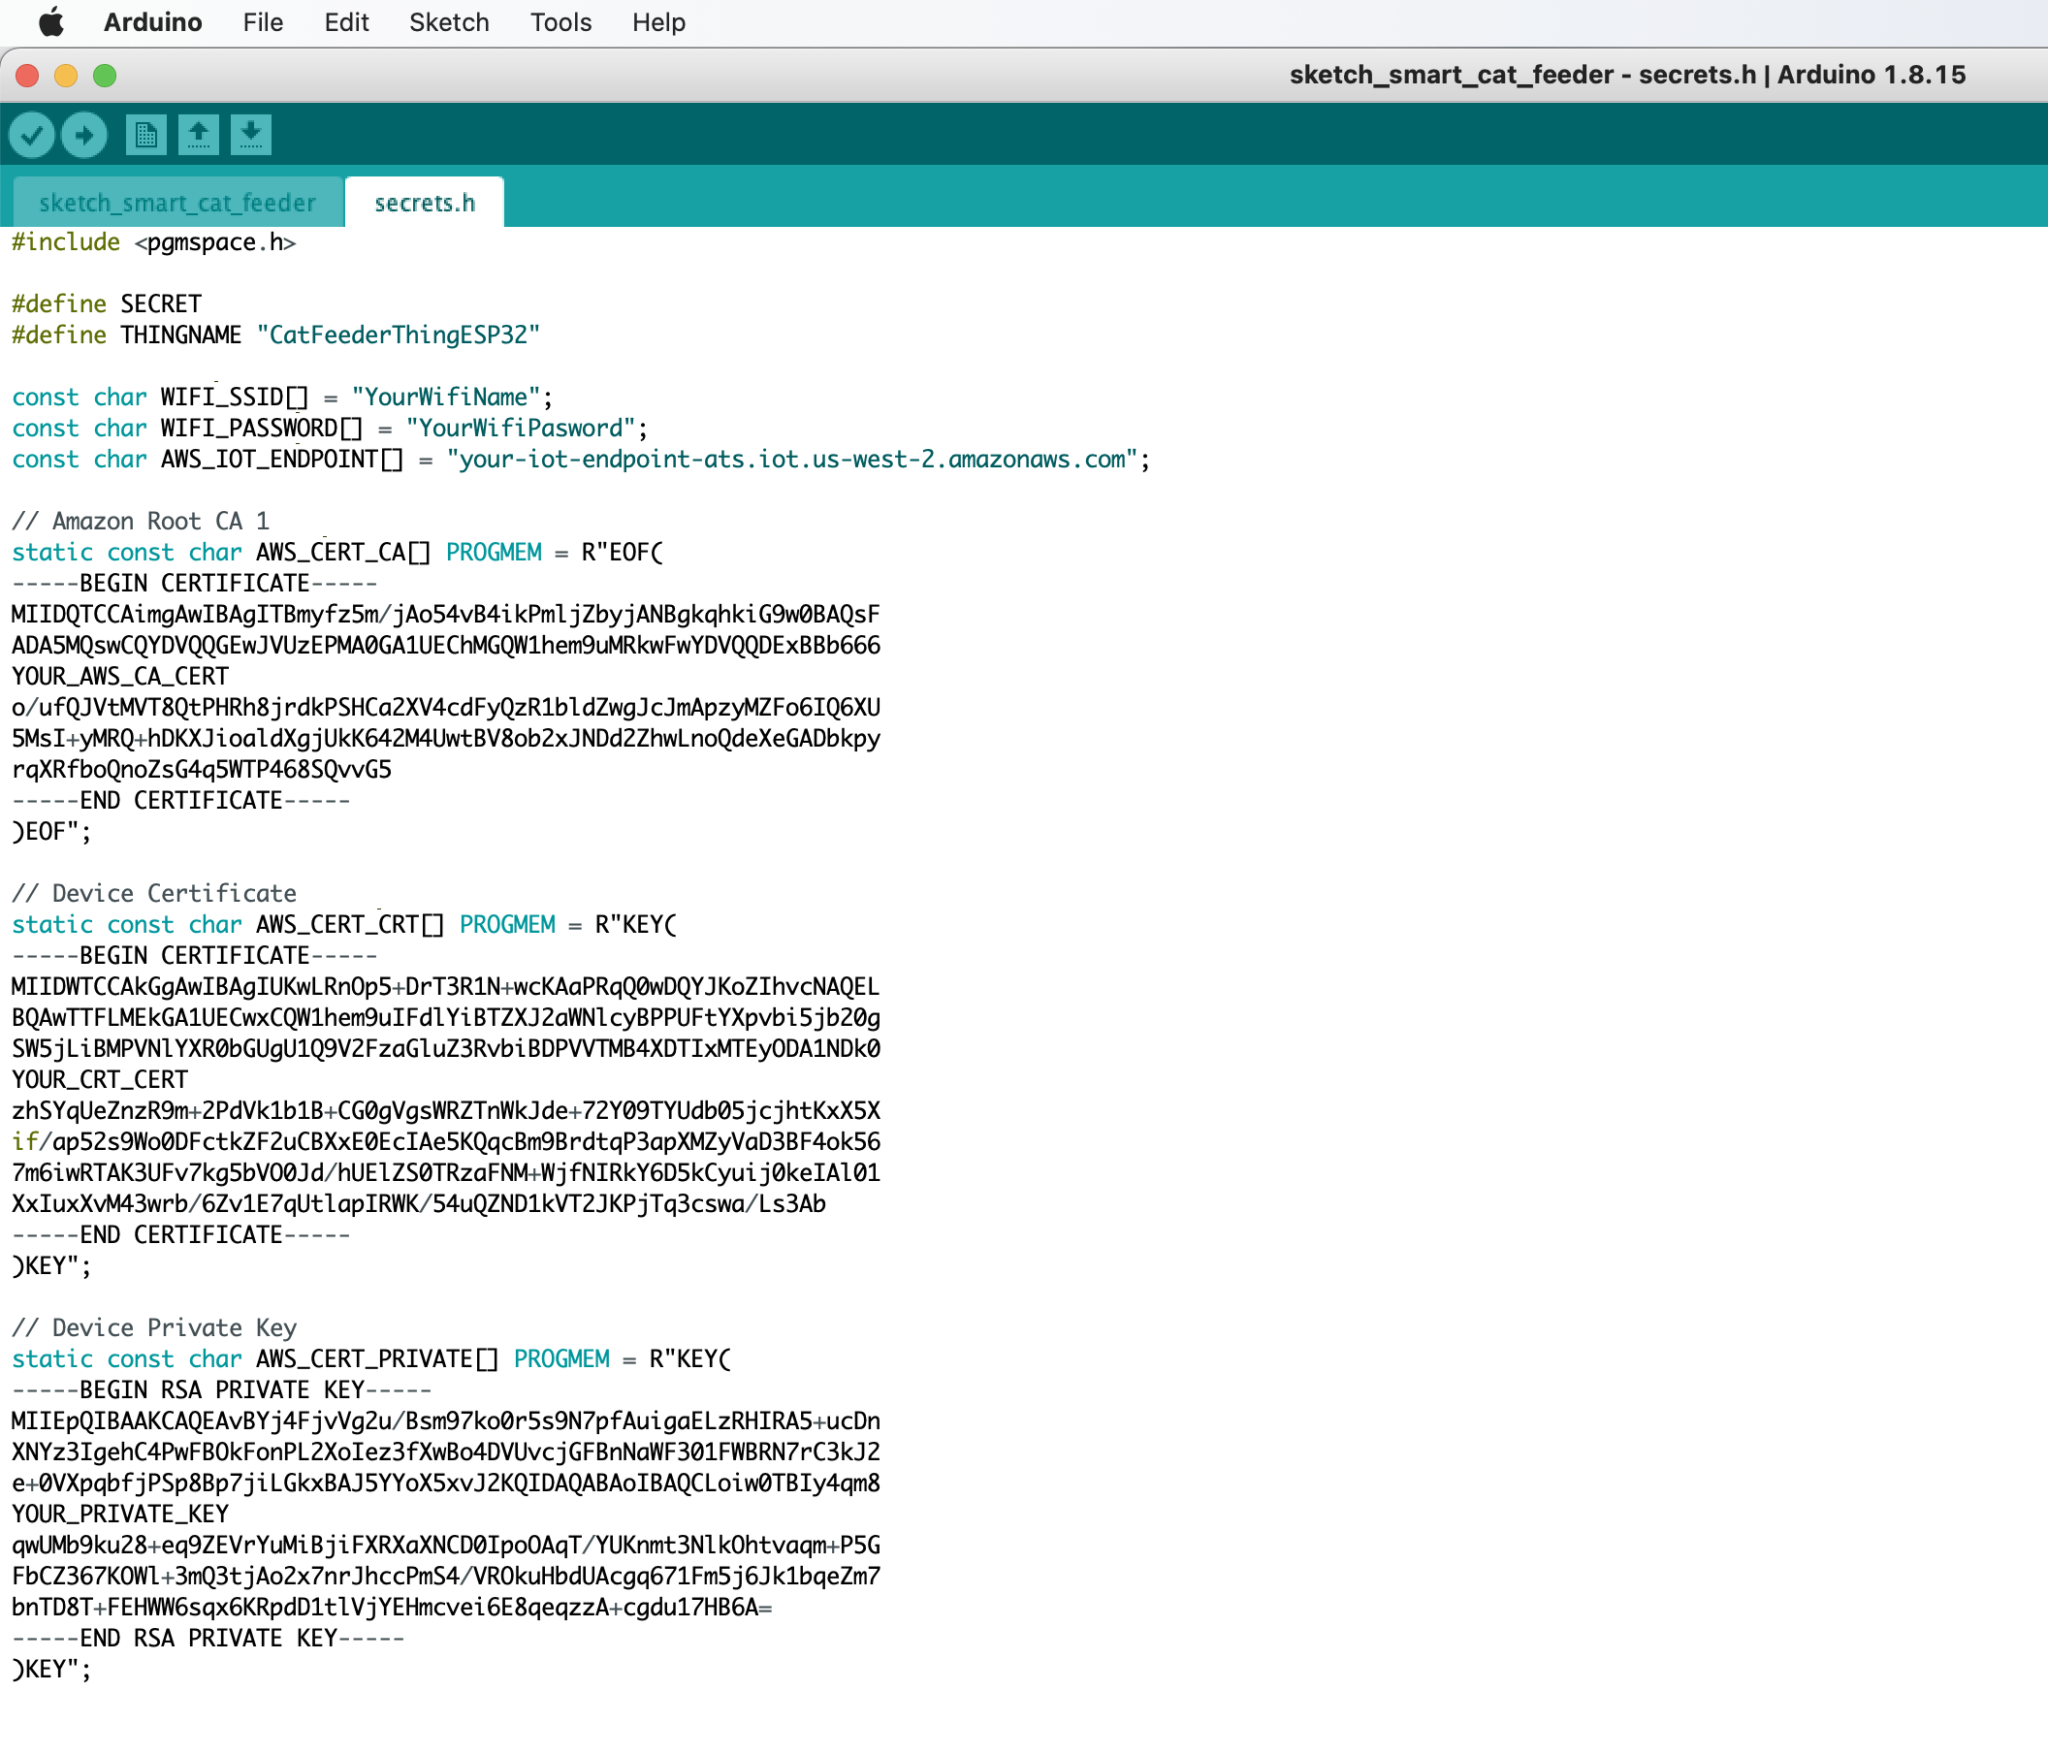
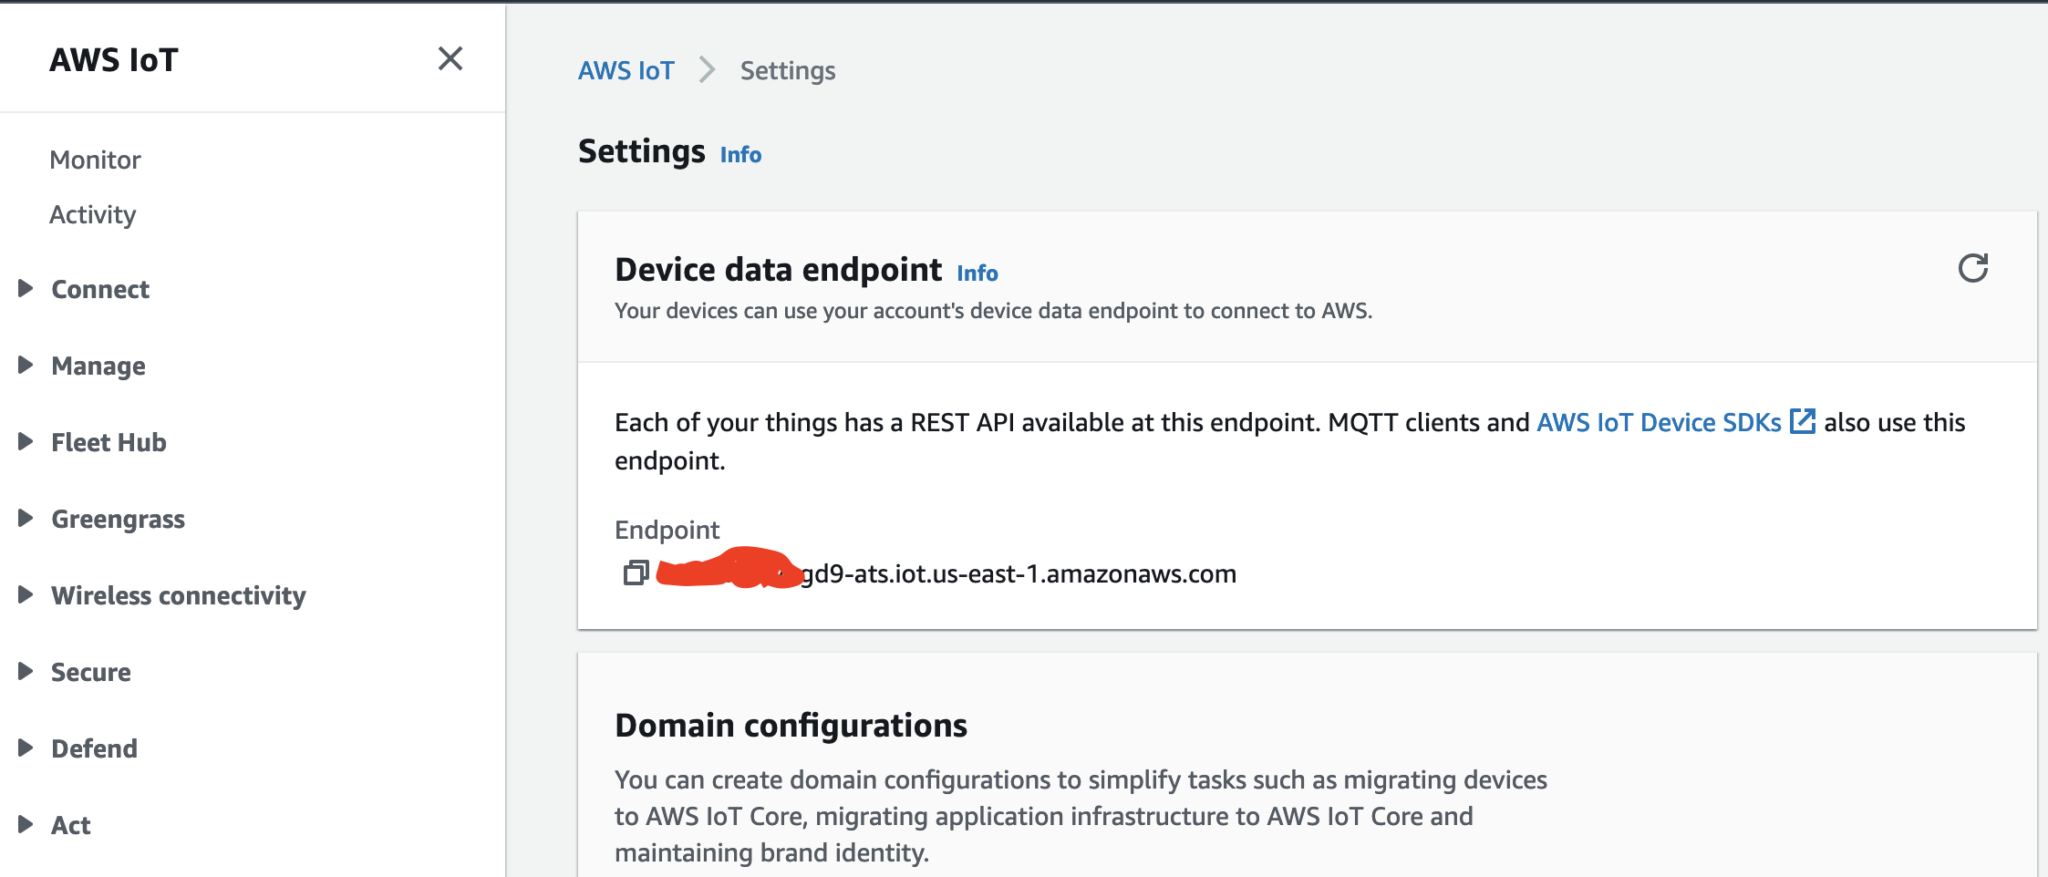
- Authenticate to AWS IoT Core using mTLS with X.509 device certificates
- Create a fresh agent instance per MQTT message to prevent conversation history accumulation and unbounded token growth
- Handle graceful shutdown with servo torque disable on SIGINT/SIGTERM
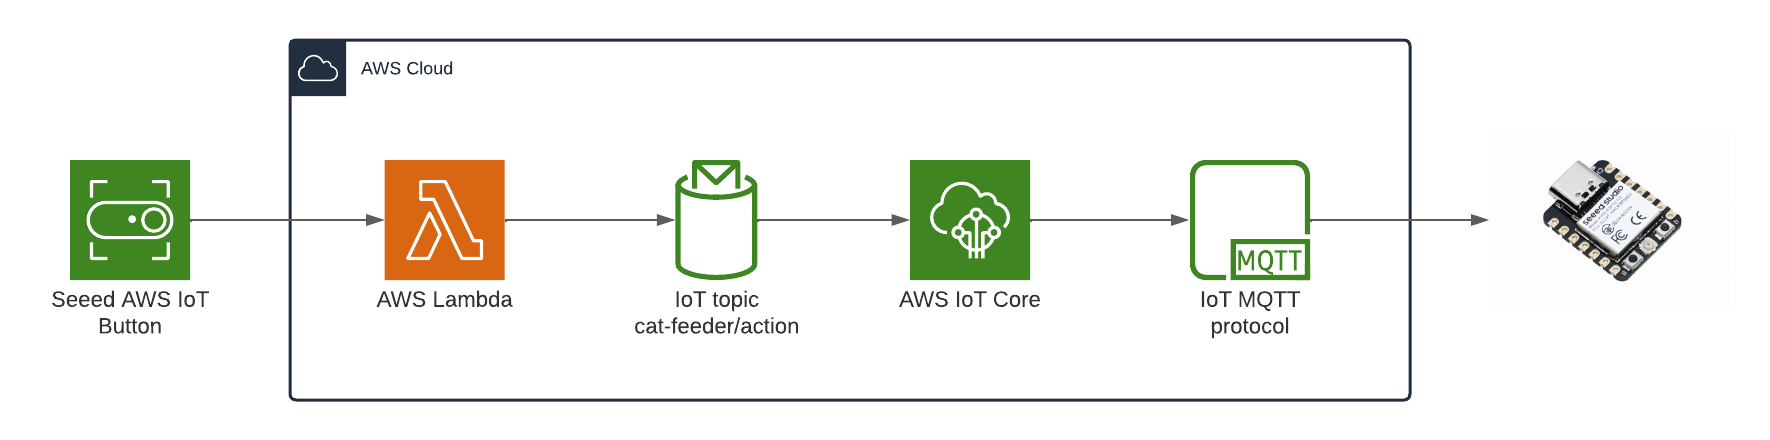
The Overall System
This diagram shows the complete end-to-end system. Part 3 is the edge device highlighted on the right — the NVIDIA Jetson running the Strands Agent that controls the Amazing Hand.
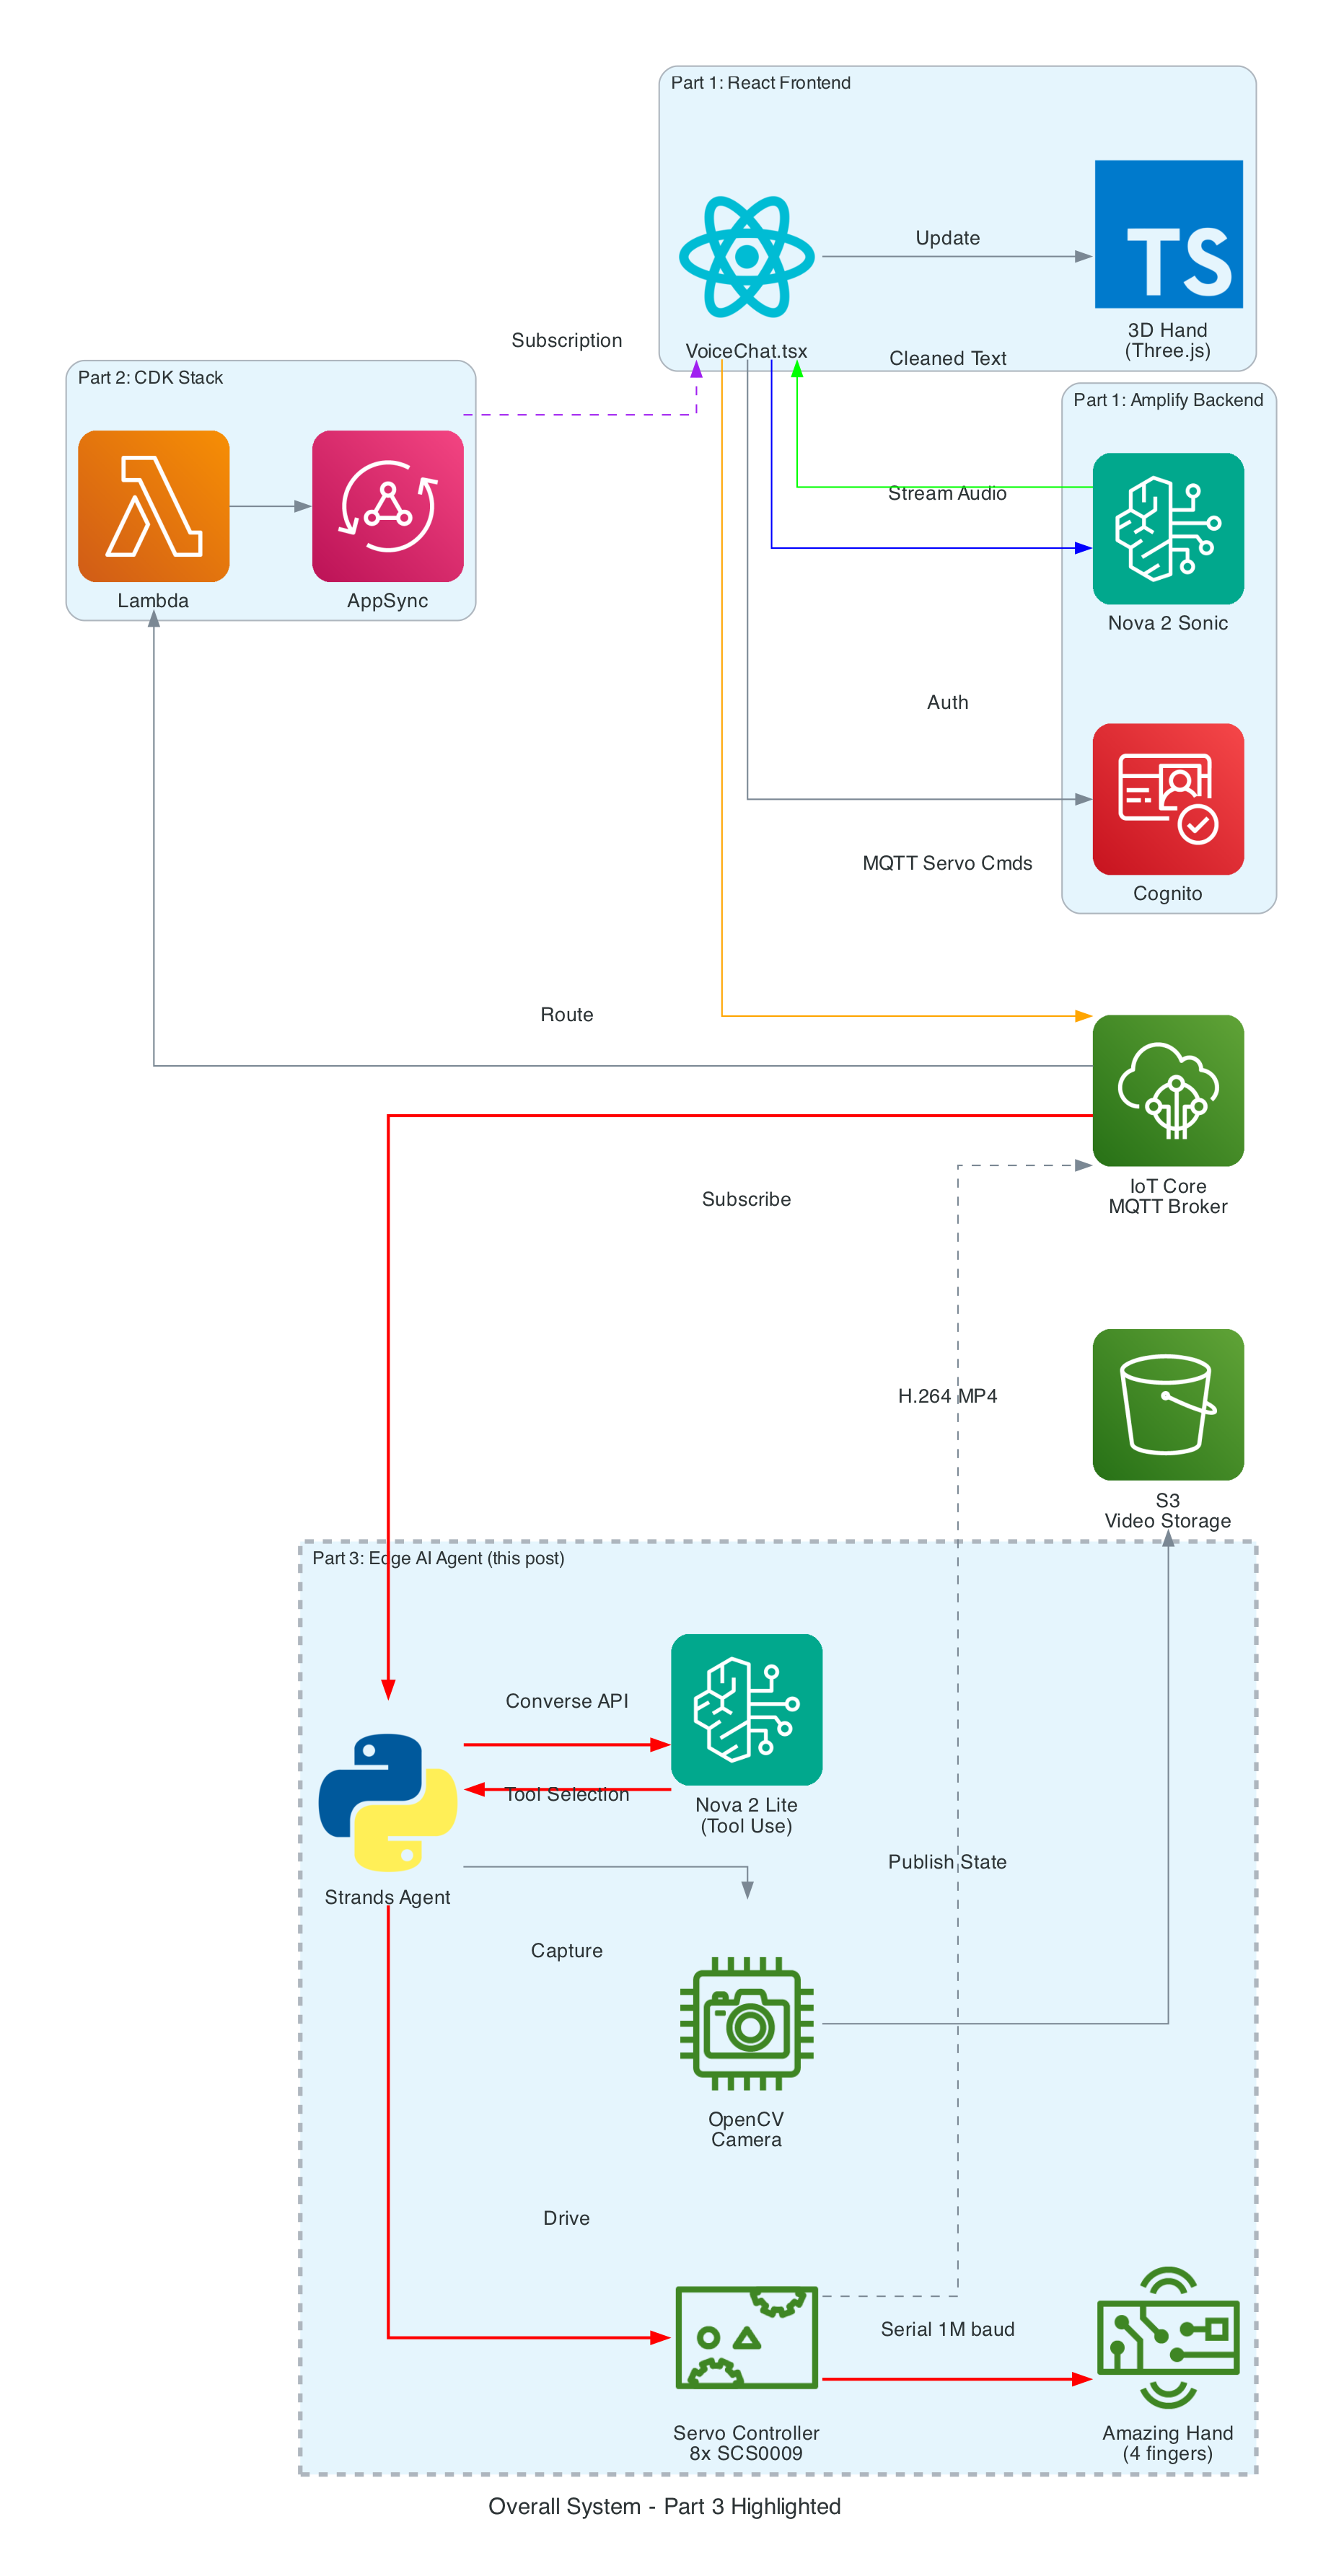
How Part 3 fits in:
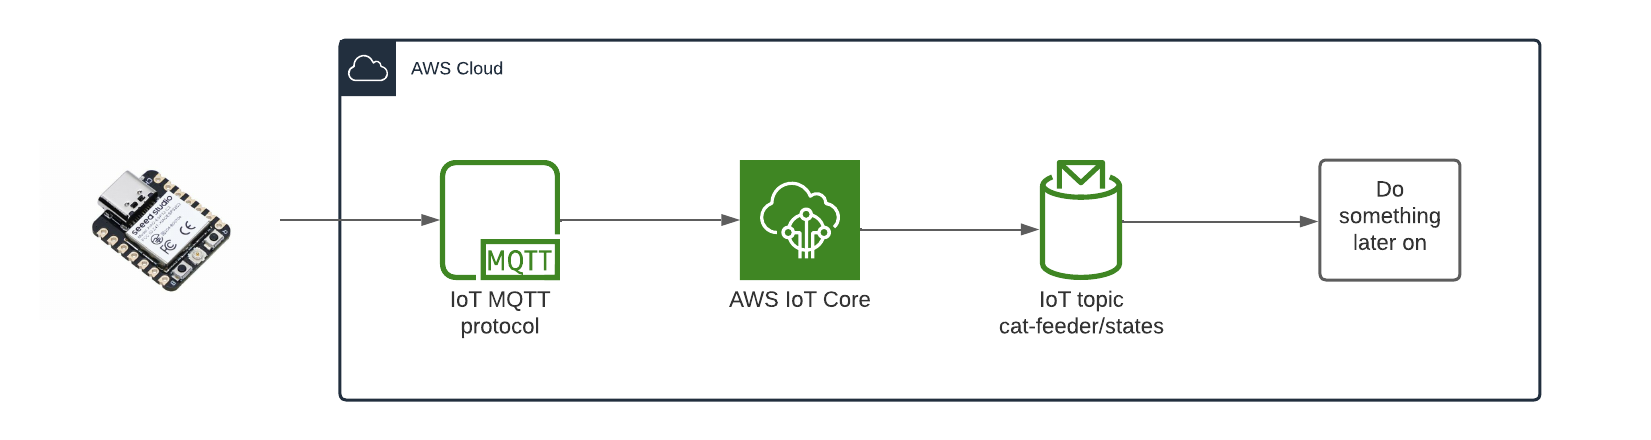
- Part 1 (Frontend) publishes cleaned sentence text to
the-project/robotic-hand/{deviceName}/actionvia MQTT - Part 3 (This agent) subscribes to the
/actiontopic, processes the command through the Strands Agent, drives the servos, records video, and publishes state back to/state - Part 2 (Infrastructure) picks up the
/statemessages and routes them through Lambda to AppSync, where the frontend receives them via GraphQL subscriptions
Architecture
The agent is a Python application built on the Strands Agents framework. It runs as a long-lived MQTT listener on the NVIDIA Jetson, creating a fresh agent instance for each incoming message to keep memory bounded.
Agent Architecture
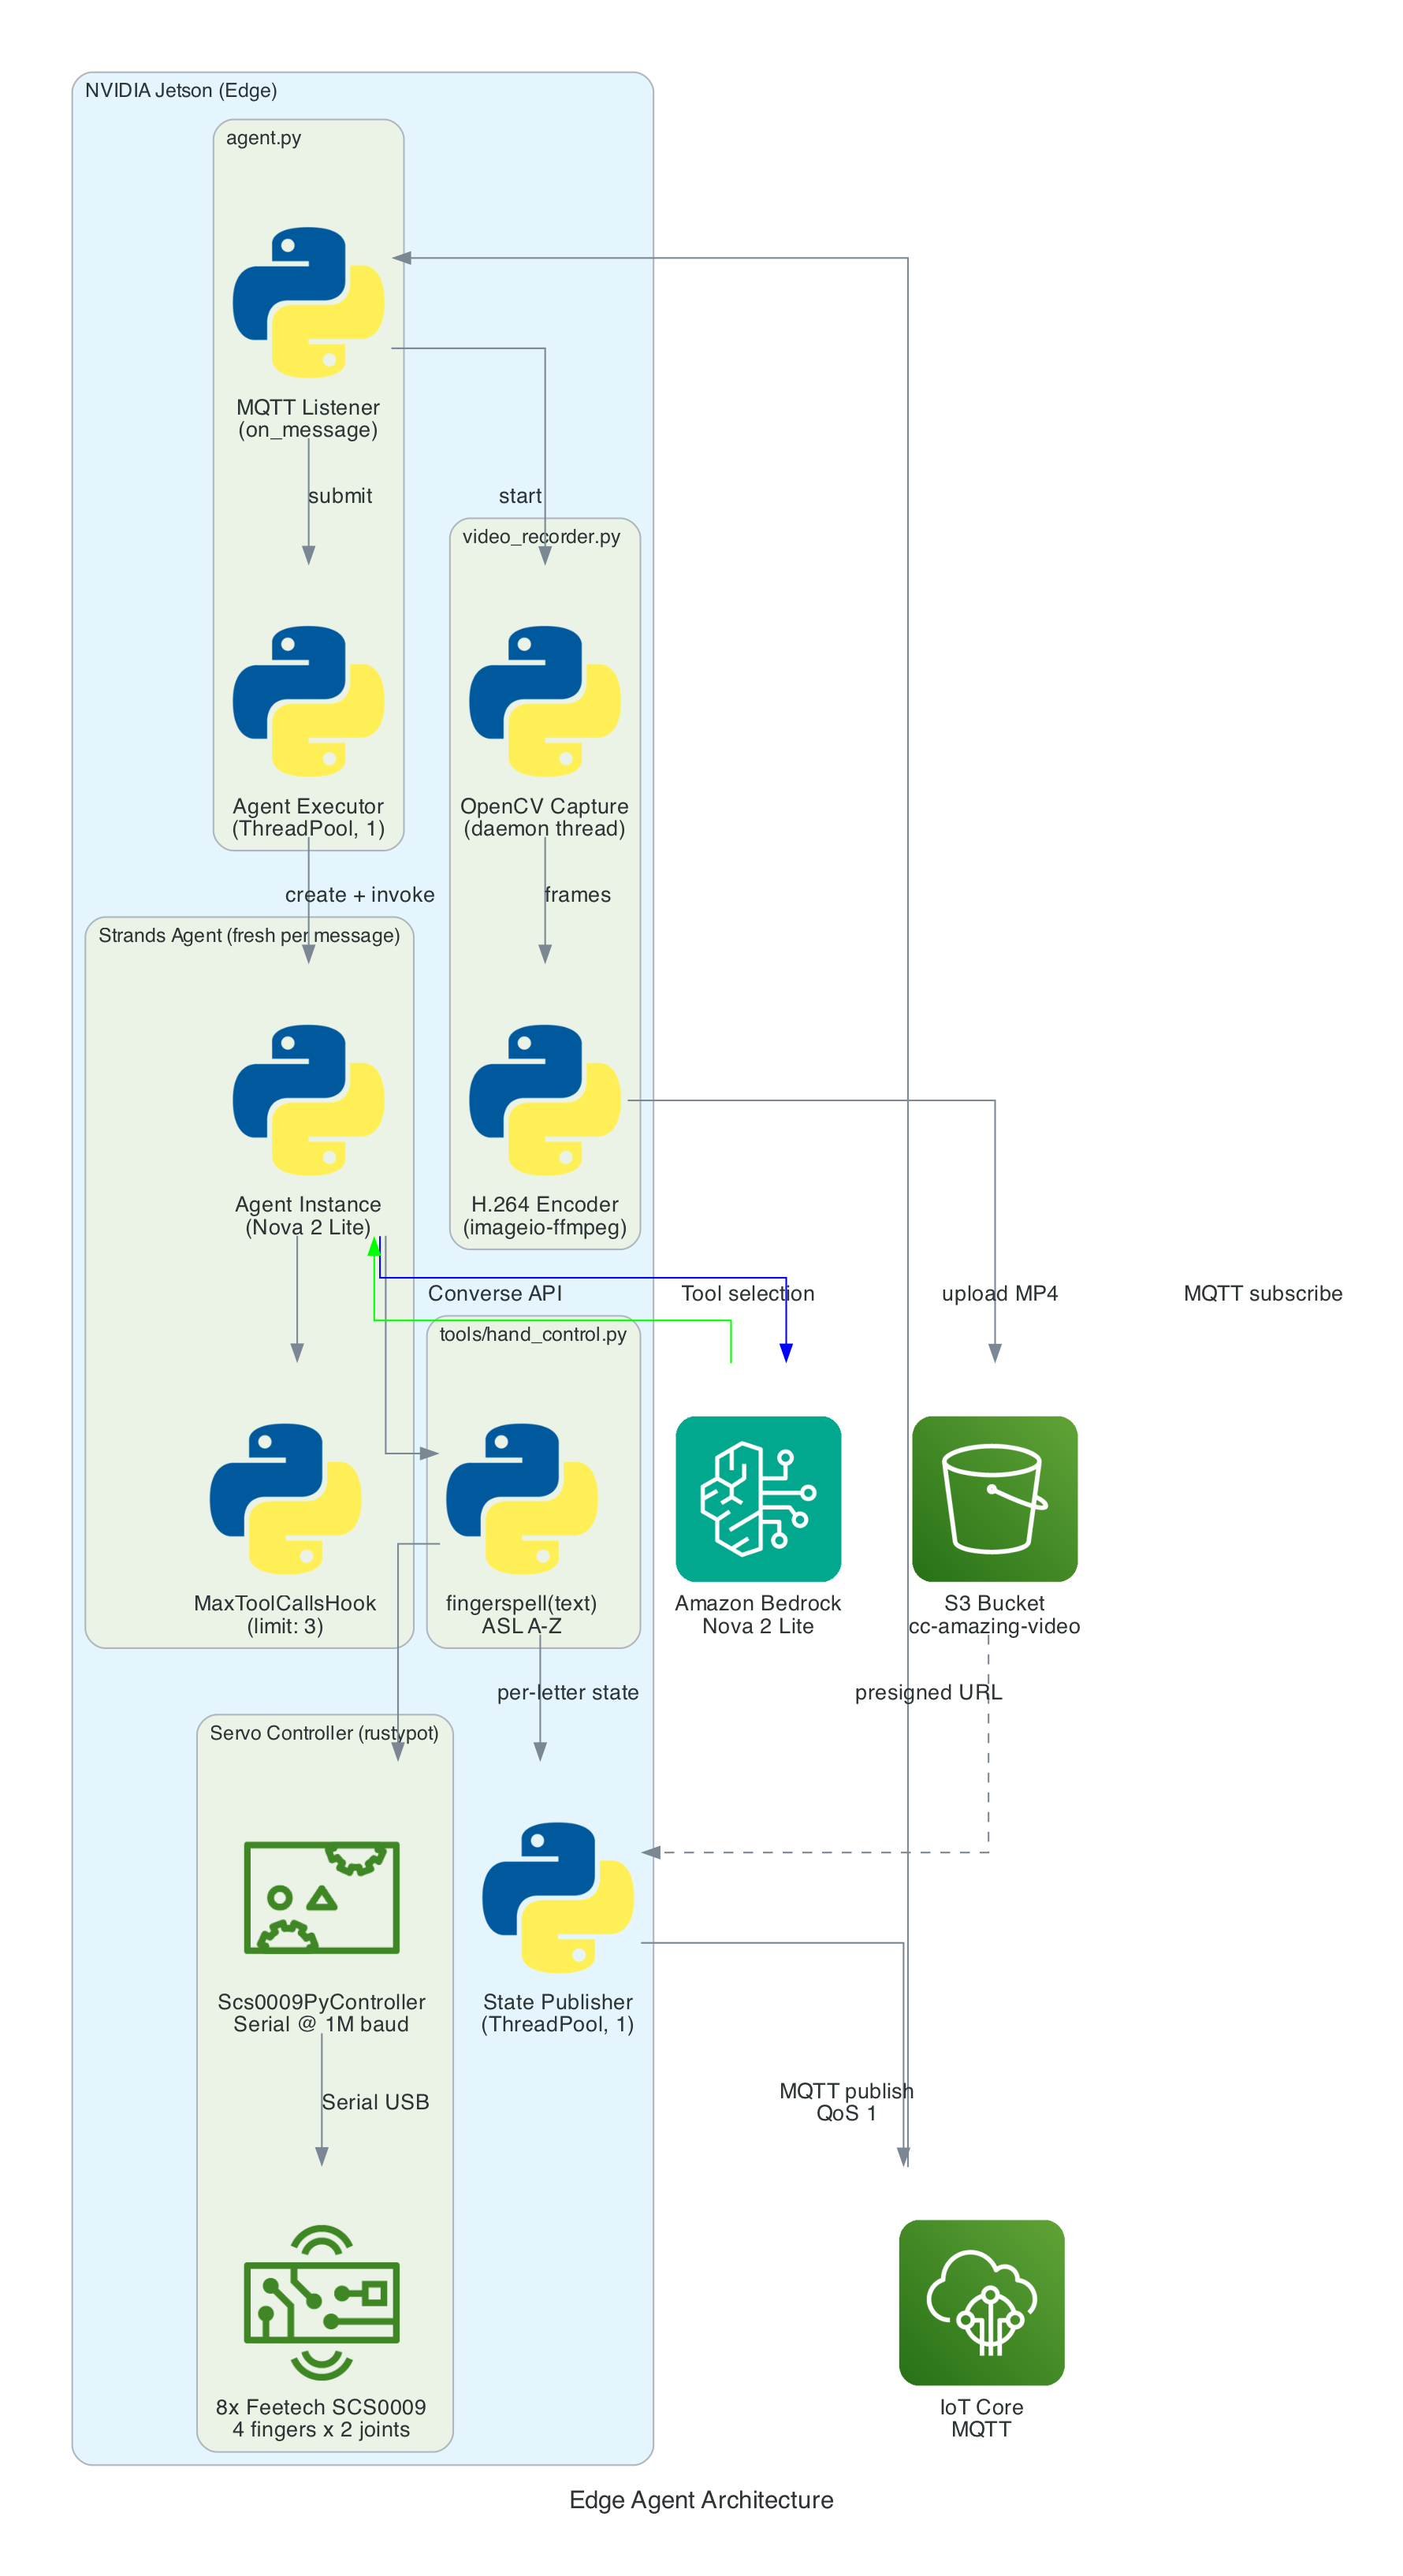
Components:
- MQTT Listener (
agent.py) — Subscribes to the action topic, parses incoming messages (plain text or JSON), and submits each action to a single-threaded agent executor to keep the AWS CRT MQTT event loop free - Strands Agent — A fresh
Agentinstance created per message with Amazon Nova 2 Lite as the model, thefingerspelltool as the available action, and aMaxToolCallsHook(limit 3) to prevent runaway tool-call loops - Fingerspell Tool (
hand_control.py) — A@tooldecorated function that the LLM invokes to spell text letter-by-letter using the 26-letter ASL alphabet - Servo Controller — Uses
rustypot.Scs0009PyControllerto communicate with 8 Feetech SCS0009 servos over serial at 1M baud. Each finger has two servos controlled by dedicated move functions (Move_Index,Move_Middle,Move_Ring,Move_Thumb) - Video Recorder (
video_recorder.py) — Background daemon thread captures frames via OpenCV, encodes to H.264 MP4 via imageio-ffmpeg, uploads to S3, and returns a presigned URL (1-hour expiry) - State Publisher — Non-blocking MQTT publisher on a separate thread that sends hand state (finger angles, letter, video URL) to the
/statetopic with QoS 1
Data Flow
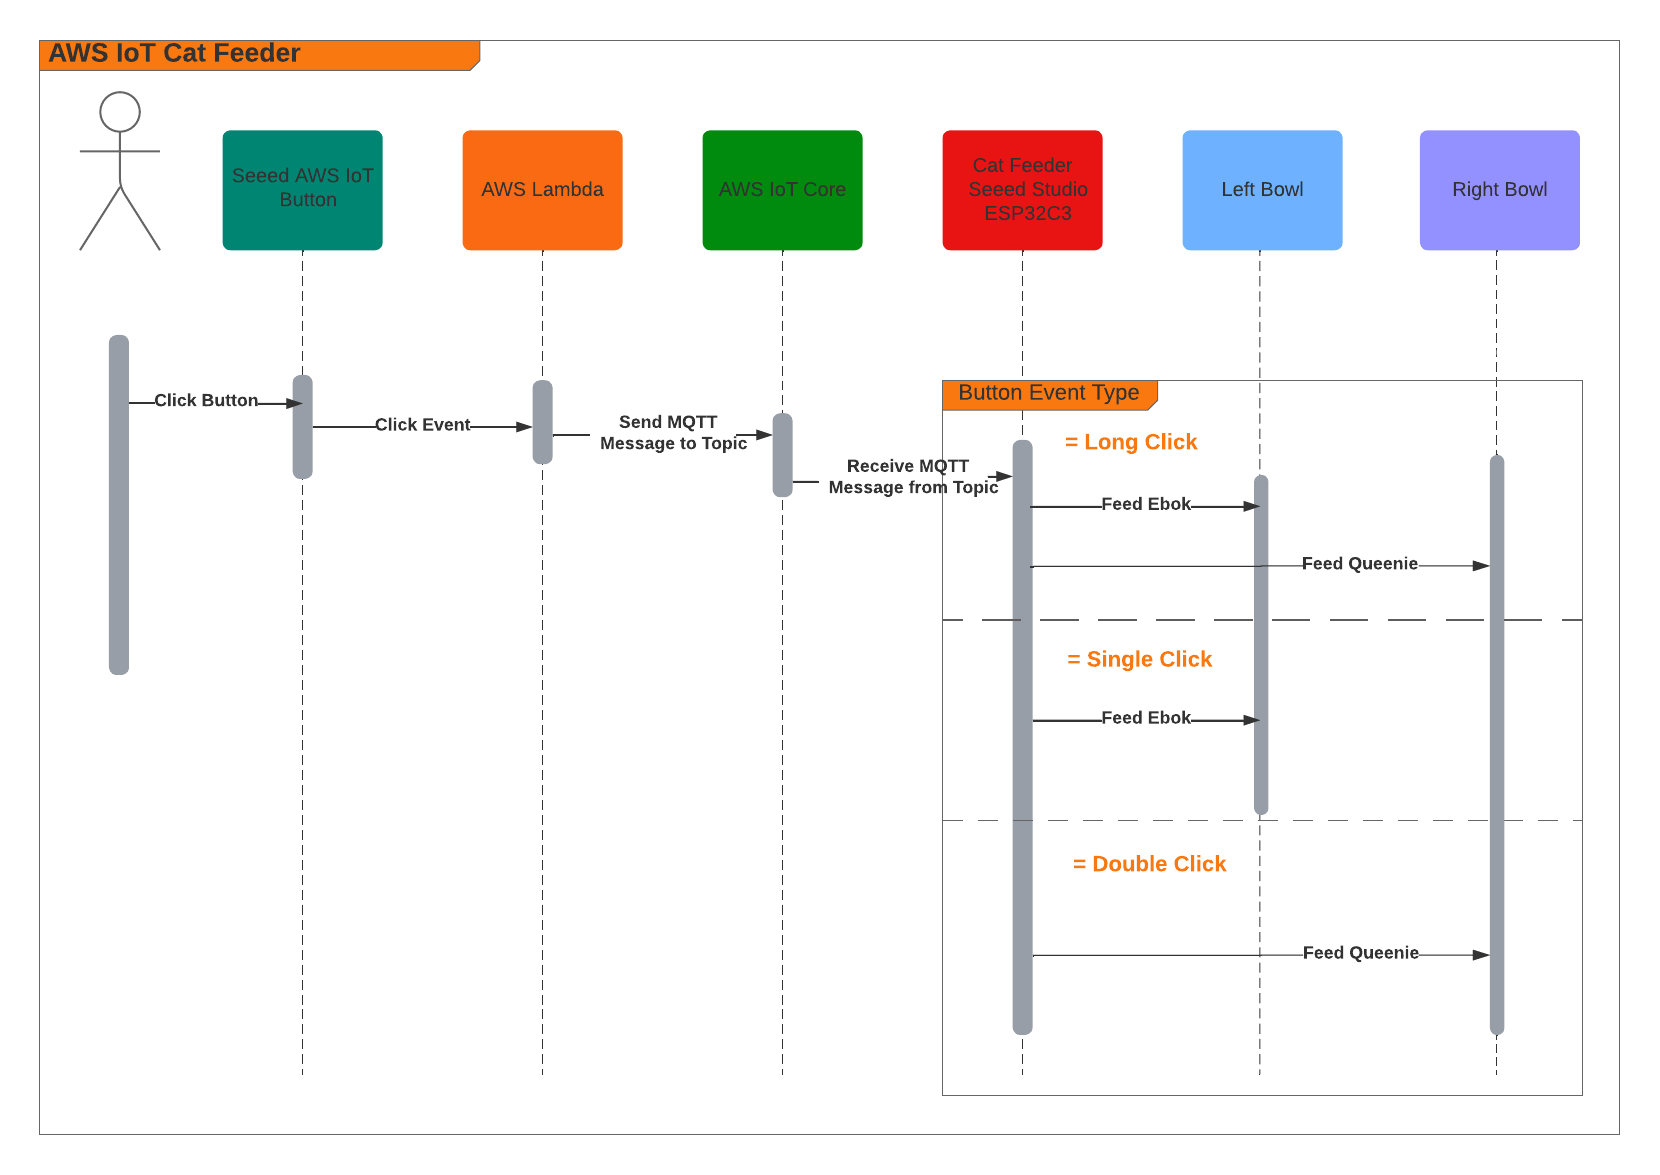
Interactive Sequence Diagram
Edge Agent: MQTT Command to Servo Control Flow
From MQTT command to ASL fingerspelling with video capture
How it works
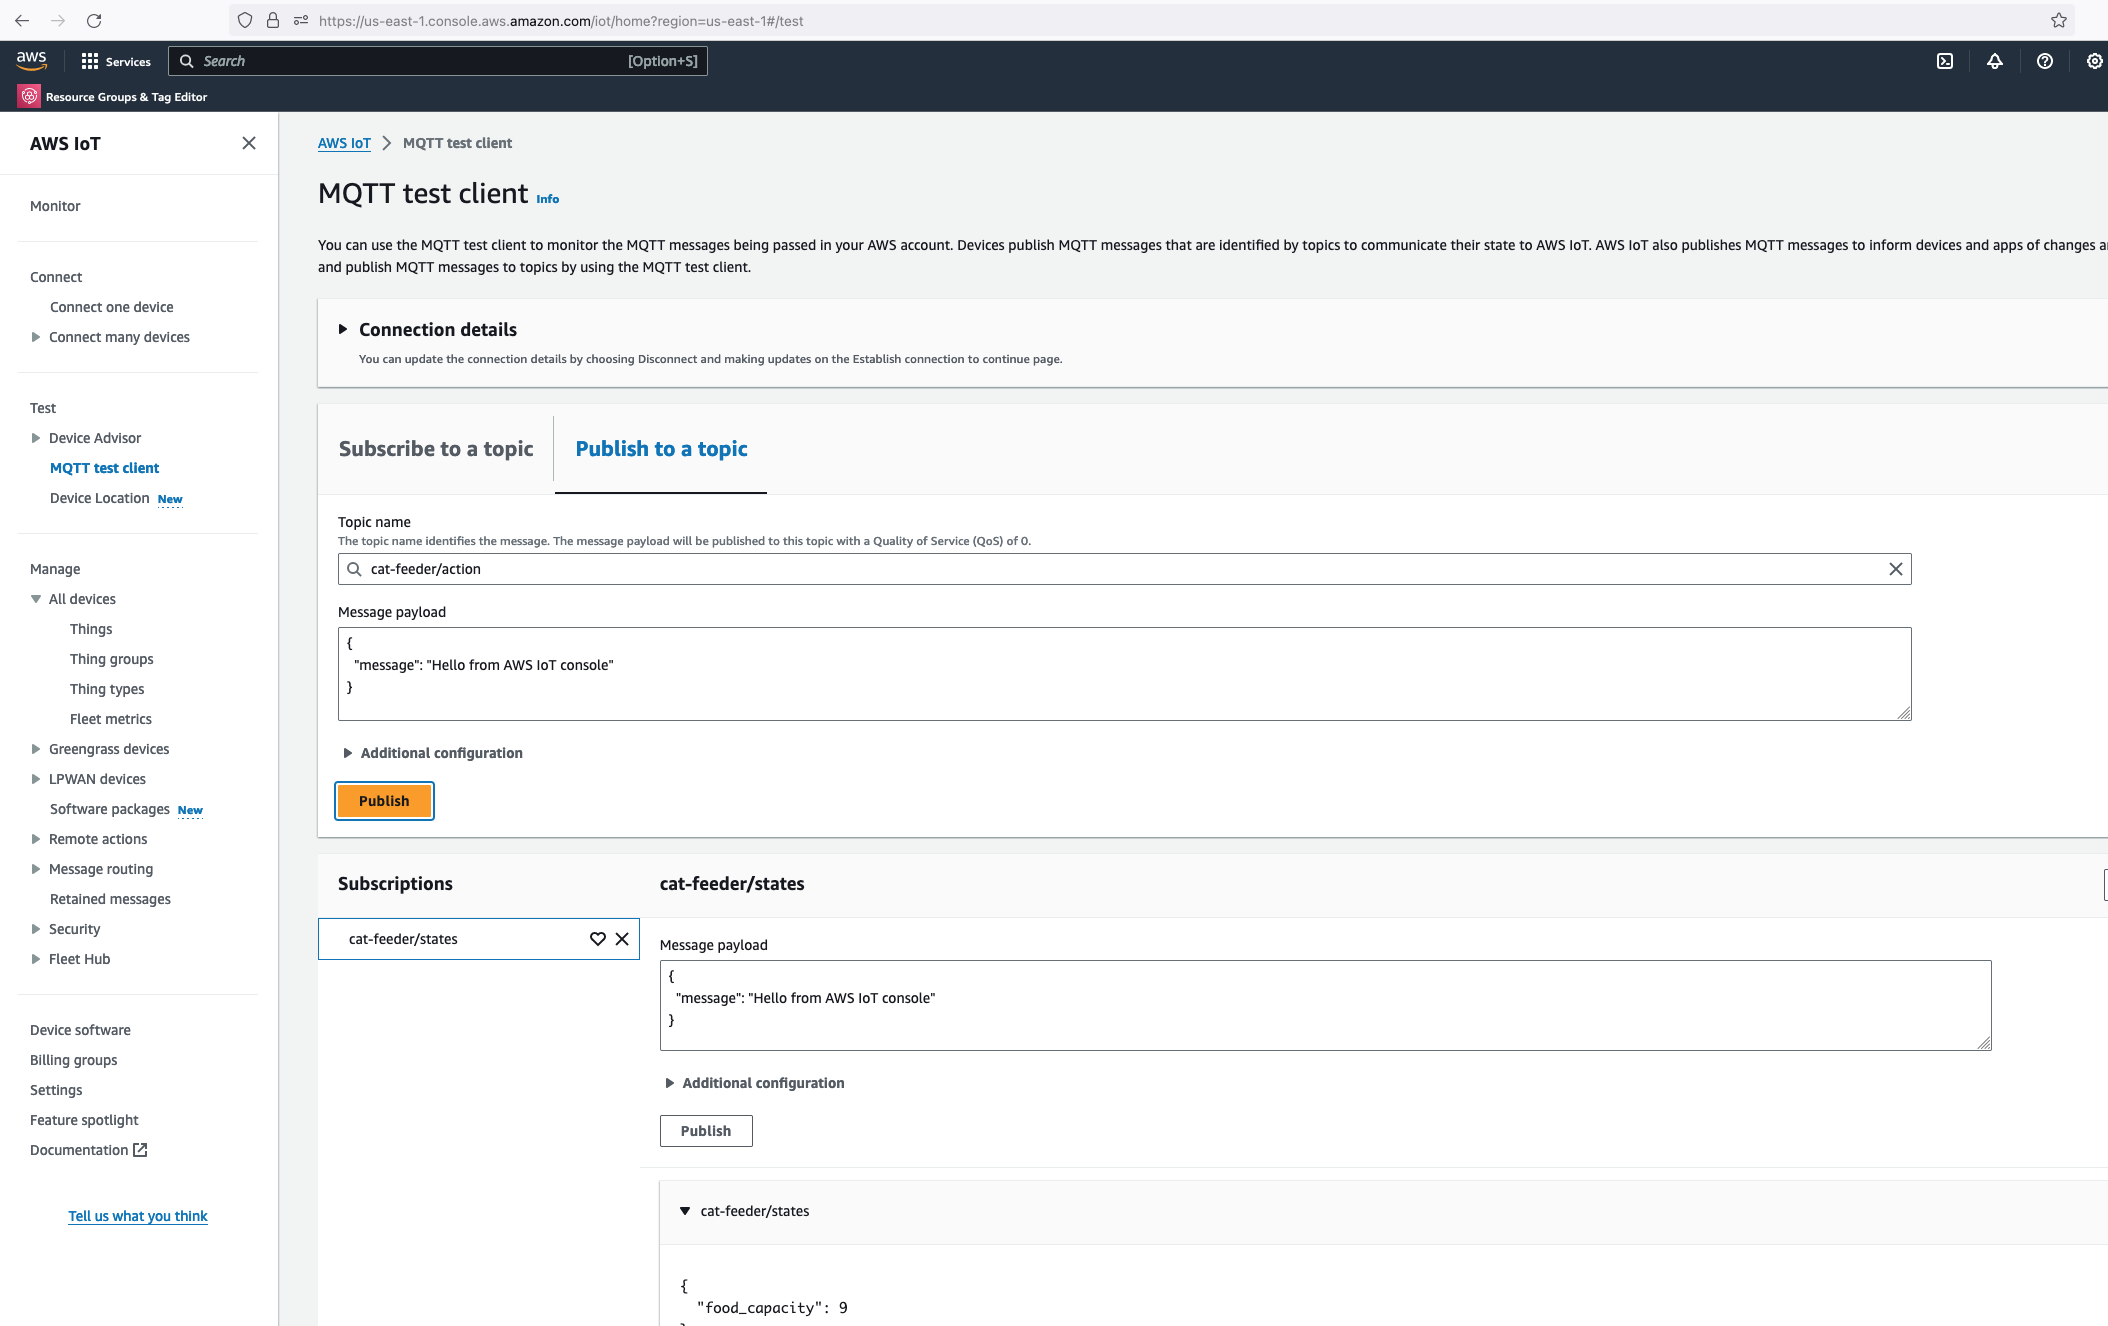
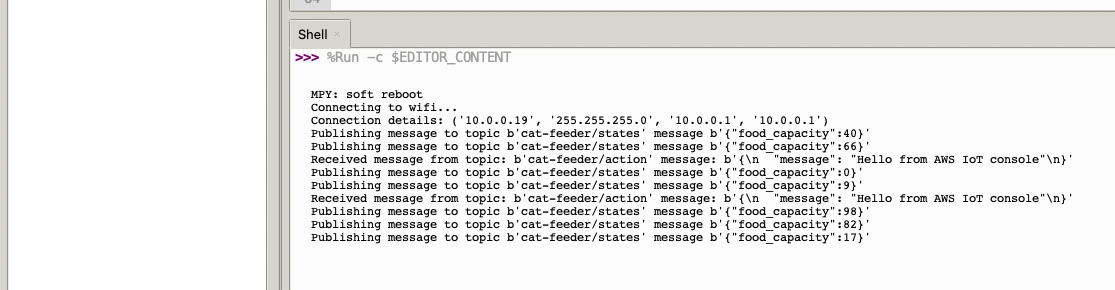
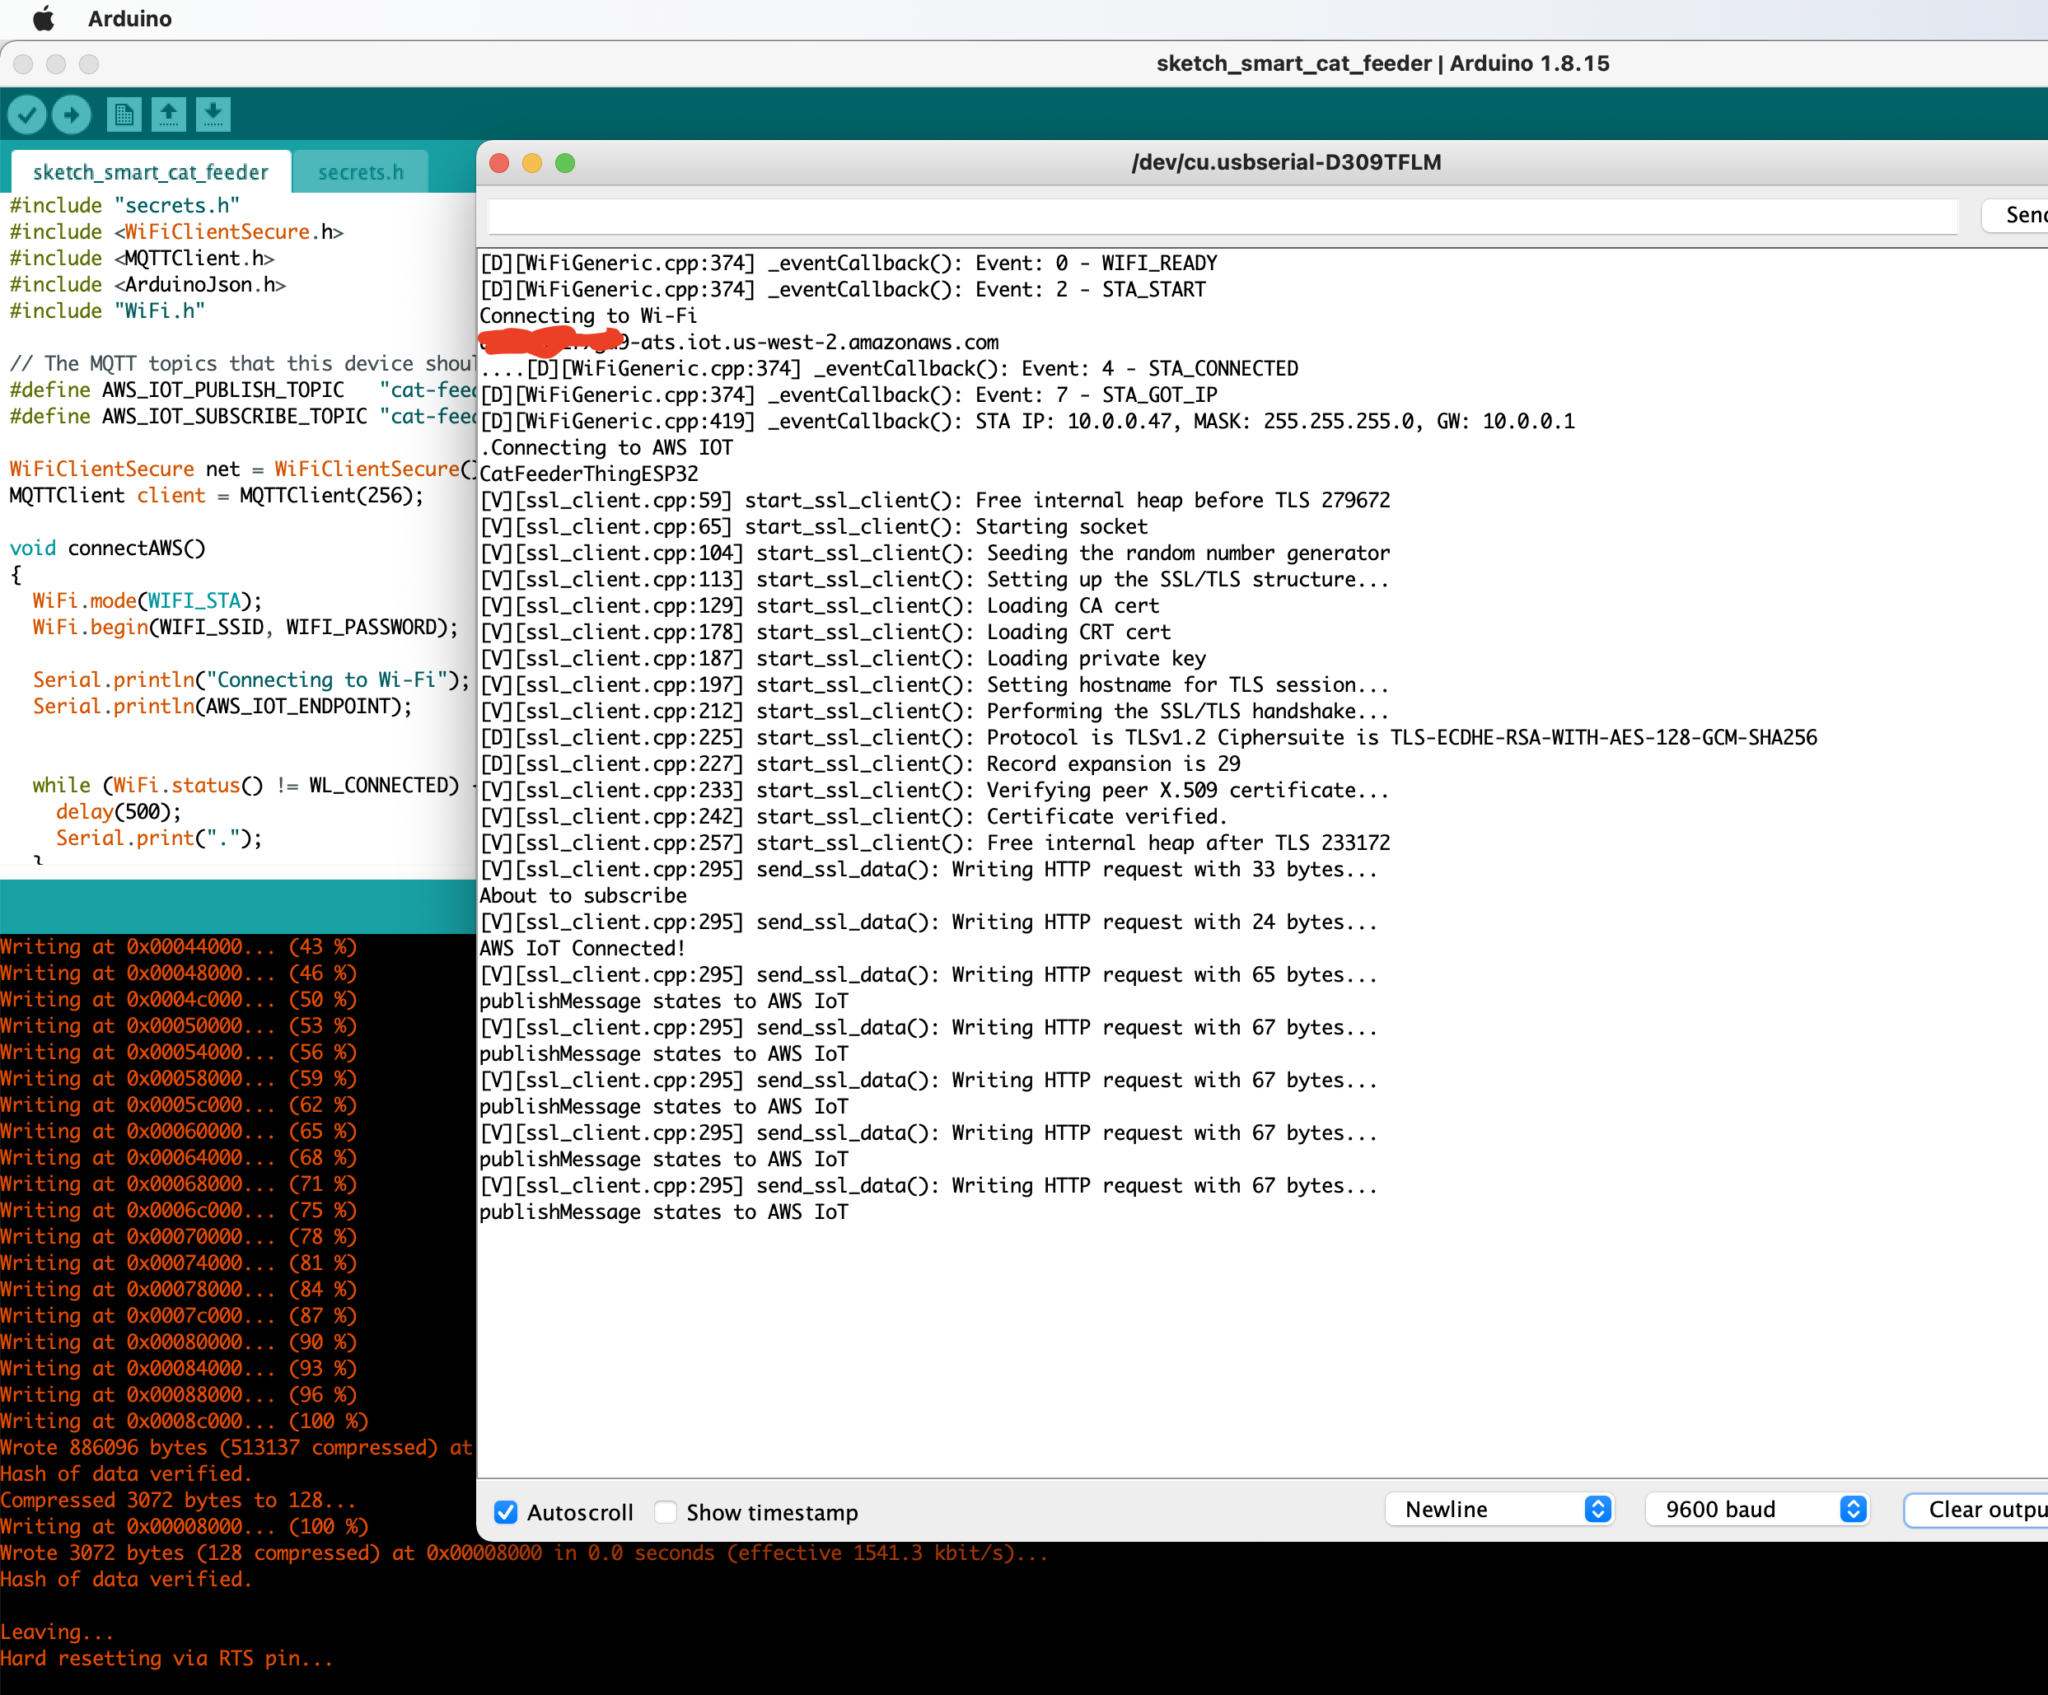
MQTT Command Reception
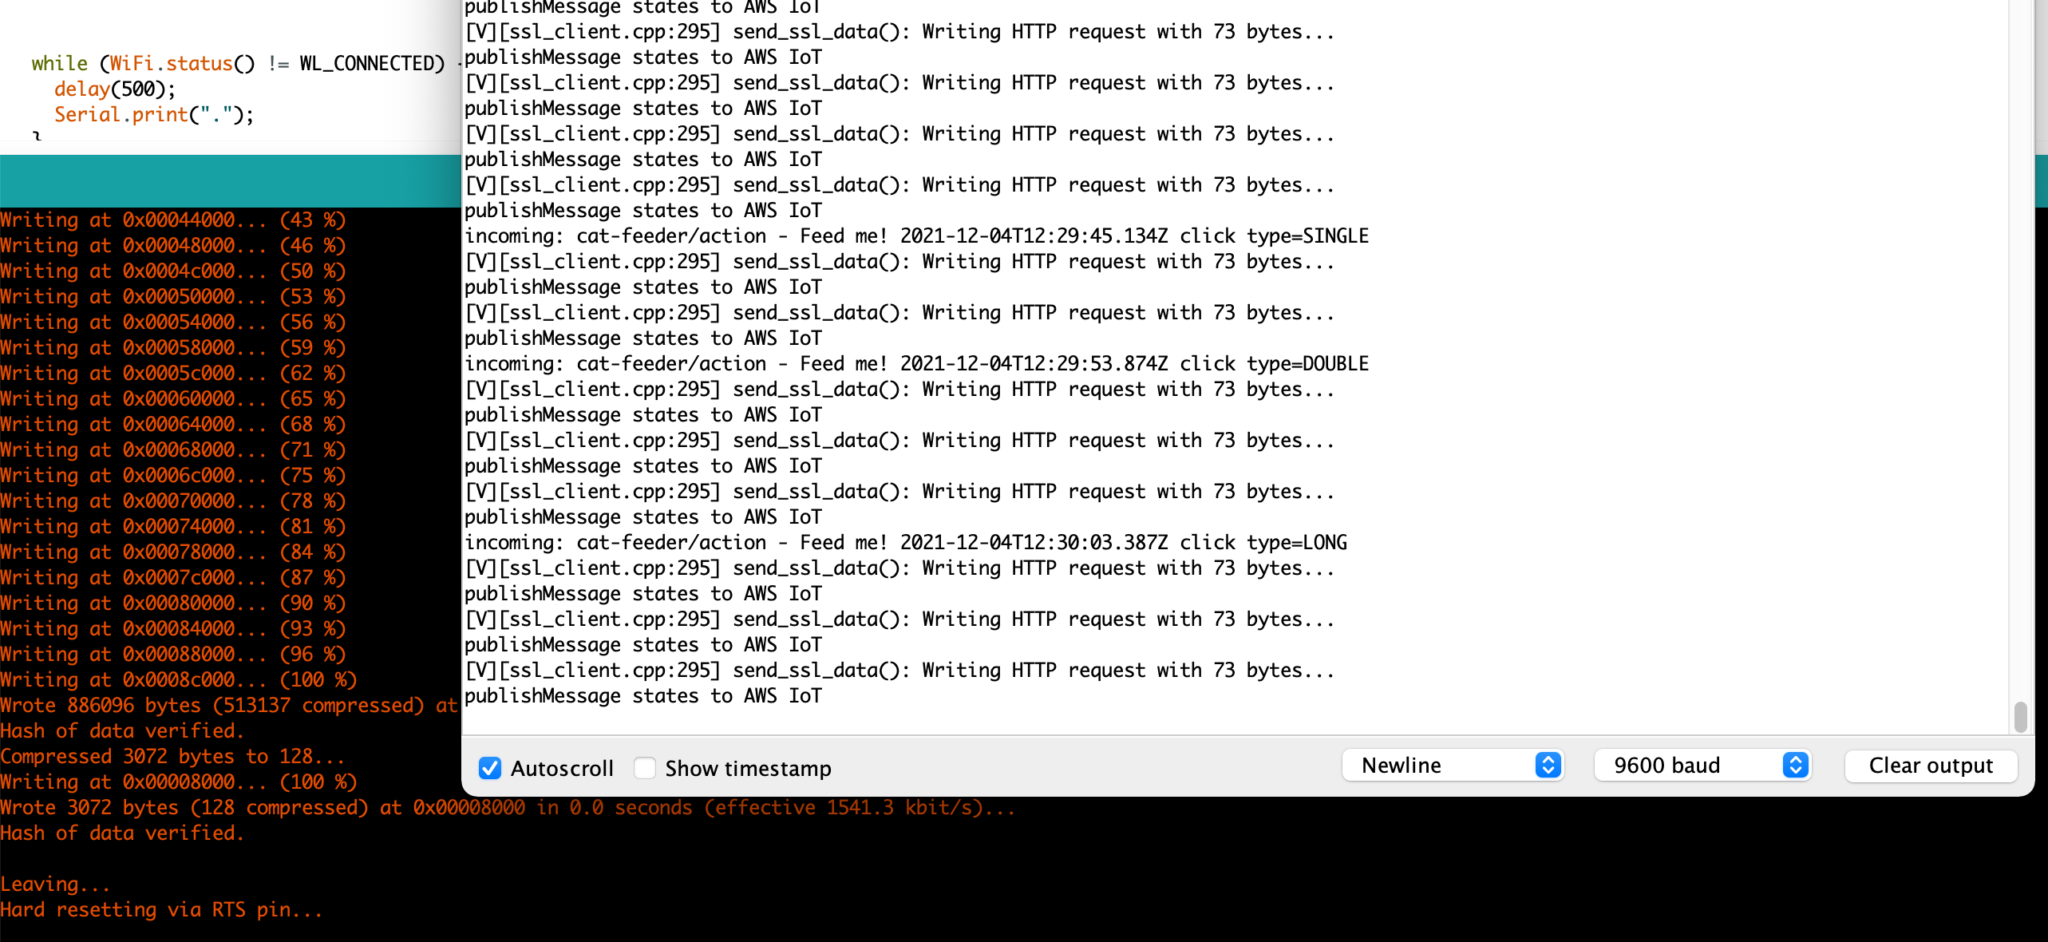
The agent subscribes to an MQTT action topic (e.g. the-project/robotic-hand/XIAOAmazingHandRight/action) using mTLS authentication with X.509 device certificates. The first connection uses clean_session=True to flush any stale session state, then reconnects with clean_session=False for normal operation.
When a message arrives, the handler tries to parse it as JSON and extract the sentence field. If JSON parsing fails, it treats the entire payload as plain text. The action is then submitted to a single-threaded executor (agent_executor) to keep the AWS CRT MQTT event loop free:
def on_message(topic, payload, dup, qos, retain, **kwargs):
    payload_str = payload.decode("utf-8")
    try:
        data = json.loads(payload_str)
        action = data.get("sentence", payload_str)
    except json.JSONDecodeError:
        action = payload_str
    agent_executor.submit(_process_action, action)
Strands Agent and Amazon Nova 2 Lite
The Strands Agents framework provides the core AI reasoning loop. A fresh agent instance is created for every MQTT message — this is deliberate to prevent conversation history from accumulating across messages, which would cause unbounded token growth over time.
The agent uses Amazon Nova 2 Lite (us.amazon.nova-2-lite-v1:0) via the Bedrock Converse API. Nova 2 Lite was chosen for its low-latency tool-use responses, which is critical for real-time servo control. The agent is configured with a MaxToolCallsHook that cancels tool calls beyond 3 to prevent infinite LLM tool-call loops.
The agent runs in fingerspell-only mode — only the fingerspell tool is available. The system prompt instructs the LLM to pass the entire message verbatim to the fingerspell tool without shortening or modifying it. State messages include a letter field identifying the current ASL letter being signed.
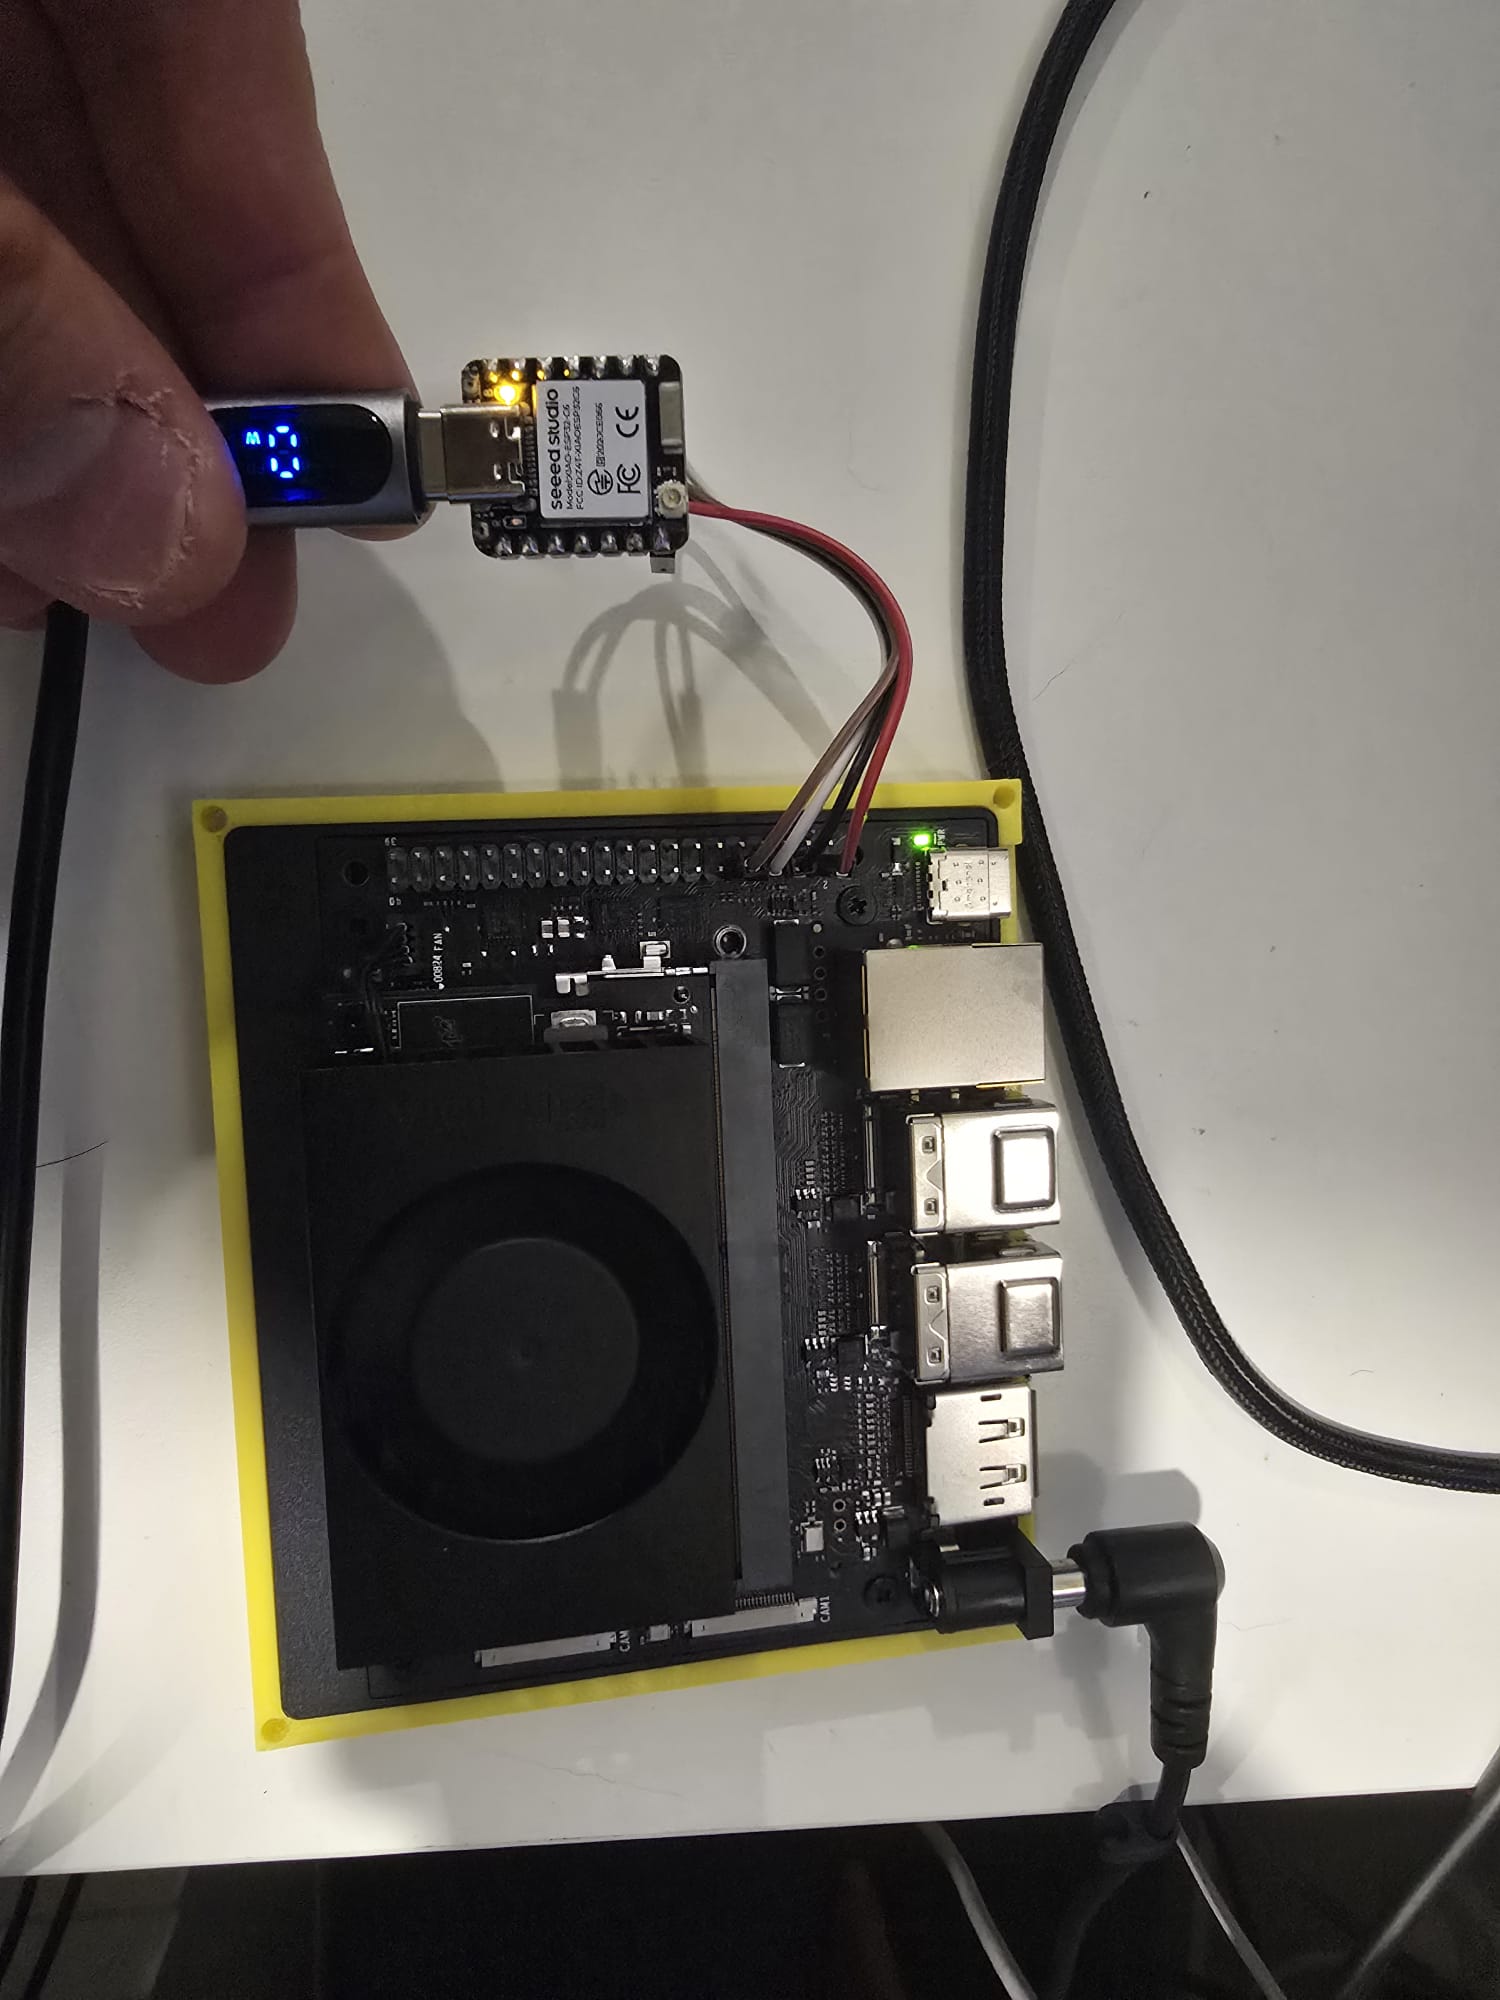
Servo Hardware and Control
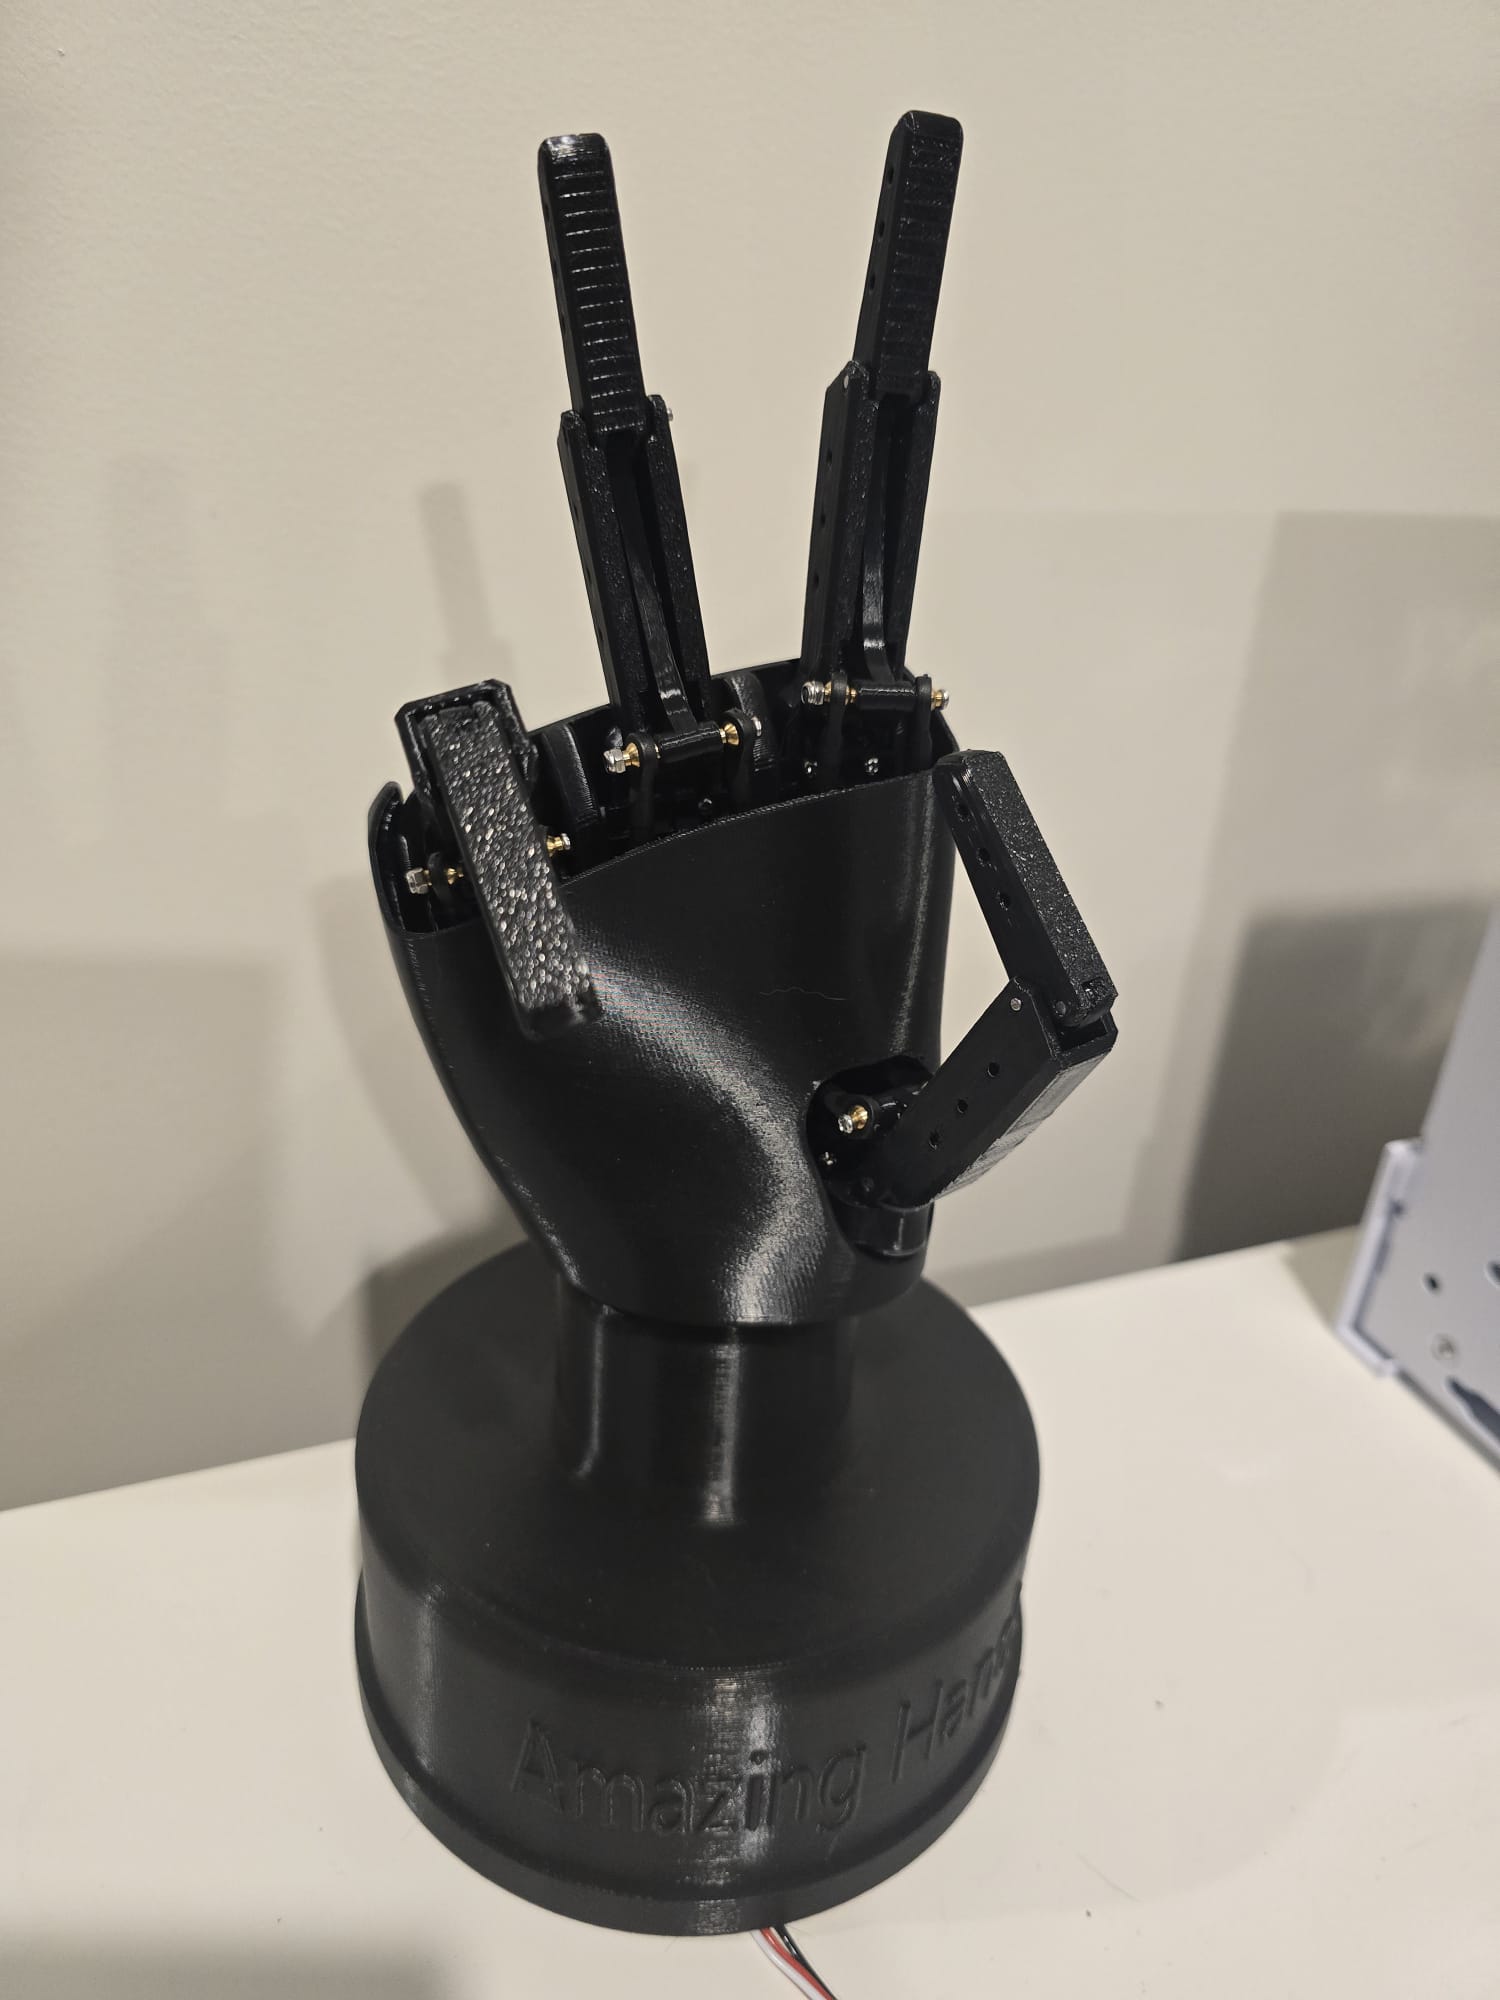
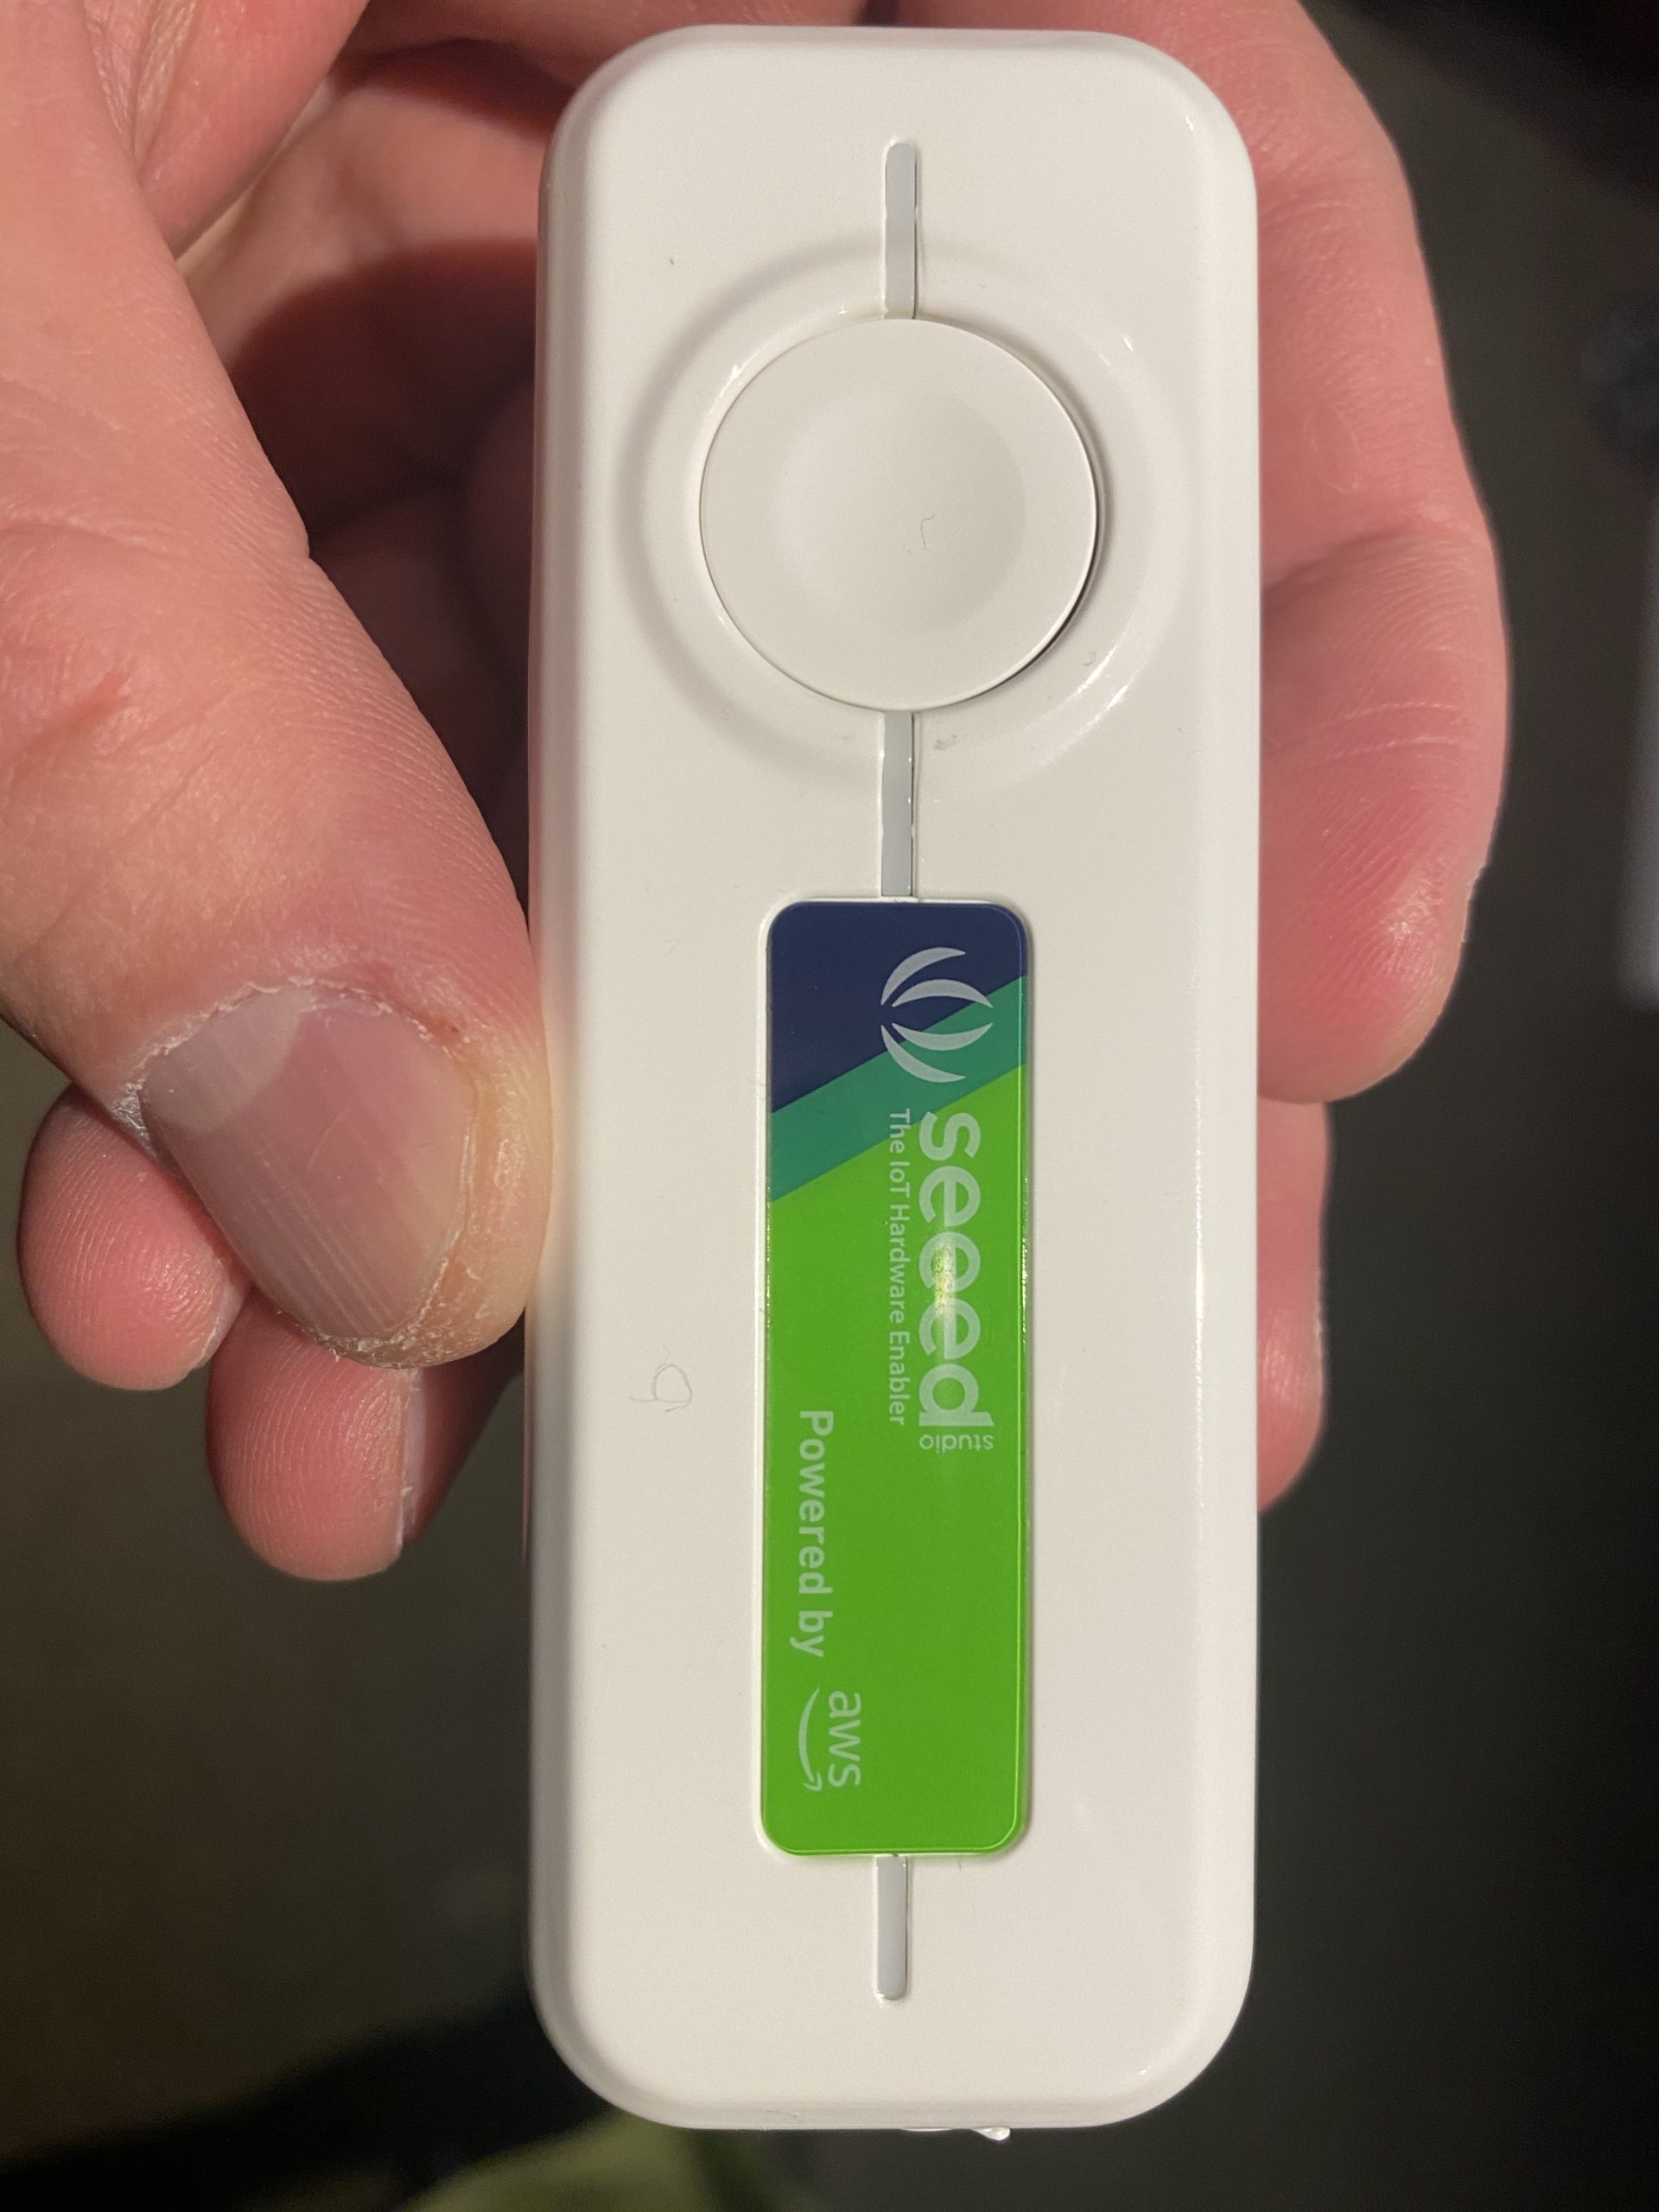
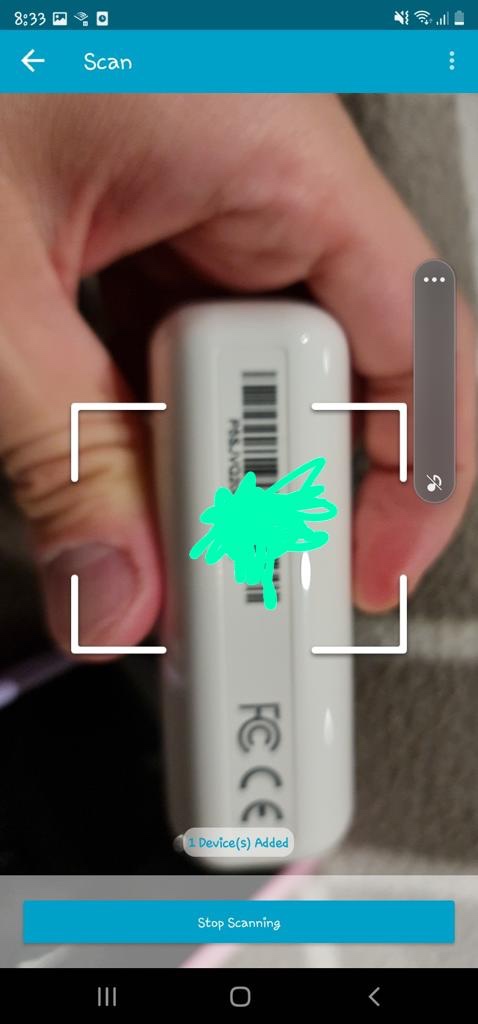
The Amazing Hand — an open-source robotic hand designed by Pollen Robotics and manufactured by Seeed Studio — has 4 fingers (index, middle, ring, thumb — no pinky) with 2 Feetech SCS0009 servos per finger (8 servos total) connected via a Waveshare driver board over serial USB at 1,000,000 baud.
Each servo has an angle range of -90 to +90 degrees. Per-servo calibration offsets (MiddlePos) are applied during move operations to account for physical alignment:
MiddlePos = [-17, 8, -16, -4, -12, 10, -9, 9]
The control sequence for each finger:
- Set goal speed for both servos (
write_goal_speed) with a 0.2ms sleep between each speed write for serial bus timing - Convert angle to radians with calibration offset:
np.deg2rad(MiddlePos[i] + angle) - Set goal position for both servos (
write_goal_position) - 5ms sleep after positions are set before the next finger's commands
ASL Fingerspelling Tool
The fingerspell(text) tool is decorated with @tool from the Strands framework, making it callable by the LLM during inference. It spells text letter-by-letter using the ASL alphabet. Each of the 26 letters (A-Z) is mapped to servo angle tuples for all 4 fingers. Each letter is held for 0.8 seconds, spaces add a 0.4-second pause, and non-letter characters are skipped. A state message with the current letter field is published after each letter.
Since the Amazing Hand has no pinky finger, ASL letters that require a pinky use the ring finger instead.
Video Recording Pipeline
Video is recorded concurrently with each fingerspelling sequence:
- Start recording — Before the agent is invoked,
start_recording()launches a background daemon thread (video-capture) that captures frames from OpenCVVideoCapture(0)at the camera's native FPS (typically 30) - Stop and encode — After the agent completes,
stop_recording_and_upload()stops the capture thread, converts frames from BGR (OpenCV) to RGB, and encodes to H.264 MP4 usingimageio.v3with the libx264 codec. The temp file is namedhand_YYYYMMDD_HHMMSS_ - Upload to S3 — The MP4 is uploaded to the configured S3 bucket (default:
cc-amazing-video) with keyvideos/hand_YYYYMMDD_HHMMSS.mp4 - Presigned URL — A presigned URL is generated with 1-hour expiry and appended to the last state message, which is re-published to the
/statetopic
State Publishing
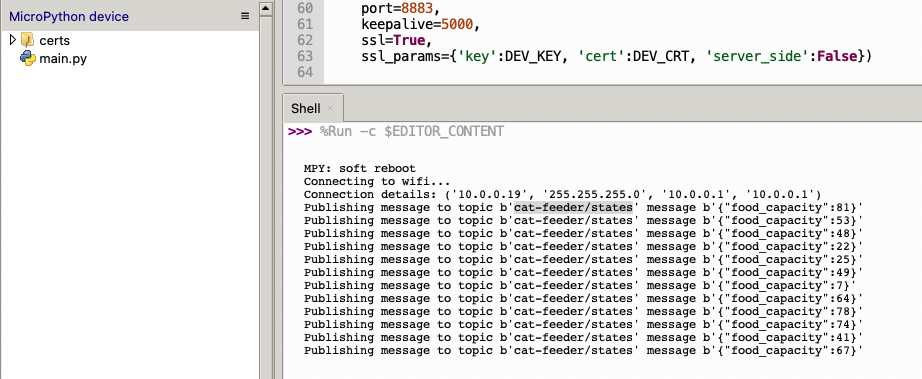
After each servo movement, the tool publishes a state message to the MQTT /state topic (e.g. the-project/robotic-hand/XIAOAmazingHandRight/state) with QoS 1. Publishing is non-blocking — it submits to a dedicated _publish_executor thread to avoid blocking the servo tool.
The state payload:
{
  "gesture": "fingerspell",
  "letter": "E",
  "ts": 1770550850,
  "fingers": {
    "index":  { "angle_1": 45, "angle_2": -45 },
    "middle": { "angle_1": 45, "angle_2": -45 },
    "ring":   { "angle_1": 45, "angle_2": -45 },
    "thumb":  { "angle_1": 60, "angle_2": -60 }
  },
  "video_url": "https://cc-amazing-video.s3.amazonaws.com/videos/hand_20260228.mp4?..."
}
The last published state is cached so that publish_state_with_video_url() can re-publish it with the presigned URL appended after video upload completes — without needing to re-read servo angles.
This state payload is what Part 2's CDK stack picks up via the IoT Rule, flattens in Lambda, and pushes into AppSync for the frontend to consume.
Threading Model
The agent uses two thread pools and a daemon thread to keep operations non-blocking:
| Thread | Type | Workers | Purpose |
|---|---|---|---|
agent_executor | ThreadPoolExecutor | 1 | Runs Strands agent off the AWS CRT MQTT event loop |
_publish_executor | ThreadPoolExecutor | 1 | Publishes state messages non-blocking |
video-capture | Daemon Thread | 1 | Background camera frame capture |
Graceful Shutdown
On SIGINT or SIGTERM, the agent:
- Sets a stop event to exit the main loop
- Disables servo torque (
write_torque_enable(1, 2)) to release the servos and prevent power draw - Disconnects from MQTT
- Logs completion
Technical Challenges & Solutions
Challenge 1: Conversation History Bloat
Problem: Strands Agents maintain conversation history by default. Over time, as hundreds of MQTT messages are processed, the token count grows unboundedly, increasing latency and cost.
Solution: A fresh Agent instance is created for every MQTT message. This discards all prior conversation history, keeping each invocation lightweight. Token usage (input, output, total) is logged after each invocation for monitoring.
Challenge 2: Runaway Tool-Call Loops
Problem: The LLM might enter a loop of calling tools repeatedly — for example, calling fingerspell then deciding to call it again with modified text, then again.
Solution: A custom MaxToolCallsHook implementing the Strands HookProvider interface. It counts tool calls per agent invocation and cancels any tool call beyond the limit of 3. This is injected into the agent via hooks=[MaxToolCallsHook()].
Challenge 3: No Pinky Finger on the Amazing Hand
Problem: The Pollen Robotics Amazing Hand has only 4 fingers (index, middle, ring, thumb) — no pinky. Several ASL letters require specific pinky positions (e.g. I, J, Y).
Solution: ASL letters that require a pinky use the ring finger instead. The 26-letter ASL alphabet is manually mapped to 4-finger servo angle tuples, approximating the correct hand shape with the available fingers.
Challenge 4: Serial Bus Timing
Problem: Sending servo commands too quickly over the serial bus causes missed commands or erratic movement. The Feetech SCS0009 protocol requires time between operations.
Solution: A 0.2ms sleep is inserted between speed writes, and a 5ms sleep is added after both goal positions are set, giving the serial bus time to process each command before the next finger's sequence begins.
Getting Started
GitHub Repository: https://github.com/chiwaichan/strands-agents-amazing-hands
Prerequisites
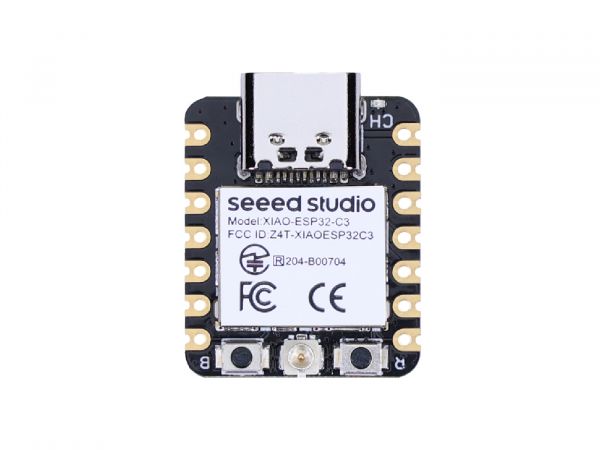
- NVIDIA Jetson (AGX Thor or Orin Nano Super) with Python 3.10+
- Pollen Robotics Amazing Hand connected via USB serial (Waveshare driver board)
- AWS IoT Core device certificates (certificate, private key, root CA)
- Amazon Bedrock access enabled for Nova 2 Lite in us-east-1
- USB camera connected to the Jetson
- S3 bucket for video storage (default:
cc-amazing-video)
Installation
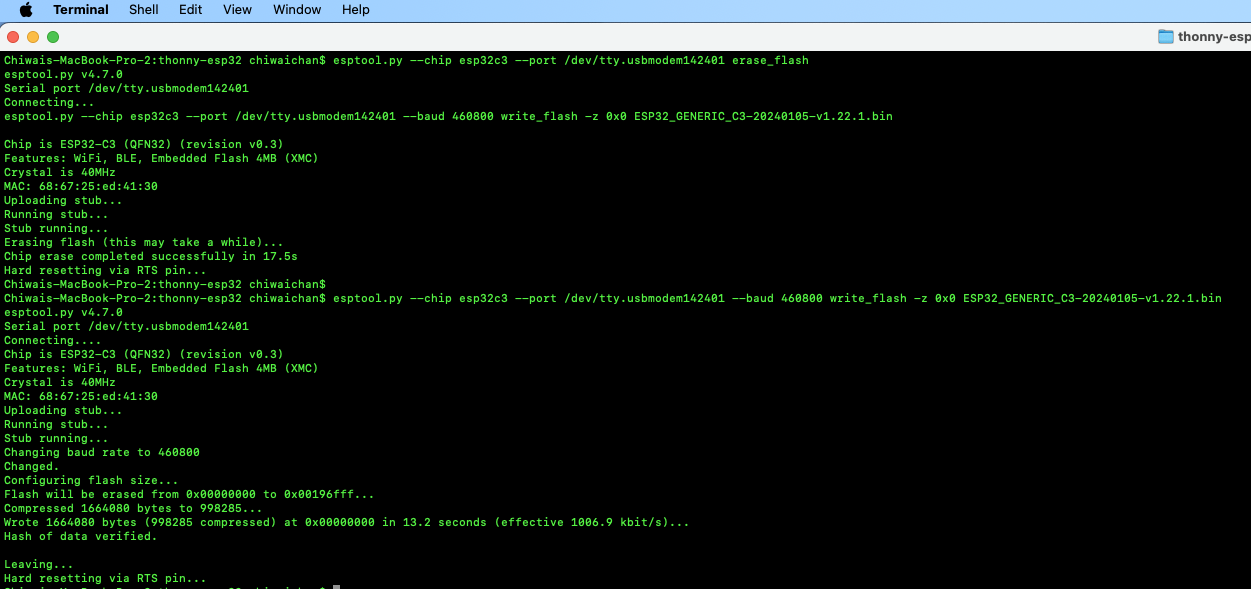
git clone https://github.com/chiwaichan/strands-agents-amazing-hands.git
cd strands-agents-amazing-hands
pip install -e .
Running the Agent
amazing-hand-agent \
  --endpoint your-iot-endpoint.iot.us-east-1.amazonaws.com \
  --cert certs/device.pem.crt \
  --key certs/device.pem.key \
  --ca certs/AmazonRootCA1.pem \
  --topic the-project/robotic-hand/XIAOAmazingHandRight/action \
  --serial-port /dev/amazing-hand-right \
  --s3-bucket cc-amazing-video
The agent will connect to IoT Core, subscribe to the action topic, and wait for commands. When a message arrives, it will process it through the Strands Agent, drive the servos, record video, and publish state back.
Summary
This post covered the edge AI agent — the final piece of the voice-to-sign-language translation system:
- Strands Agents framework with Amazon Nova 2 Lite for tool-use — a fresh agent per MQTT message prevents history bloat, with
MaxToolCallsHooklimiting calls to 3 - ASL fingerspelling with the 26-letter alphabet (A-Z), each letter held for 0.8 seconds — the
fingerspelltool is decorated with@toolfor LLM invocation - 8 Feetech SCS0009 servos on 4 fingers controlled via
rustypotover serial at 1M baud, with per-servo calibration offsets - Video pipeline captures via OpenCV in a background daemon thread, encodes to H.264 MP4 via imageio-ffmpeg, uploads to S3, and includes a 1-hour presigned URL in the final state message
- Non-blocking threading with 2 thread pools (agent executor off MQTT event loop, state publisher) and a daemon thread for video capture
- Real-time state publishing to IoT Core after every servo movement — which Part 2's CDK stack routes through Lambda to AppSync, completing the feedback loop to the React frontend in Part 1
- Graceful shutdown disables servo torque on SIGINT/SIGTERM to release the servos and prevent power draw