Recently I switched my Cat Feeder project's IaC to AWS CDK in favour of increasing my focus and productivity on building and iterating, rather than constantly mucking around with infrastructure everytime I resume my project after a break; which is rare and far between these days.
Just as with coding IoT microcontrollers such as the ESP32s, I want to get straight back into building every opportunity I get; so I am also switching away from Arduino based microcontroller development written in C++ - I don't have a background in C++ and to be honest this is the aspect I struggled with the most because I tend to forget things after not touching it for 6 months or so.
So I am switching to MicroPython to develop the logic for all my IoT devices going forward, this means I get to use Python - a programming lanaguge I work with frequently so there is less chance of me being forgetful when I use it at least once a month. MicroPython is a lean and efficient implementation of the Python 3 programming language that includes a subset of the Python standard library and is optimized to run on microcontrollers and in constrained environments - a good fit for IoT devices such as the ESP32!
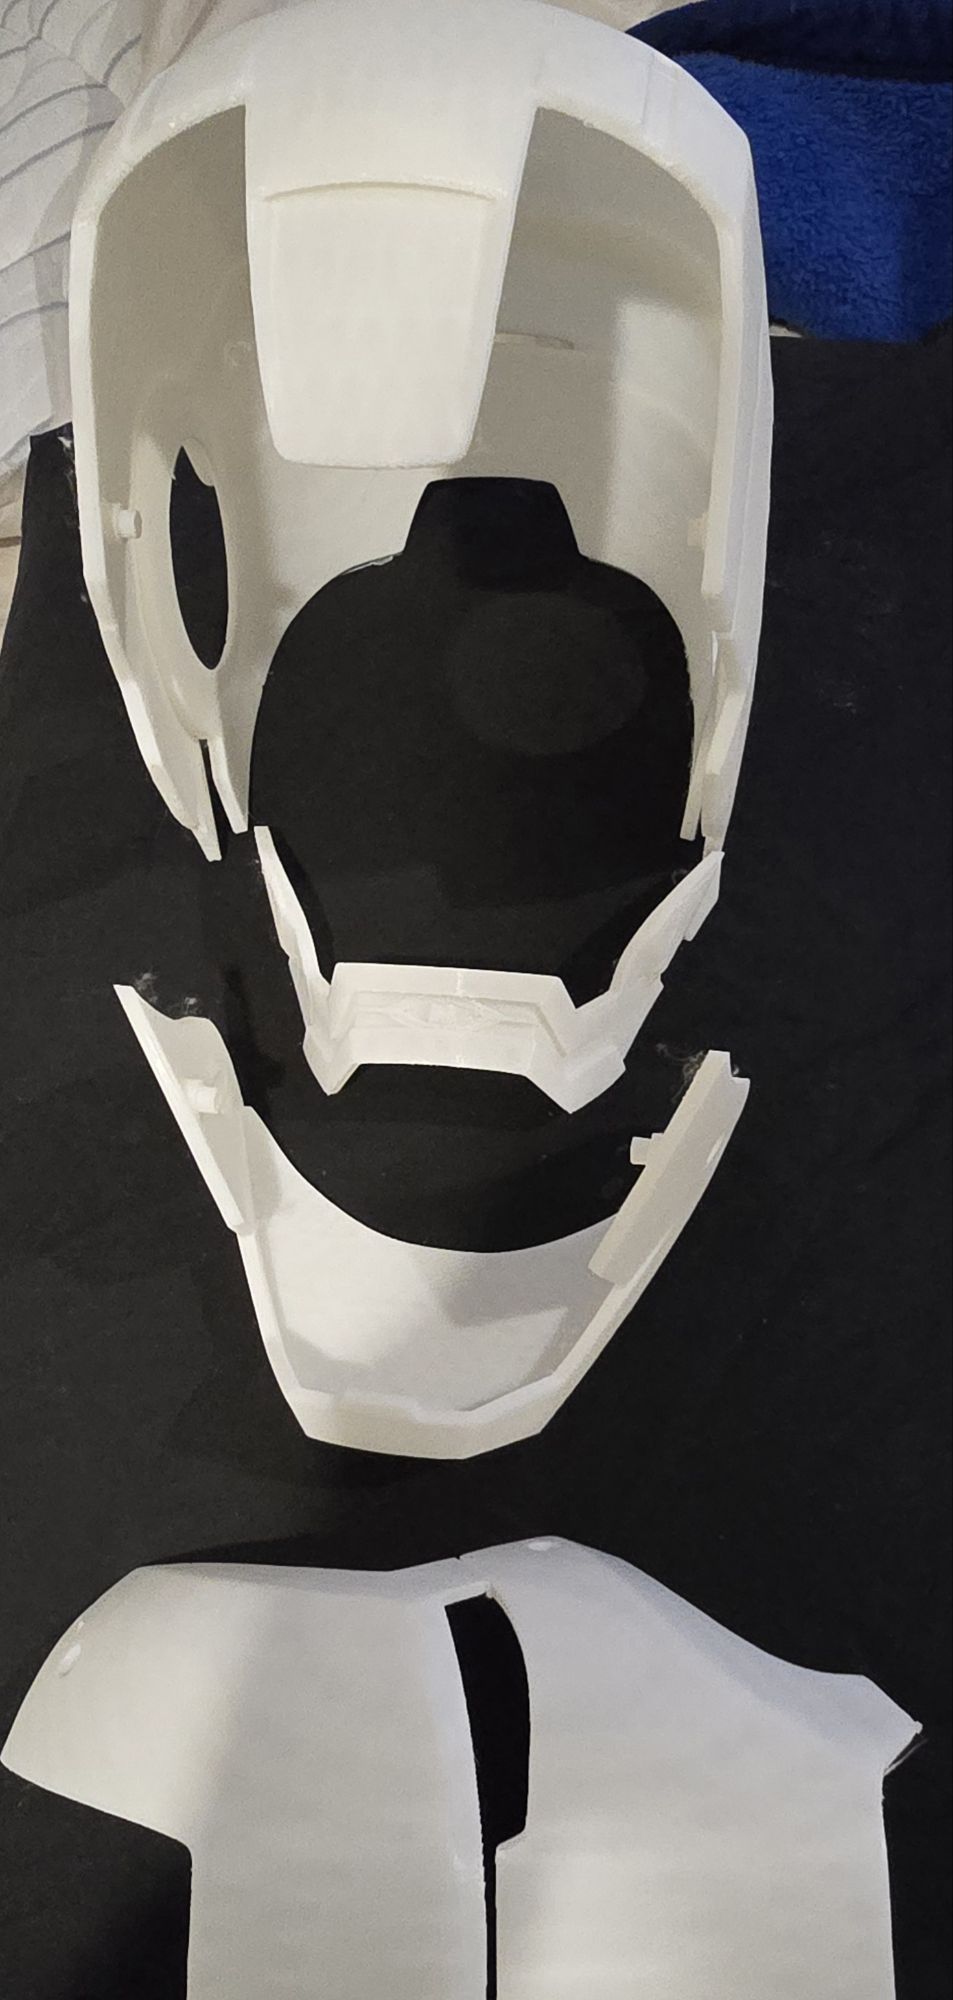
What about all the Arduino hardware and components I already invested in?
Good news is MircoPython is supported on all ESP32 devices - based on the ones I myself have purchased; all I need to do to each ESP32 device is to flash it with a firmware - if you are impatient, you can scroll down and skip to below to the flashing the firmware section. When I first started Arduino, MicroPython was available to use, but that was 2 years ago and there were not as many good blog and tutorial content out there as there is today; I couldn't at the time work out how to control components such as sensors, servos and motors as well as I could with C++ based coding using Arduino; nowdays there are way more content to learn off and I've learnt (by PoCing individual components) enough to switch to MicroPython. As far as I understand it, any components you have for Arduino can be used in MicroPython, provided that there is a library out there that supports it, if there isn't then you can always write your own!
What's covered in this blog?
By the end of this blog, you will be able to send and receive MQTT messages from AWS IoT core using MicroPython, I will also cover the steps involved in flashing a MicroPython firmware image onto an ESP32C3. Although this blog has a focus and example on using an ESP32, this example can be applied to any micro-controllers of any brand or flavours, provided the micro-controller you are using supports MicroPython.
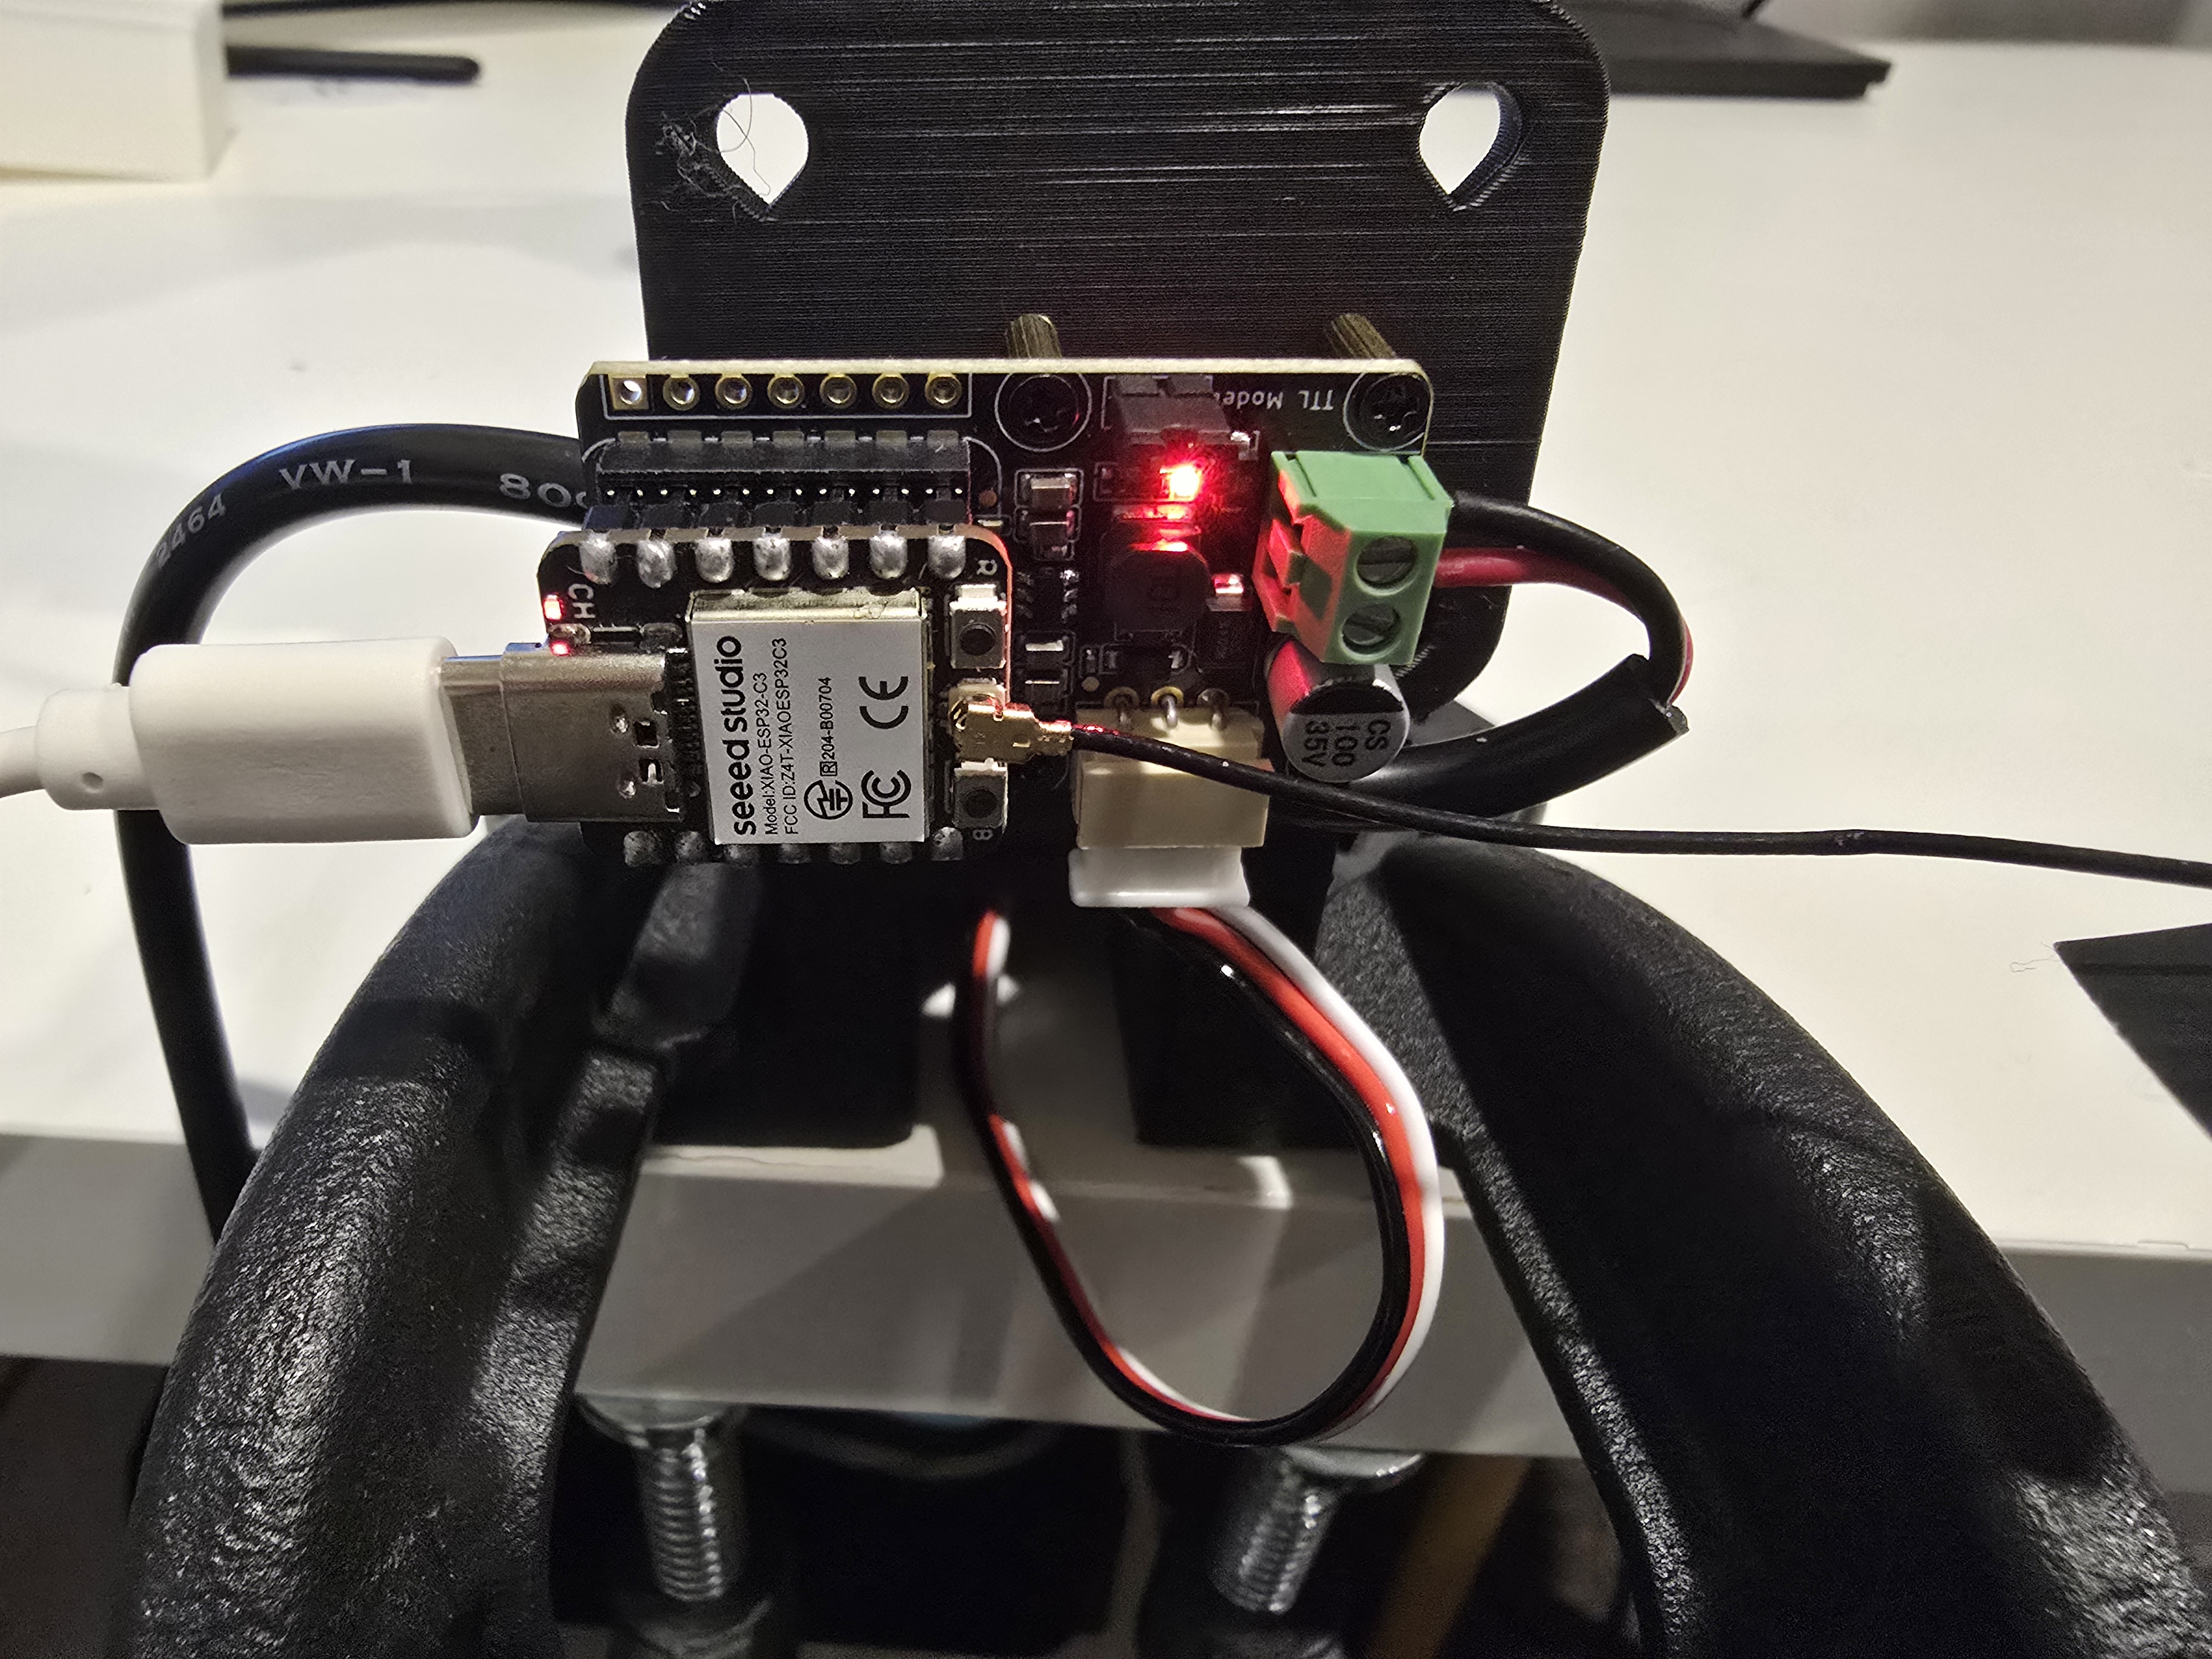
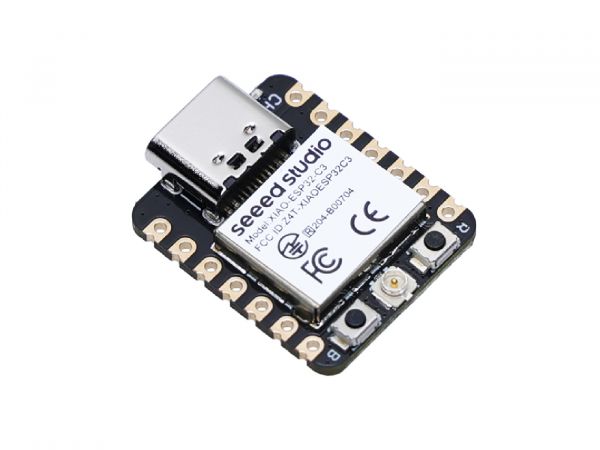
Flashing the MicroPython firmware onto a Seeed Studio XIAO ESP32C3
The following instructions works for any generic ESP32C3 devices!
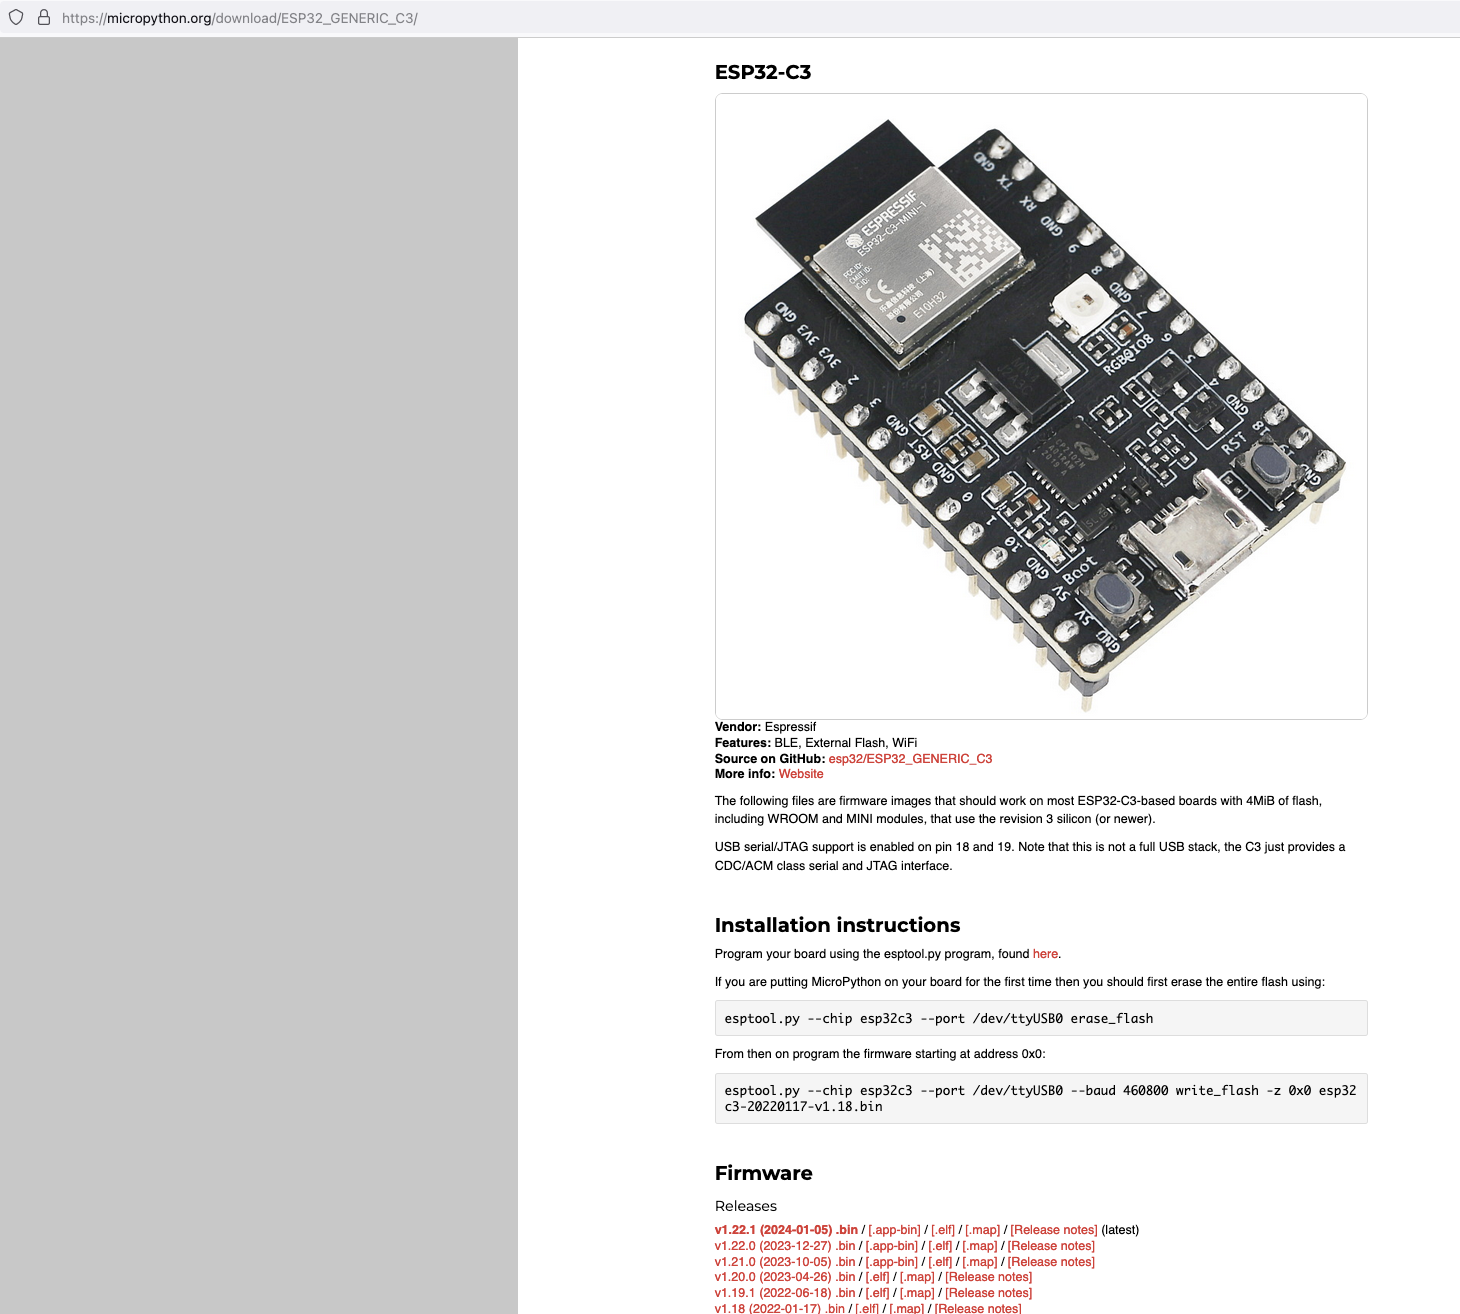
Download the latest firmware from micropython.org
https://micropython.org/download/ESP32_GENERIC_C3/
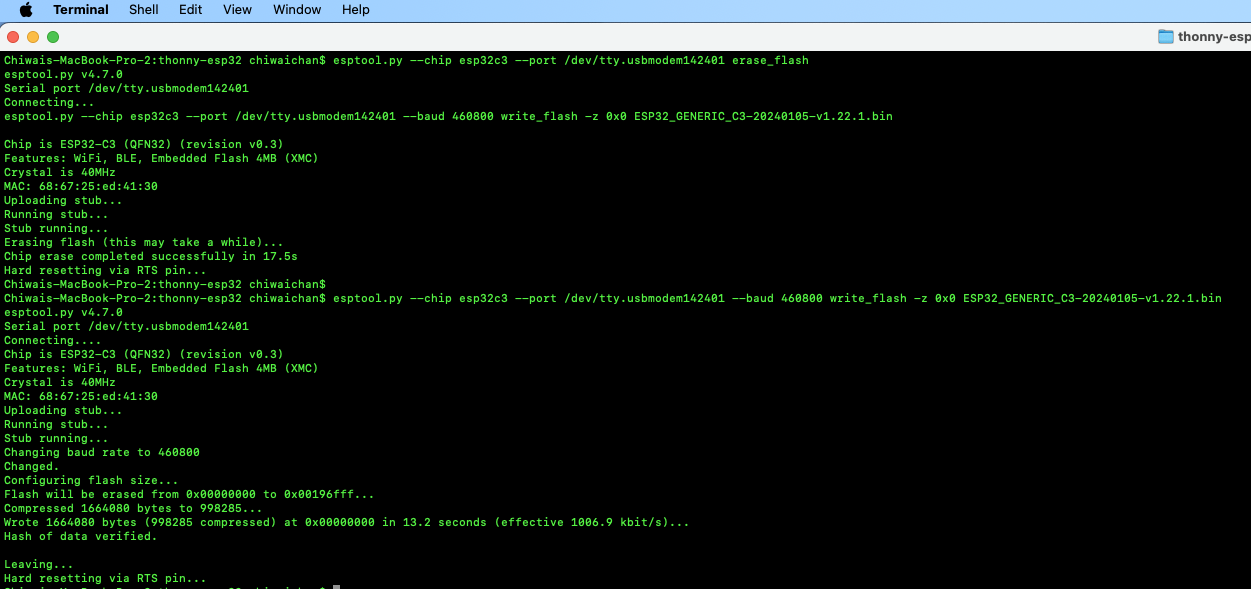
Next, I connected my ESP32C3 to my Mac and ran the following command to find the name of the device port

My ESP32C3 is named "/dev/tty.usbmodem142401", the name for your ESP32C3 may be different.
Next, install esptool onto your computer, then run the following commands to flash the MicroPython firmware onto the ESP32C3 using the bin file you've just downloaded.
esptool.py --chip esp32c3 --port /dev/tty.usbmodem142401 erase_flash

esptool.py --chip esp32c3 --port /dev/tty.usbmodem142401 --baud 460800 write_flash -z 0x0 ESP32_GENERIC_C3-20240105-v1.22.1.bin
It should look something like this when you run the commands.
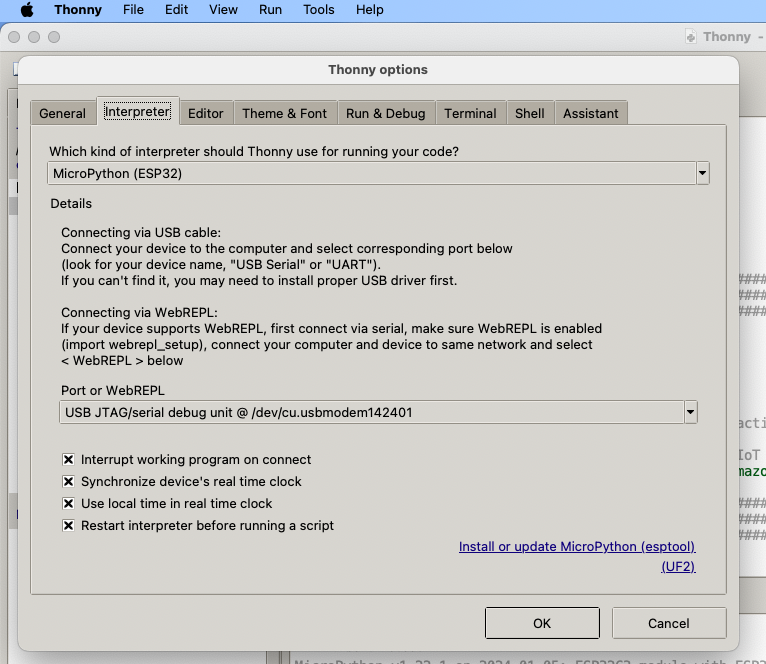
Install Thonny and run it. Then go to Tools -> Options, to configure the ESP32C3 device in Thonny to match the settings shown in the screenshot below.
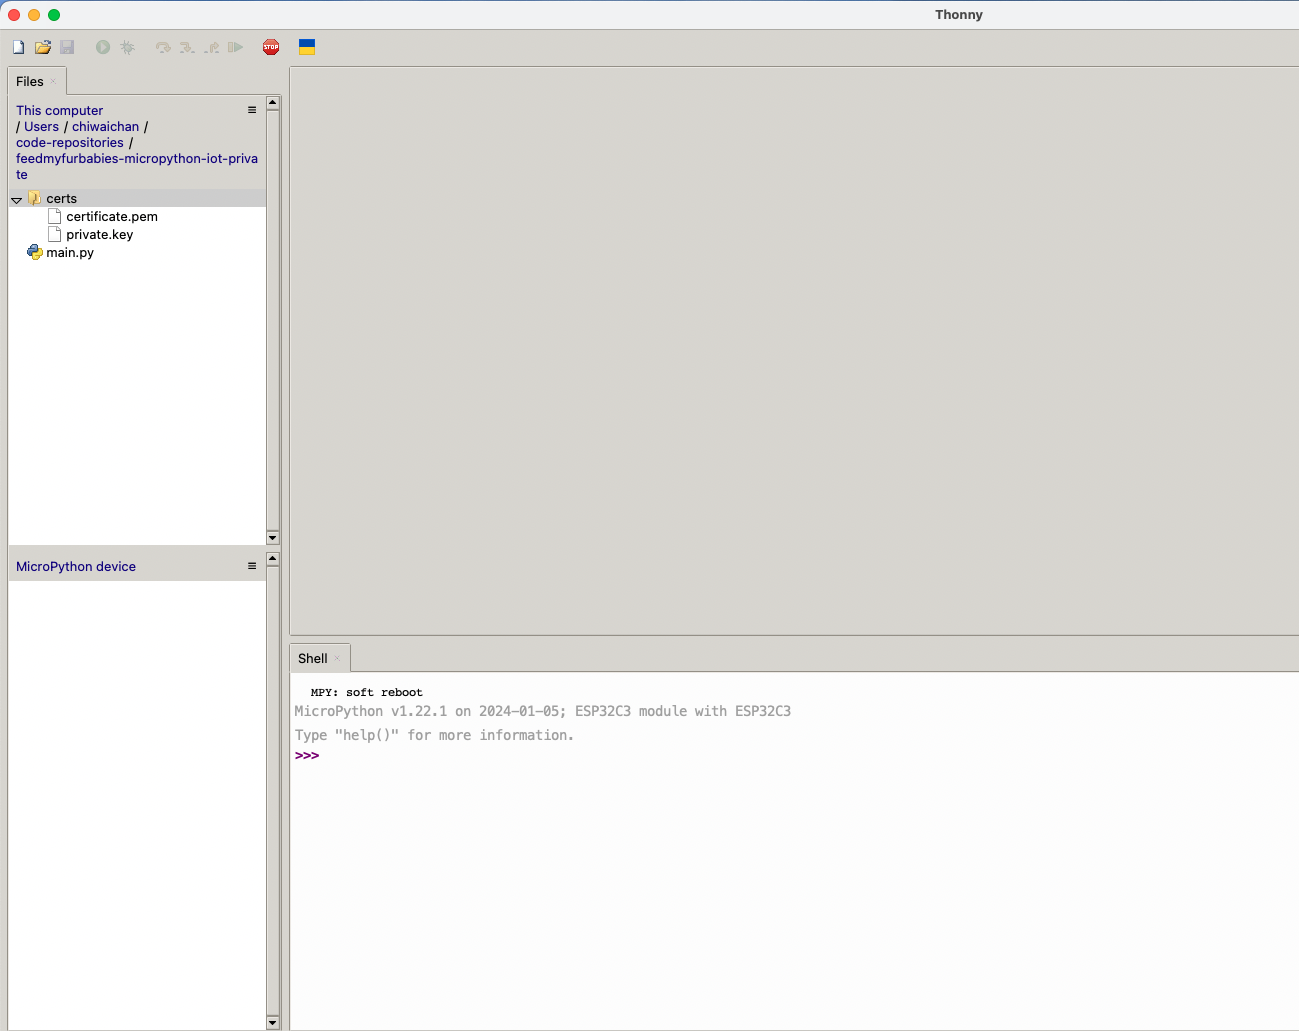
If everything went well, you should see these 2 sections in Thonny: "MicroPython Device" and "Shell", if not then try clicking on the Stop button in the top menu.
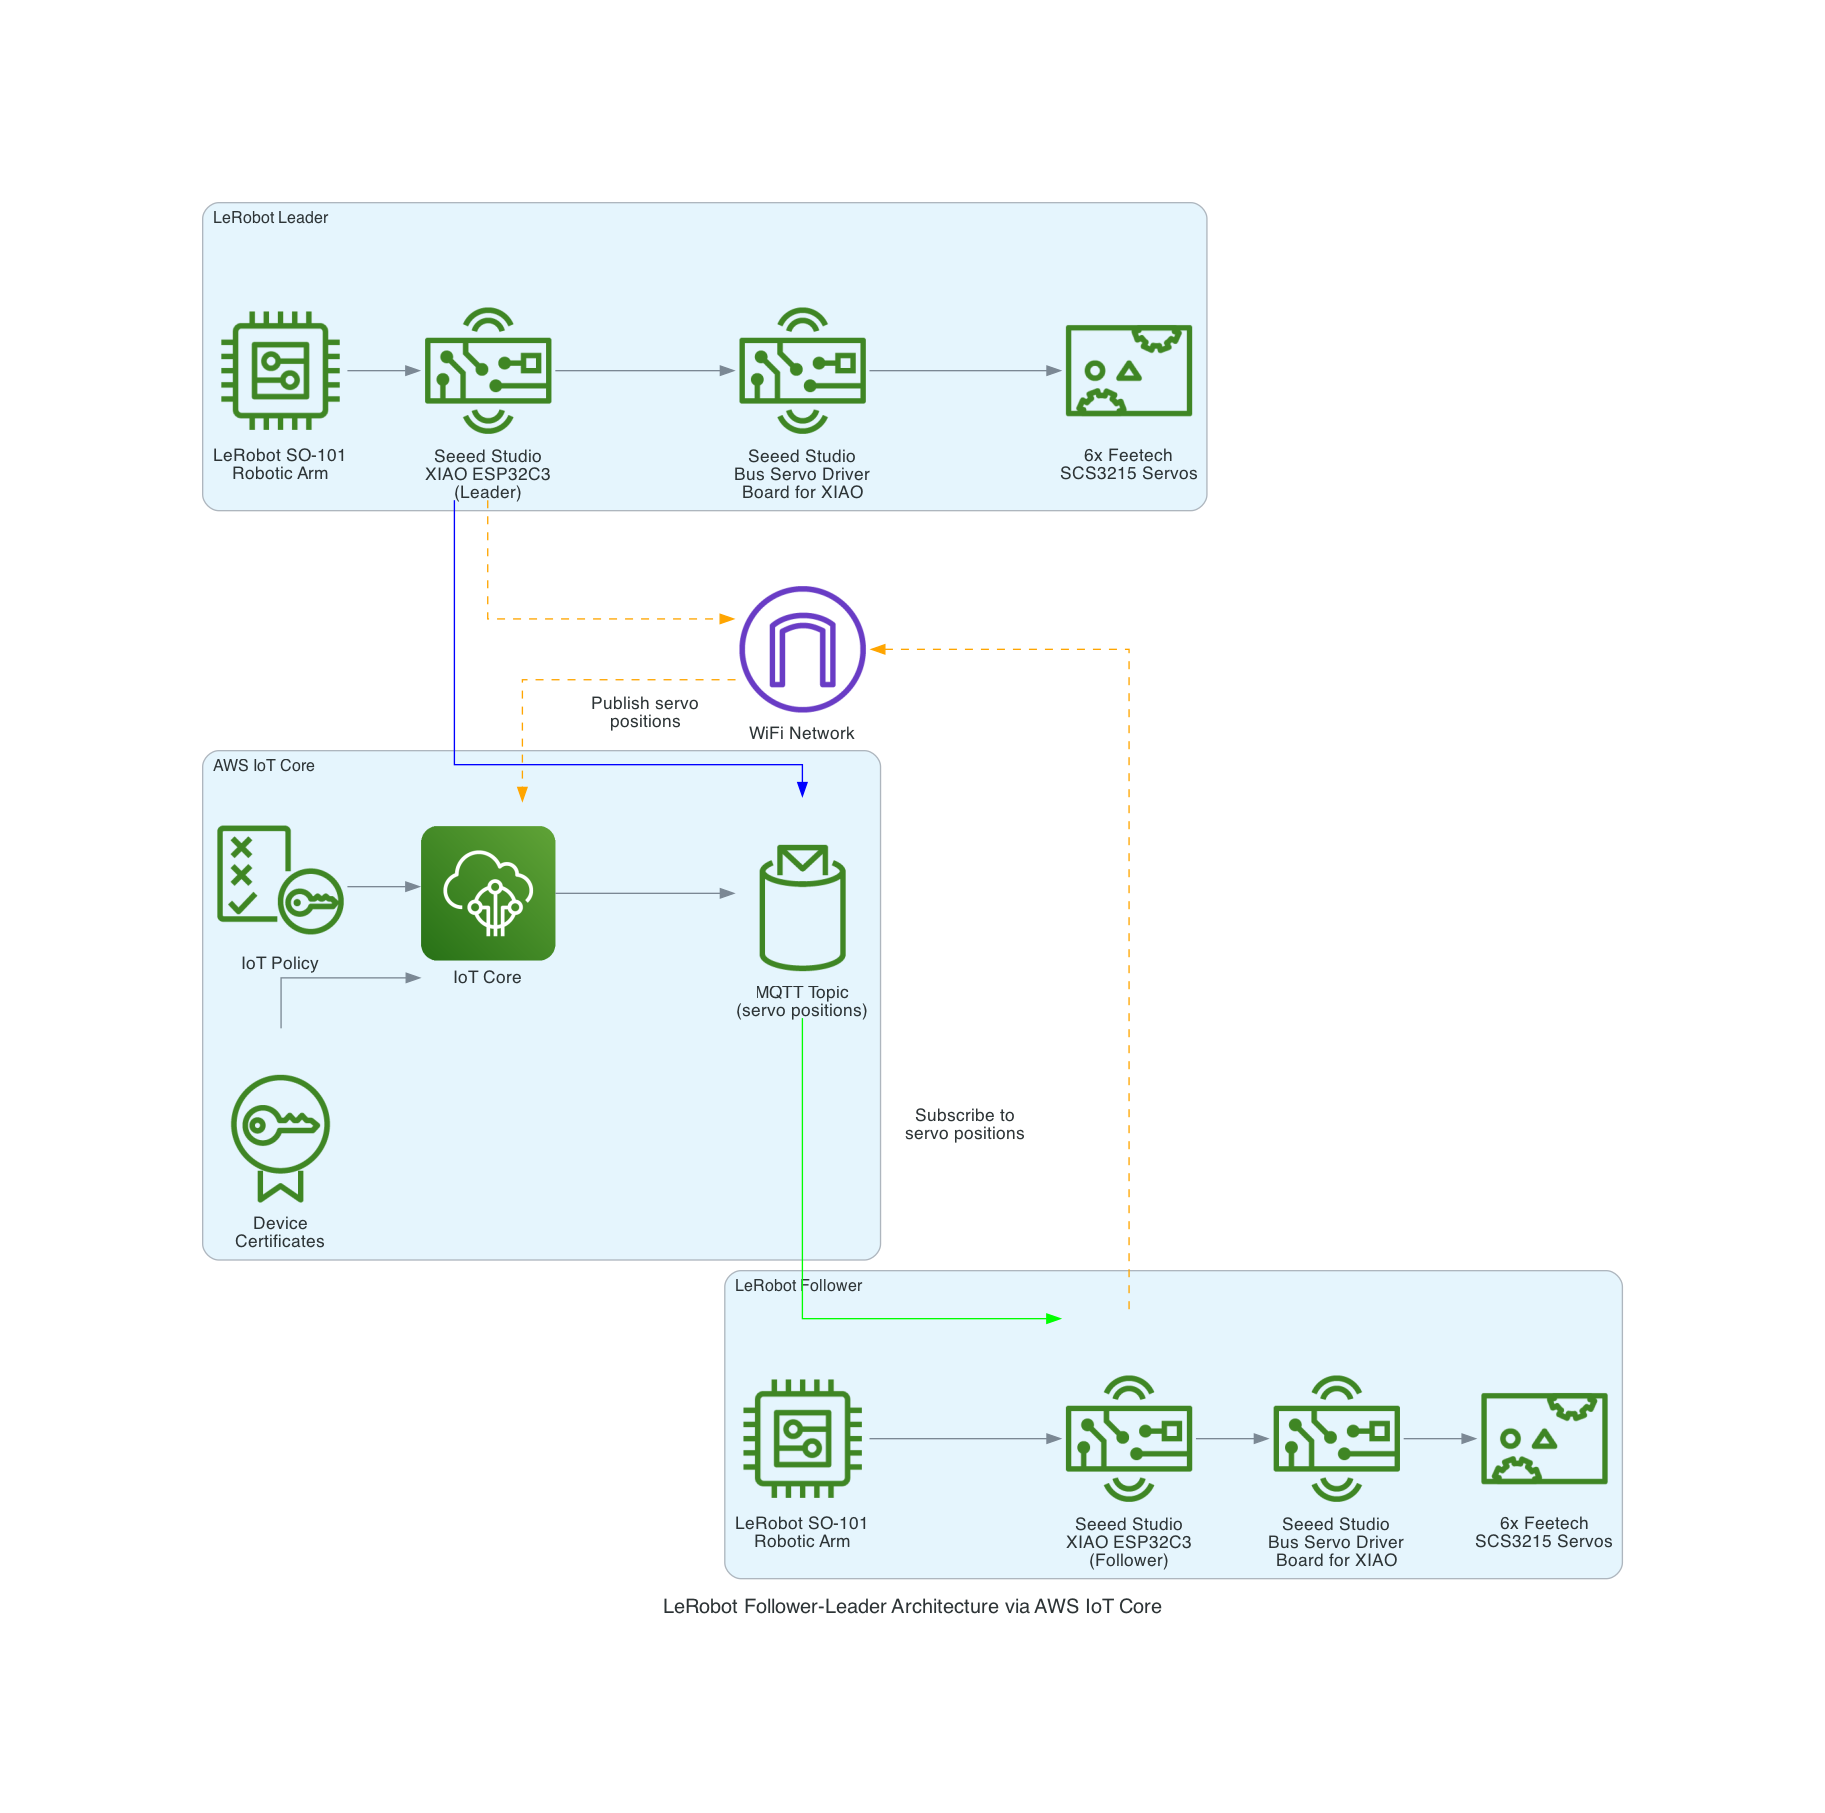
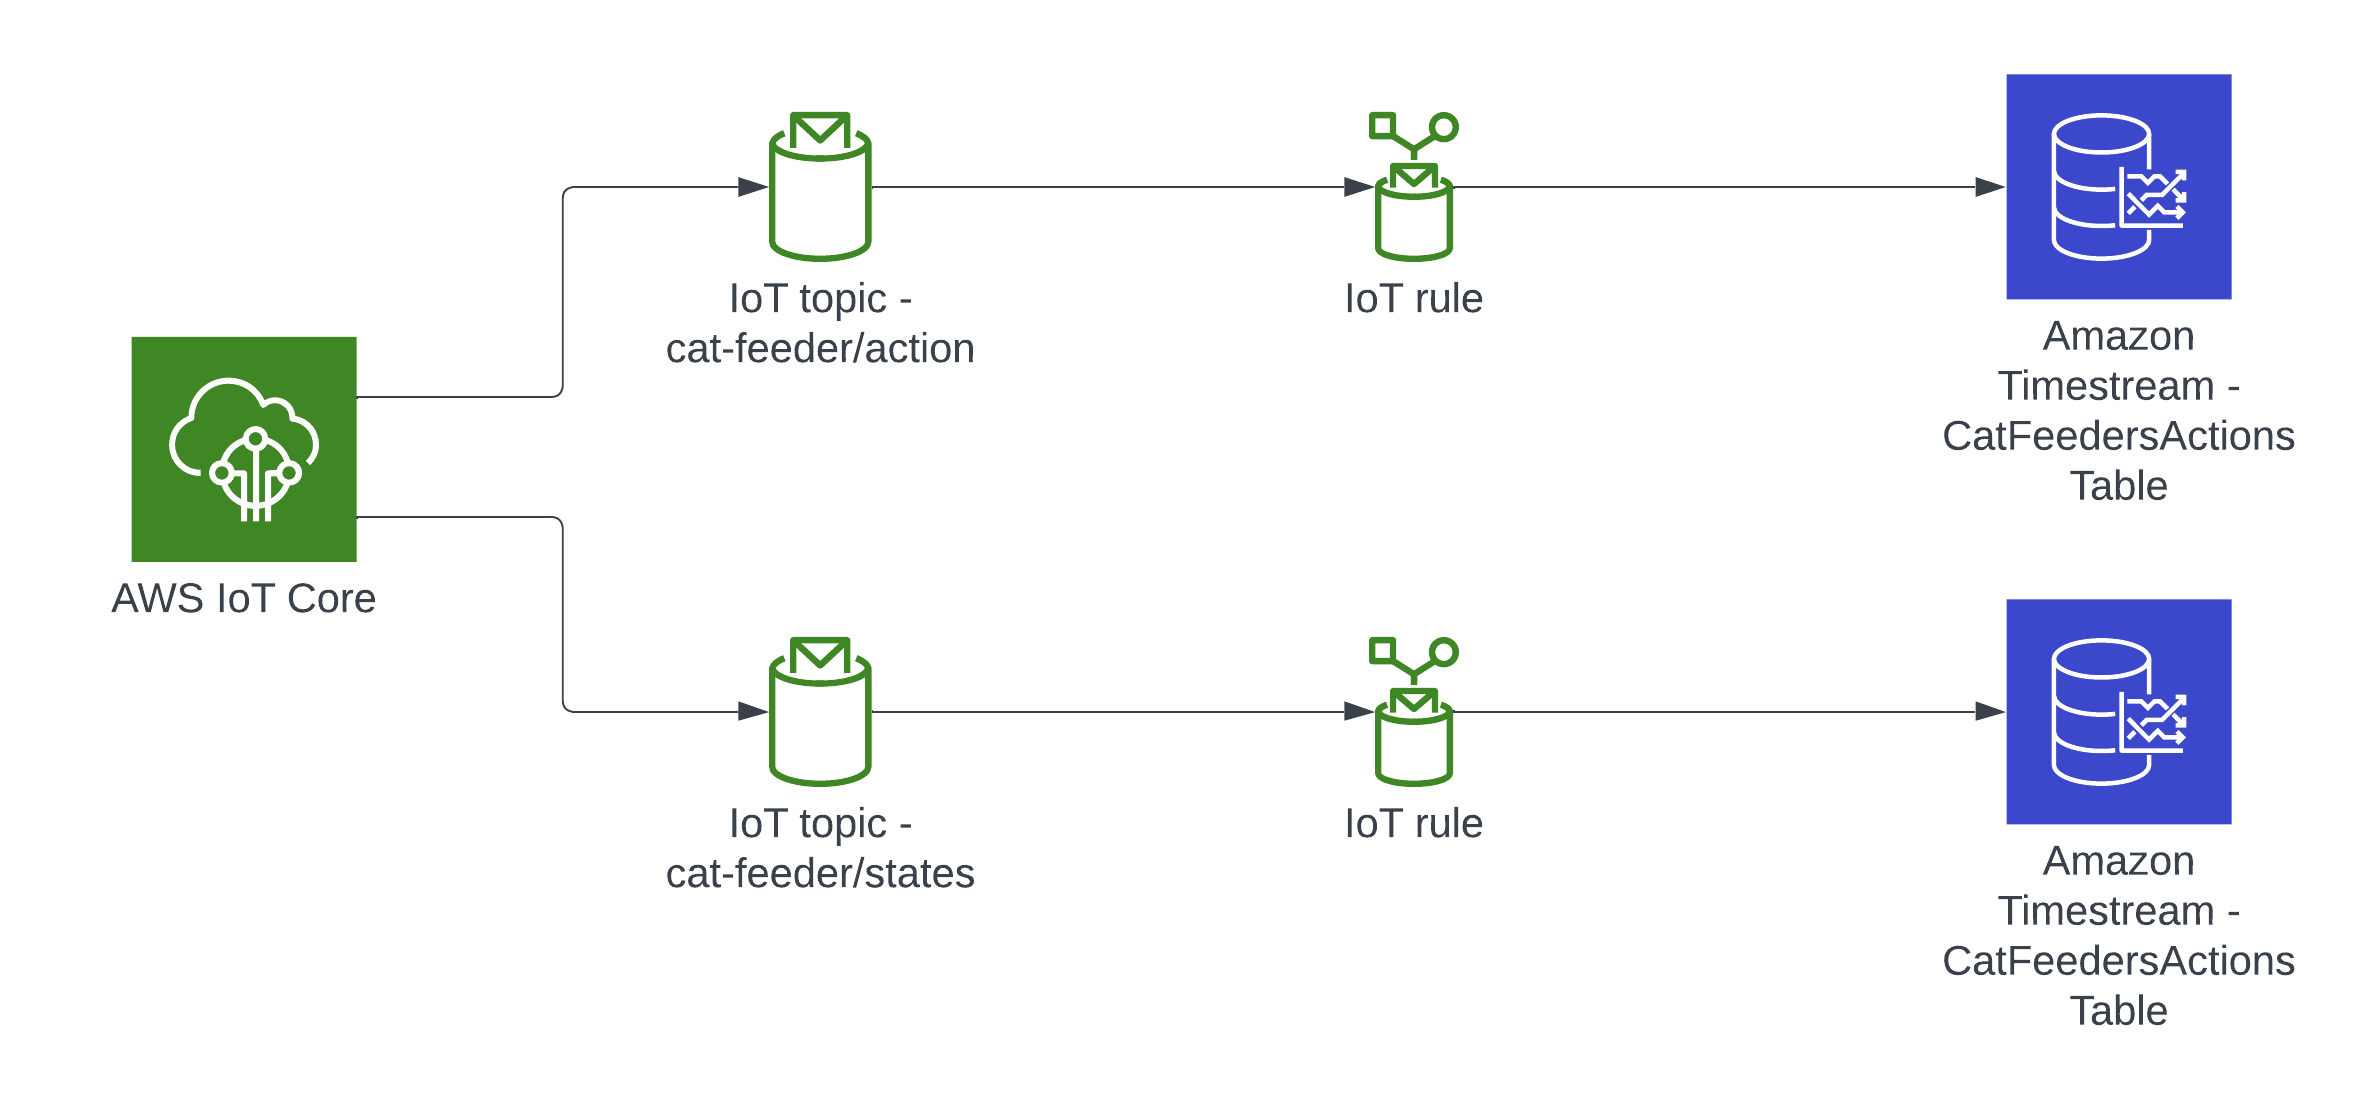
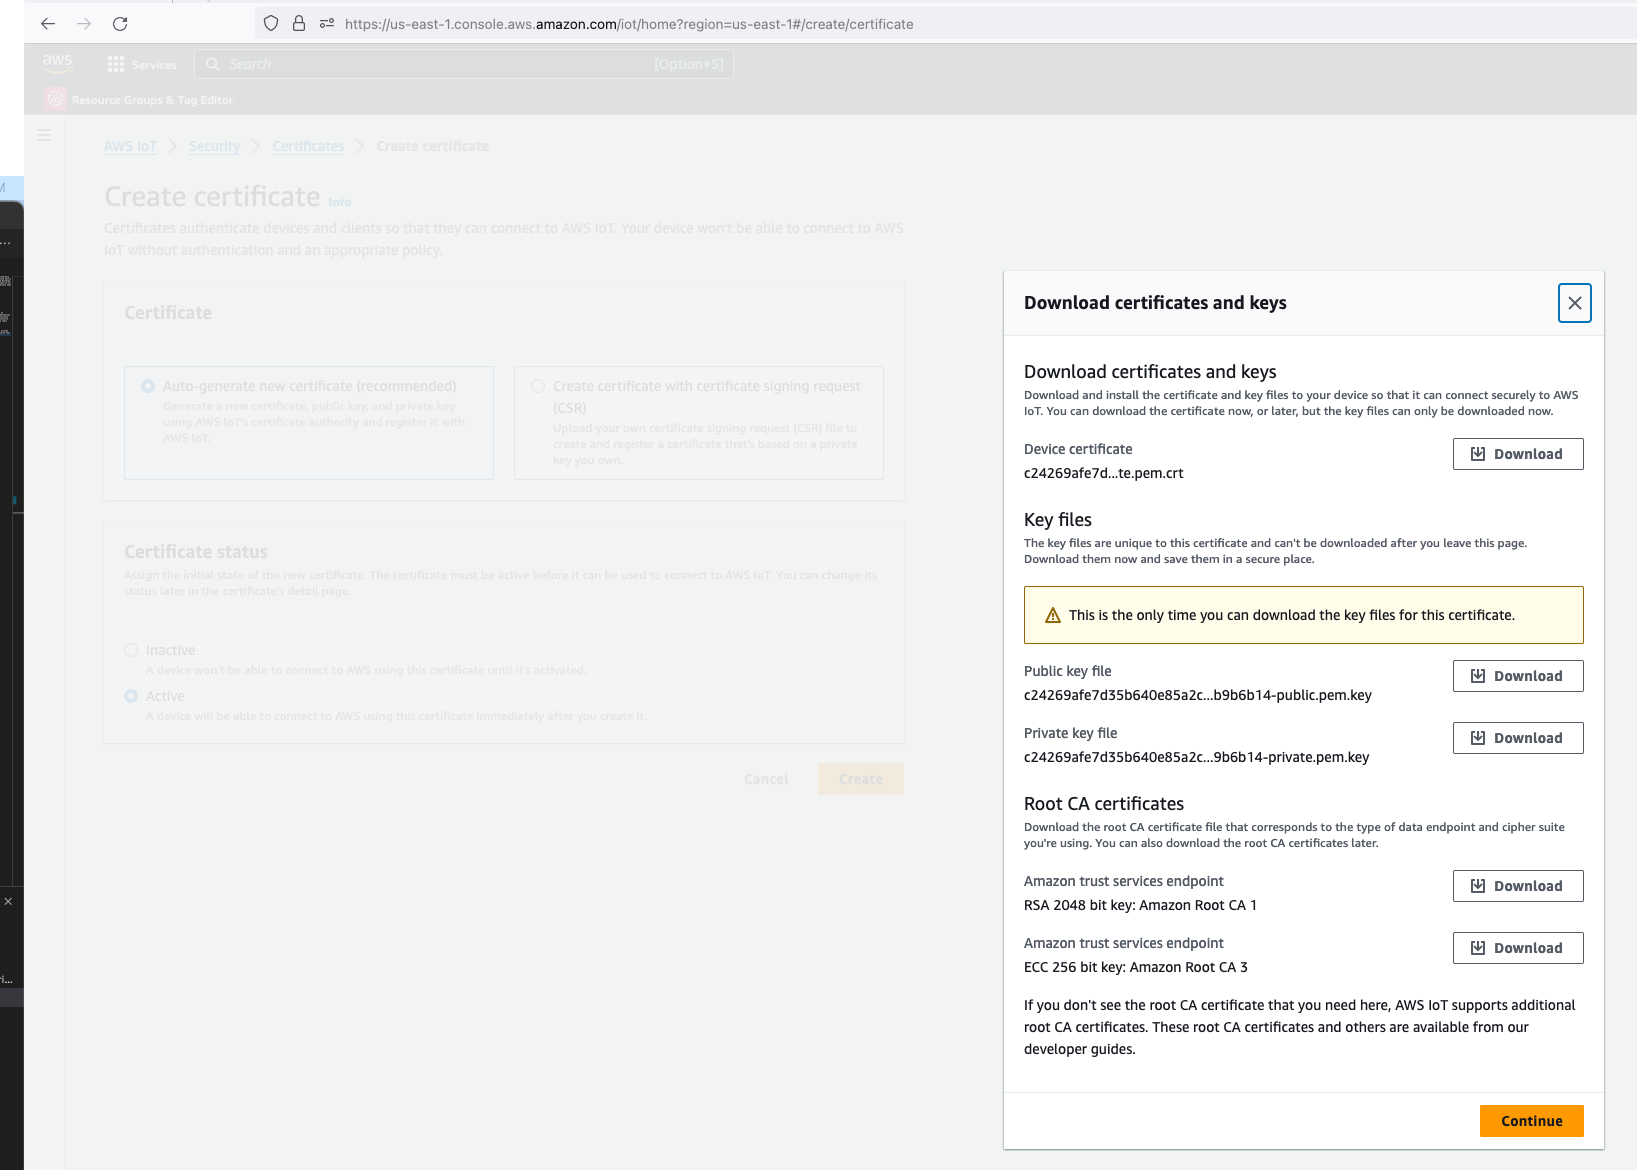
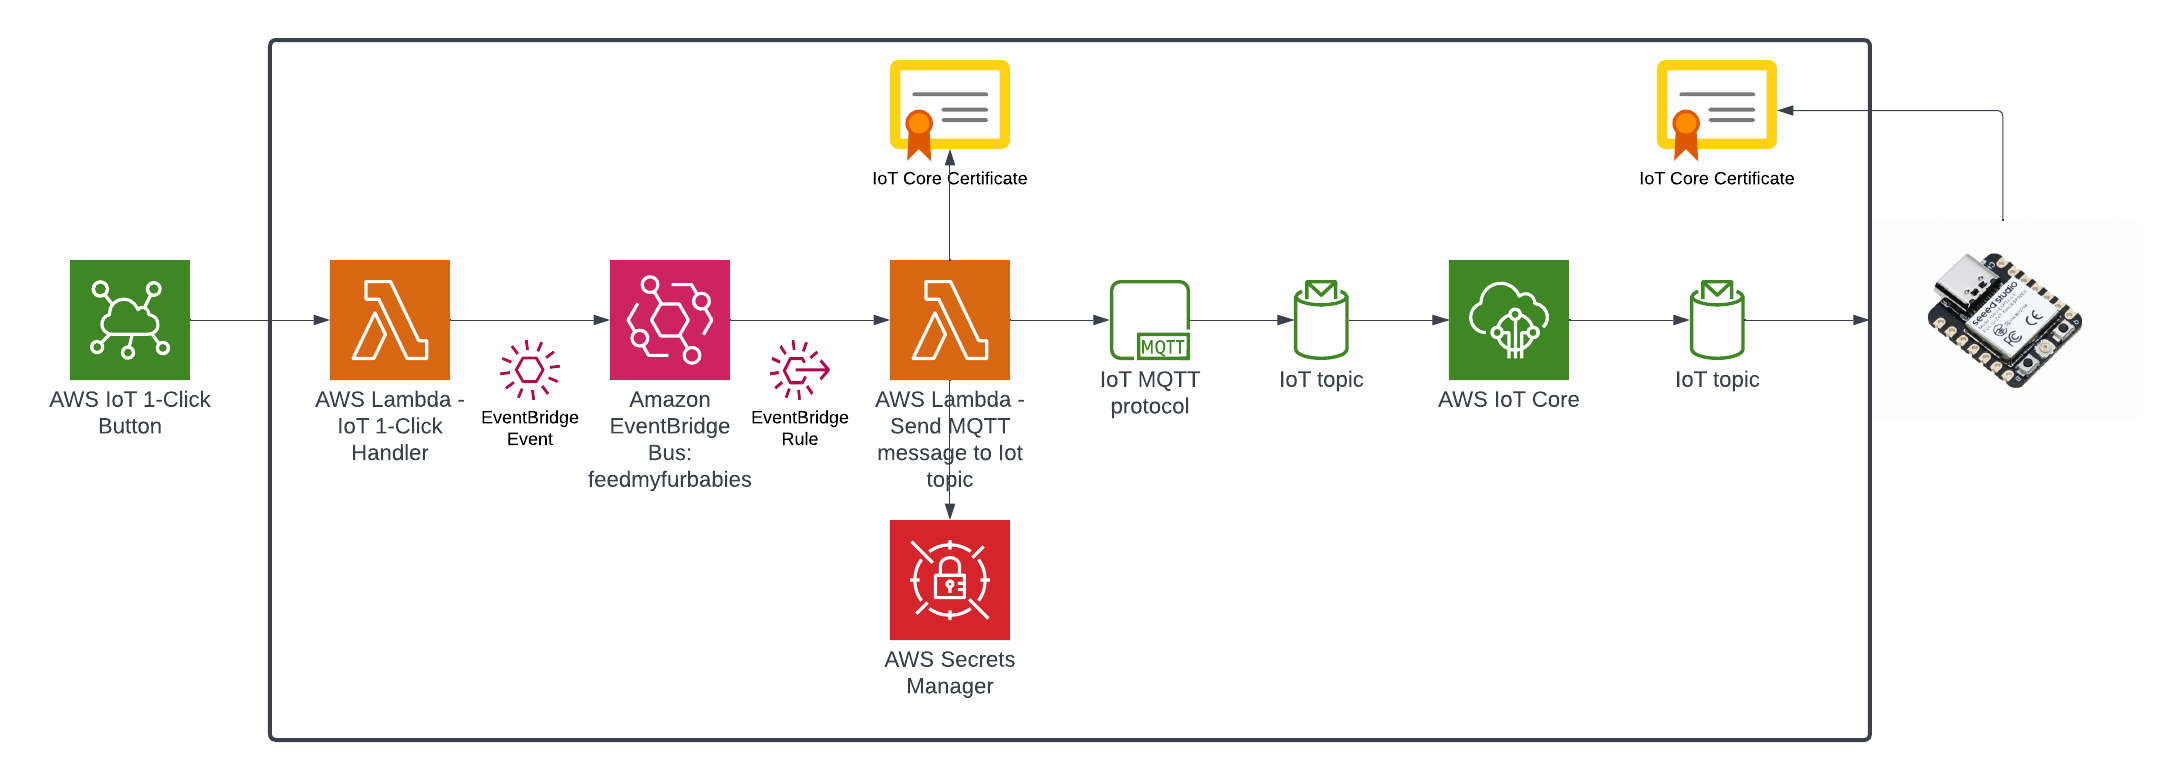
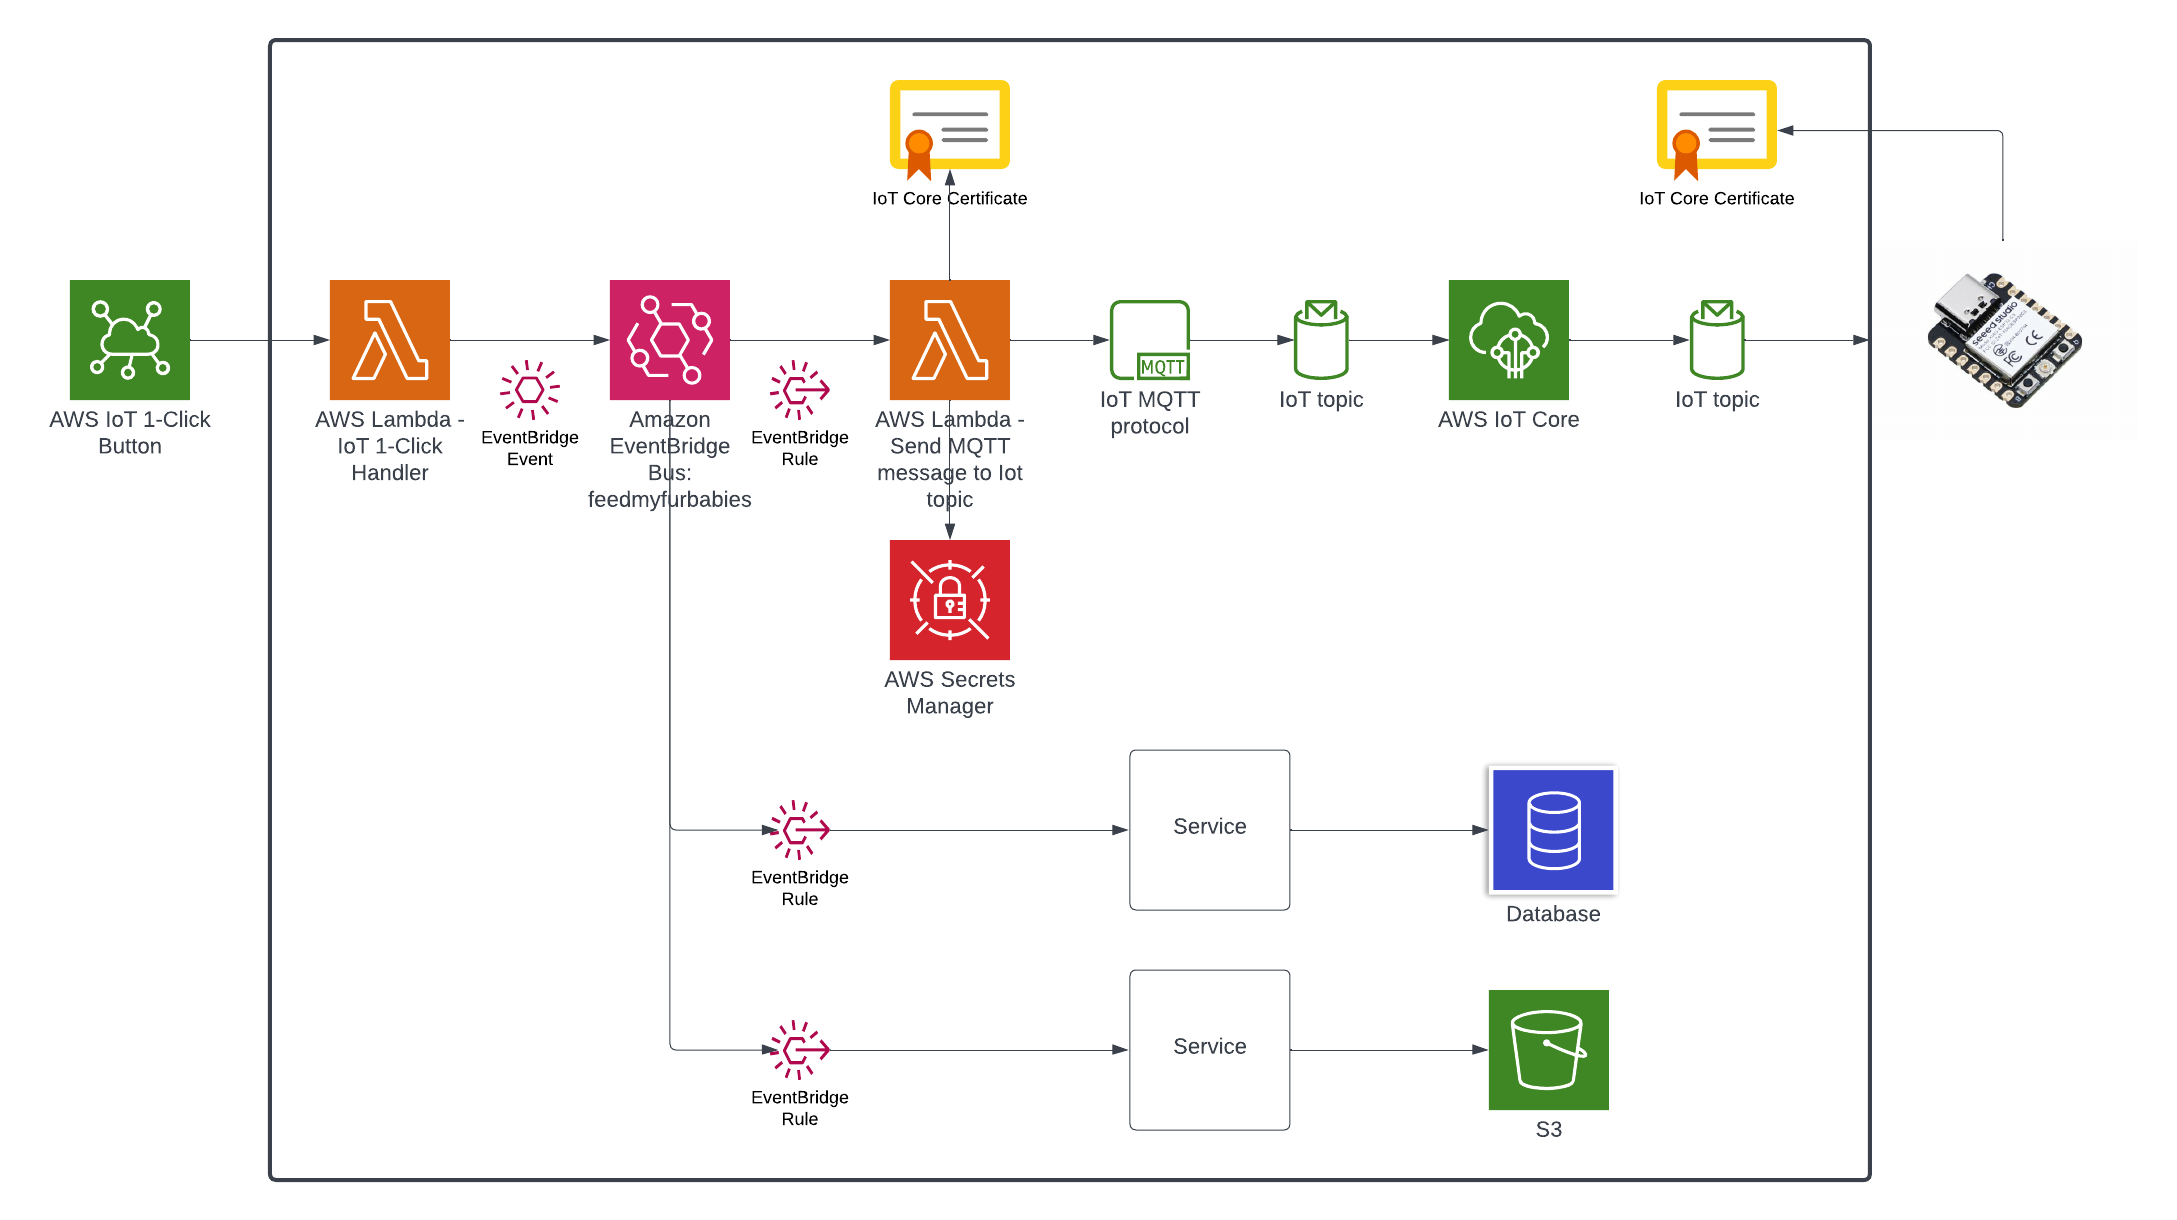
AWS IoT Core Certificates and Keys
In order to send MQTT messages to an AWS IoT Core Topic, or to receive a message from a Topic in reverse, you will need a set of Certificate and Key\s for your micro-controller; as well as the AWS IoT Endpoint specific to your AWS Account and Region.
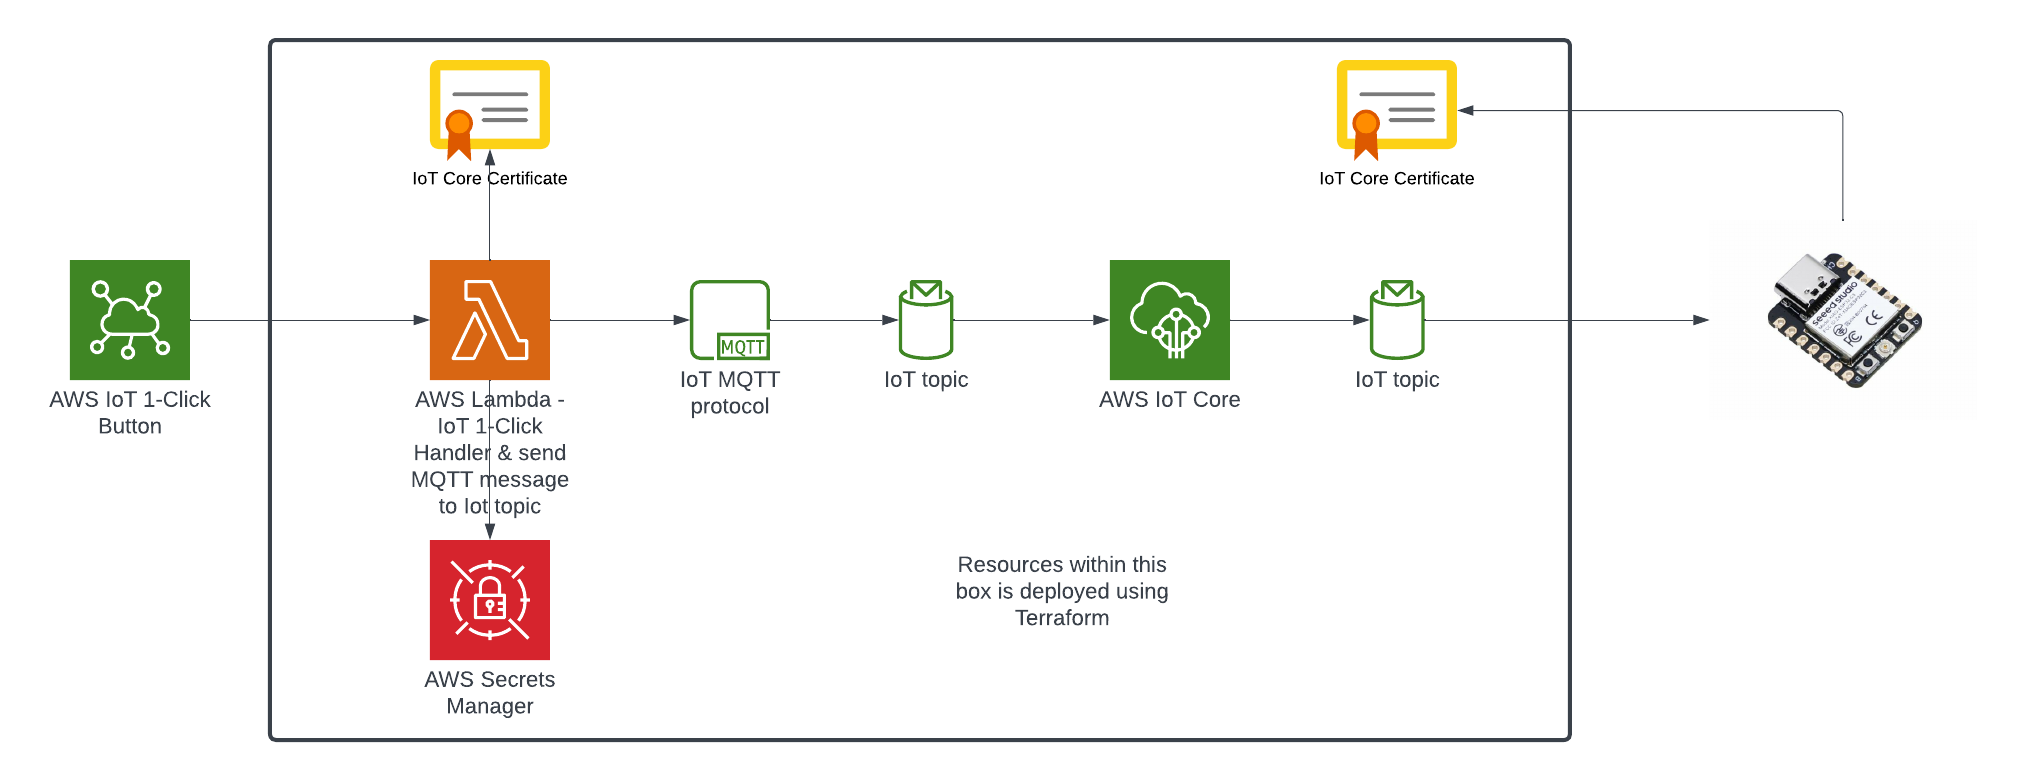
It's great if you have those with you so you can skip to the next section, if not, do not worry I've got you covered. In a past blog I have a reference architecture accompanied by a GitHub repository on how to deploy resources for an AWS IoT Core solution using AWS CDK, follow that blog to the end and you will have a set of Certificate and Key to use for this MicroPython example; the CDK Stack will deploy all the neccessary resources and policies in AWS IoT Core to enable you to both send and receive MQTT messages to two separate IoT Topics.
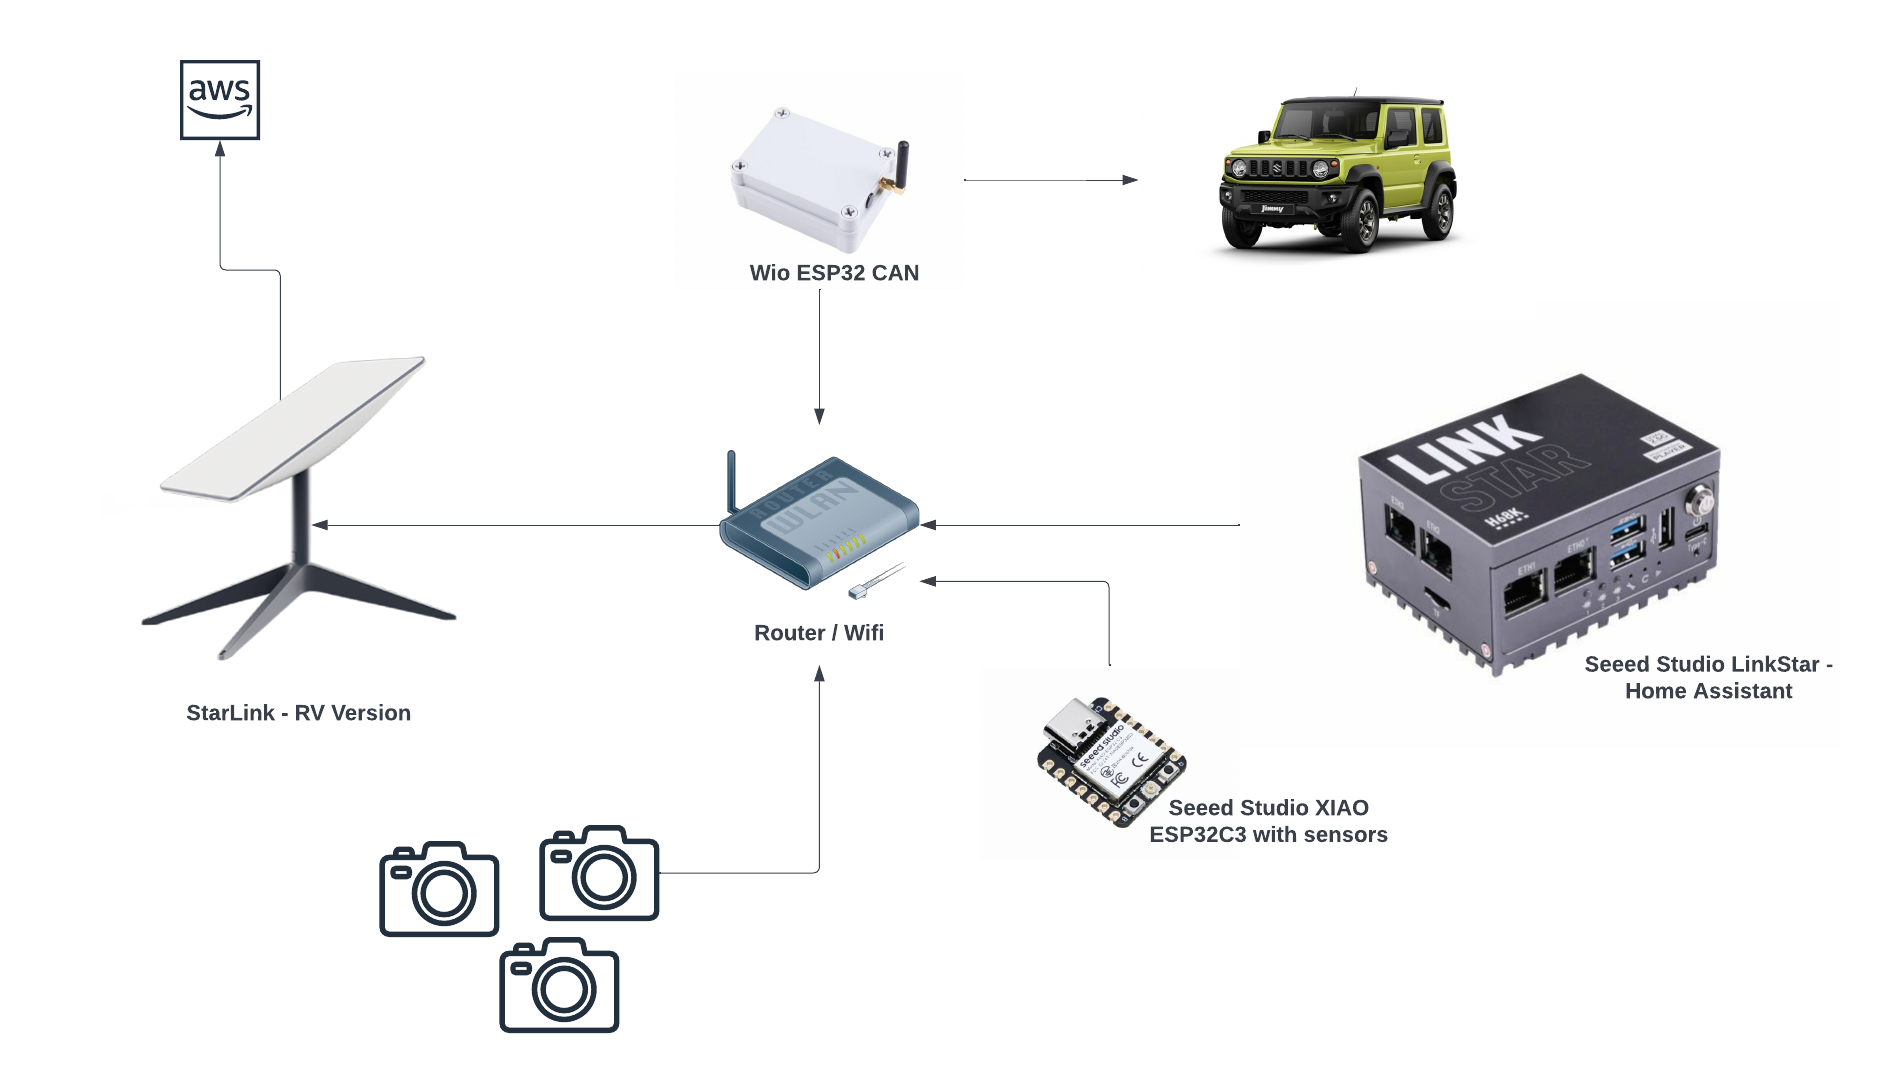
Reference AWS IoT Core Architecture: https://chiwaichan.co.nz/blog/2024/02/02/feedmyfurbabies-i-am-switching-to-aws-cdk/
Upload the MicroPython Code to your device
Now lets upload the MicroPython code to your micro-controller and prepare the IoT Certificate and Key so we can use it to authenticate the micro-controller to enable it to send and receive MQTT messages between your micro-controller and IoT Core.
Clone my GitHub repository that contains the MicroPython example code to publish and receive MQTT message with AWS IoT Core: https://github.com/chiwaichan/feedmyfurbabies-micropython-iot
It should look something like this.
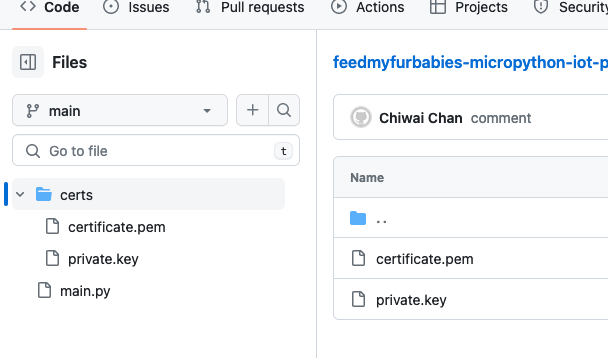
Copy your Certificate and Key into the respective files shown in the above screenshot; otherwise, if you are using the Certificate and Key from my reference architecture, then you should use the 2 Systems Manager Parameter Store values create by the CDK Stack.

Next we convert the Certificate and Key to DER format - converting the files to DER format turns it into a binary format and makes the files more compact, especially neccessary when we run use it on small devices like the ESP32s.
In a terminal go to the certs directory and run the following commands to convert the certificate.pem and private.key files into DER format.
openssl rsa -in private.key -out key.der -outform DER
openssl x509 -in certificate.pem -out cert.der -outform DER
You should see two new files with the DER extension appear in the directory if all goes well; if not, you probably need to install openssl.

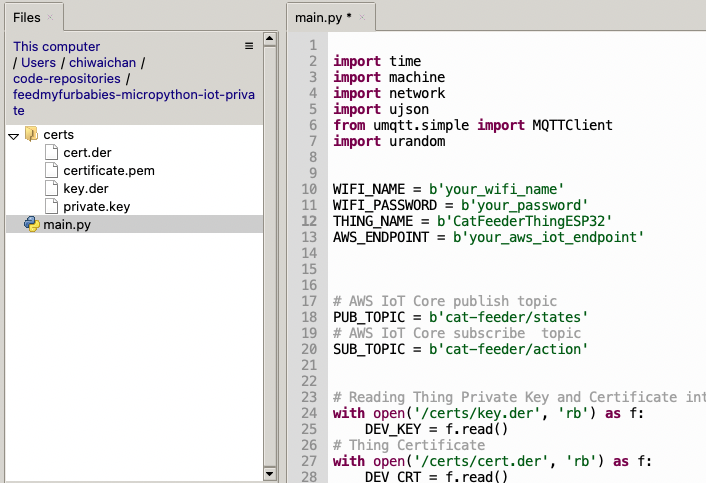
In Thonny, in the Files explorer, navigate to the GitHub repository's Root directory and open the main.py file. Fill in the values for the variables shown in the screenshot below to match your environment, if you are using my AWS CDK IoT referenece architecture then you are only required to fill in the WIFI details and the AWS IoT Endpoint specific to your AWS Account and Region.
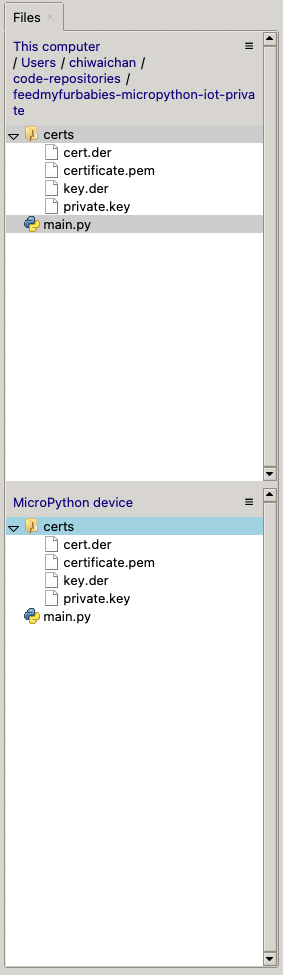
Select both the certs folder and main.py in the Files explorer, then right click and select "Upload to /" to upload the code to your micro-controller; the files will appear in the "MicroPython Device" file explorer.
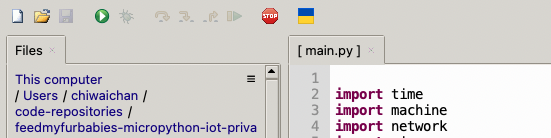
This is the moment we've been waiting for, lets run the main.py Python script by clicking on the Play Icon in green.
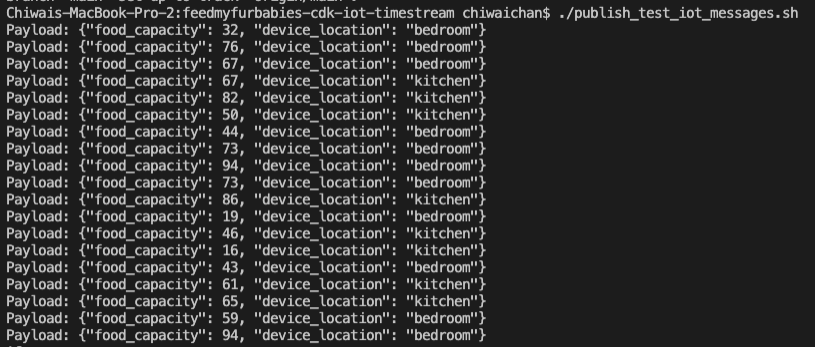
If all goes well you should see some output in the Shell section of Thonny.
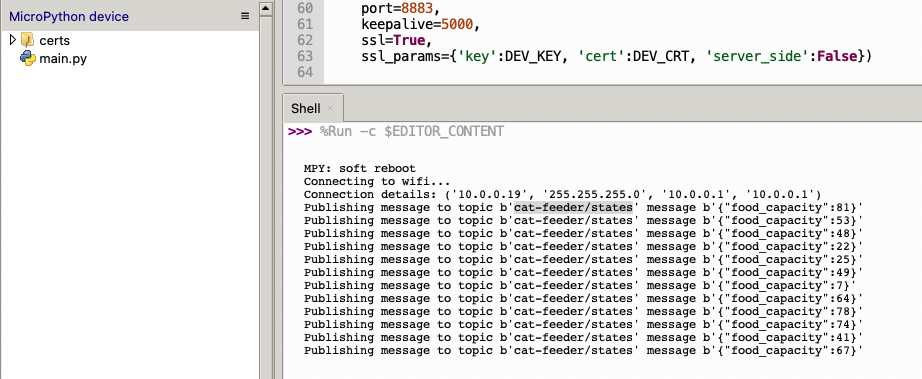
The code in the main.py file has a piece of code that is generating a random number for the food_capacity percentage property in the MQTT message; you can customise the message to fit your use case.
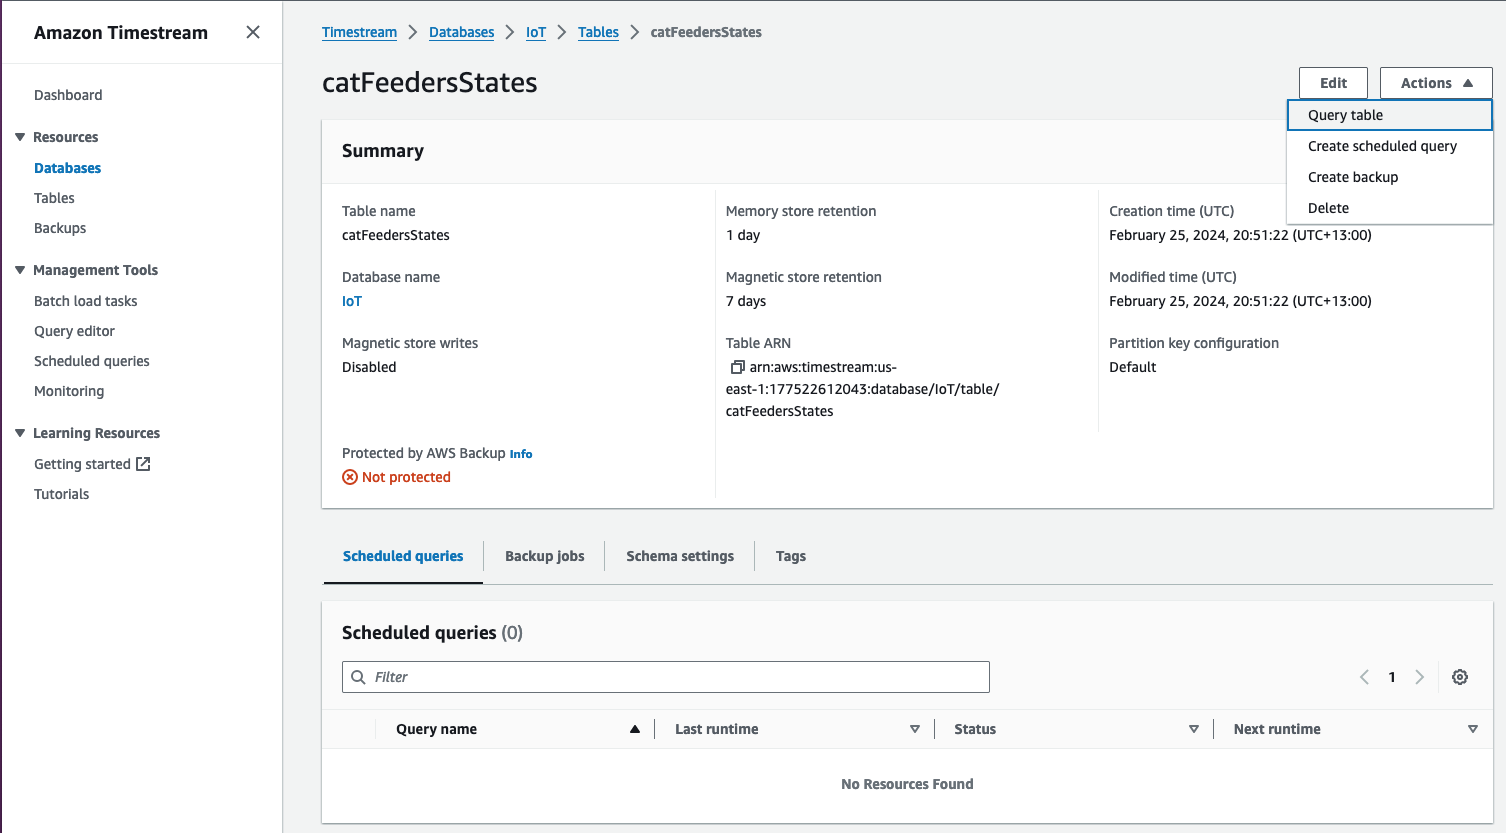
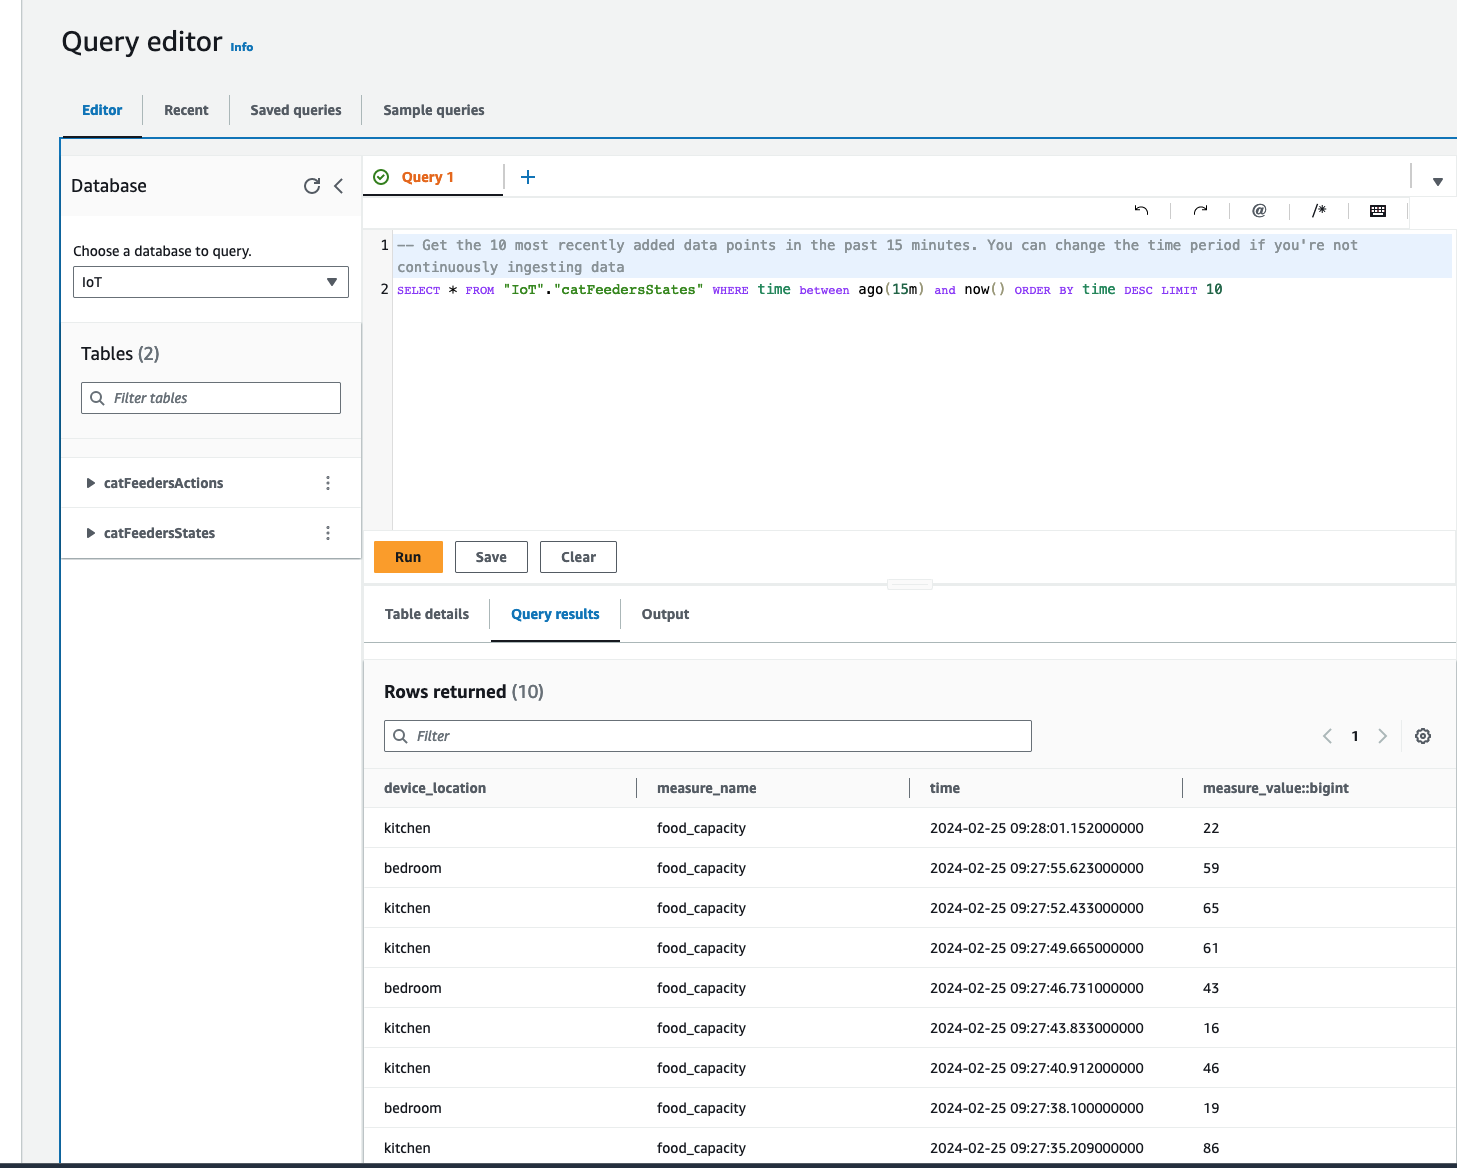
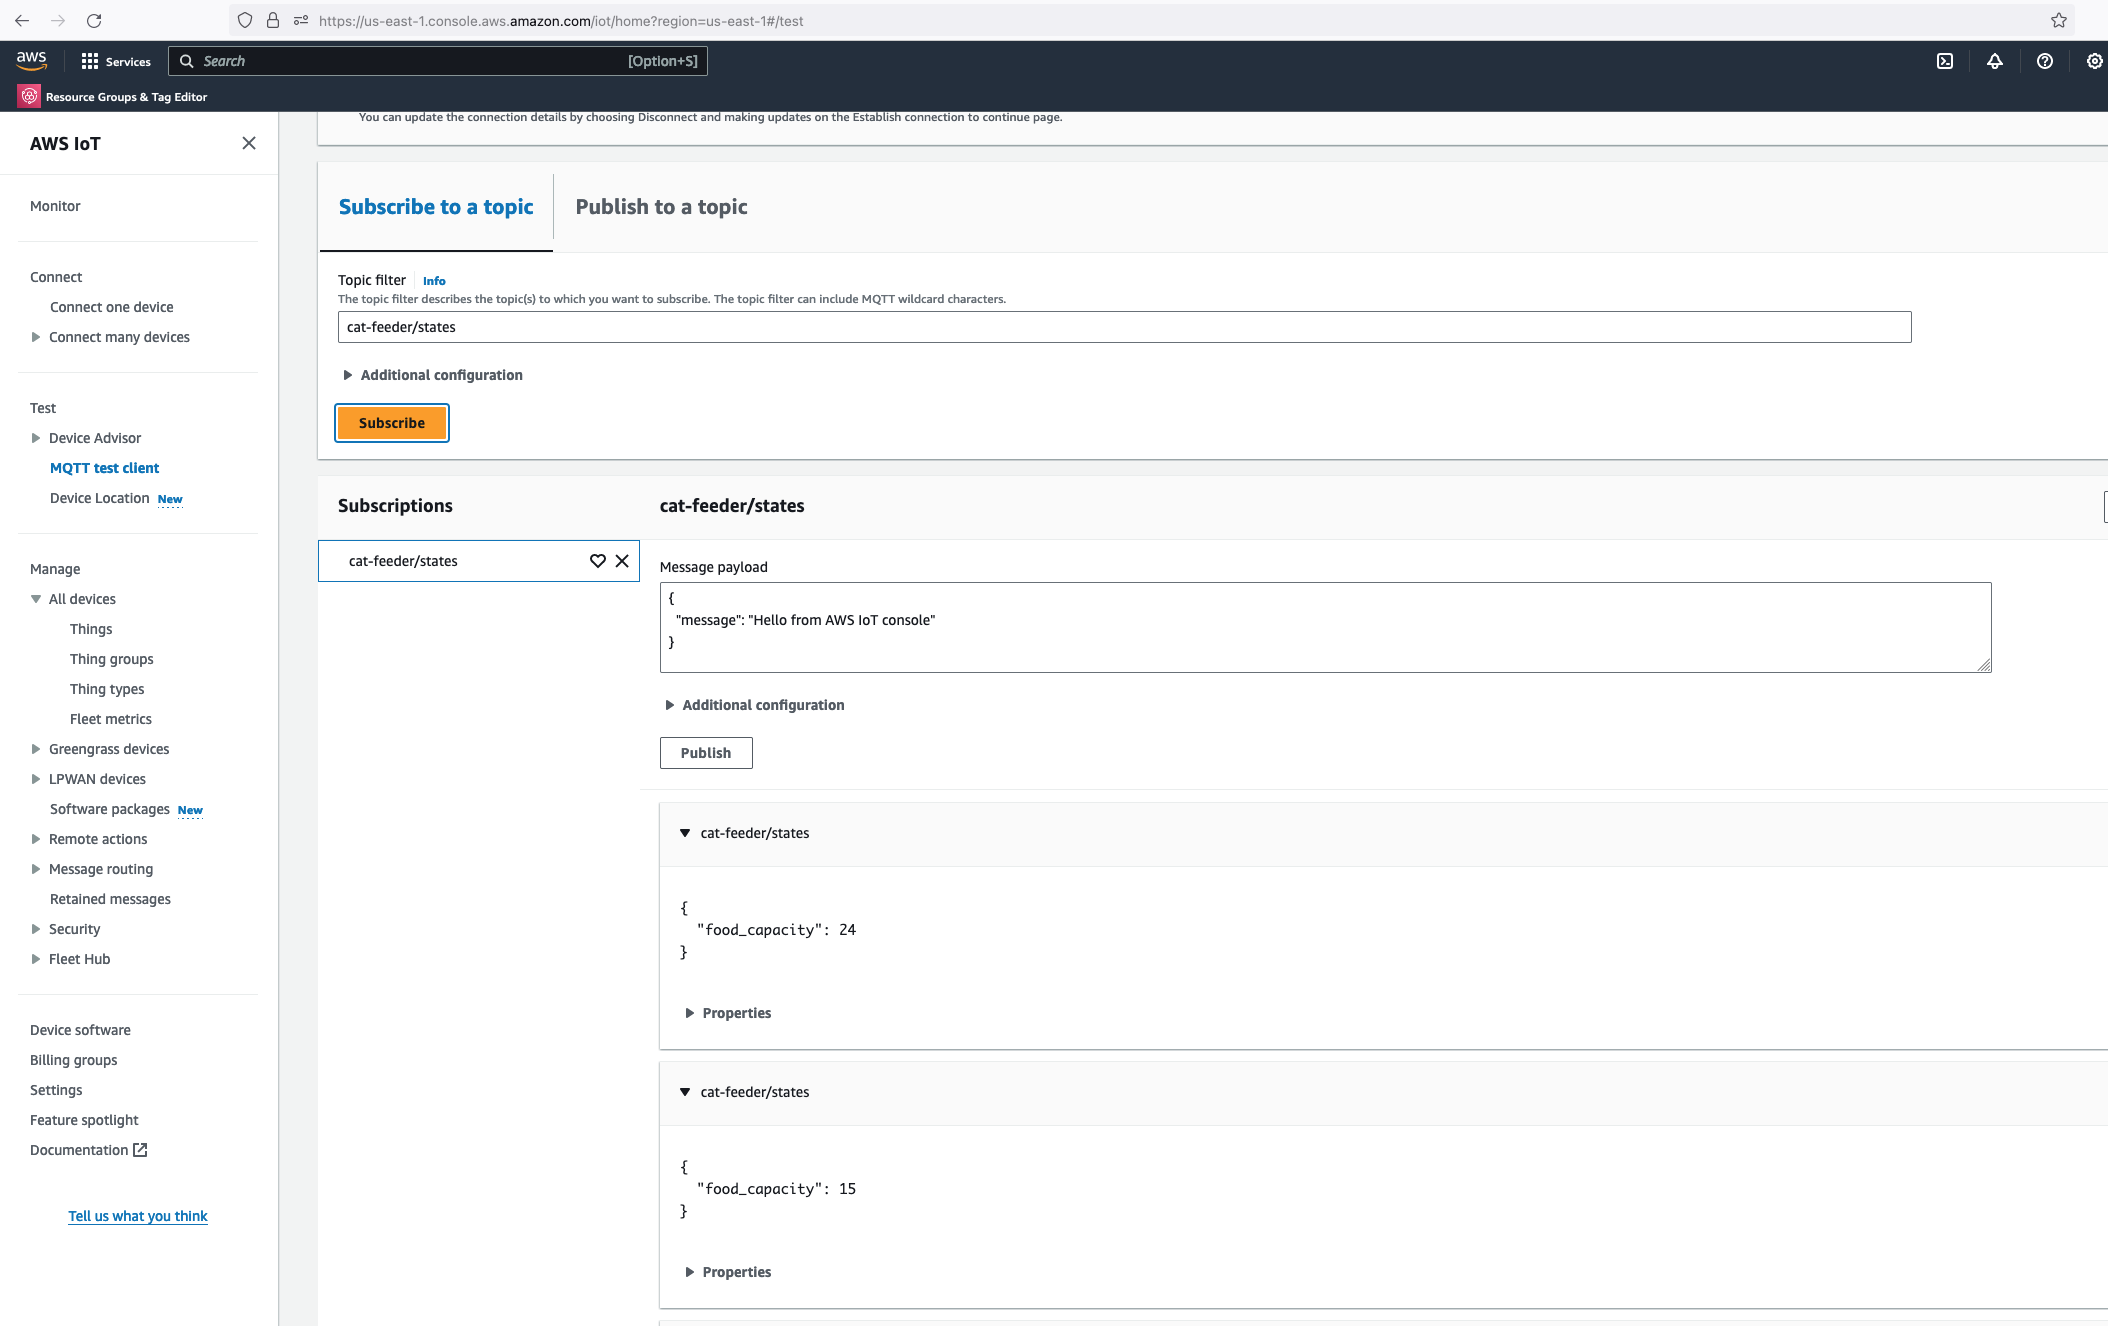
But lets verify it is actually received by AWS IoT Core.
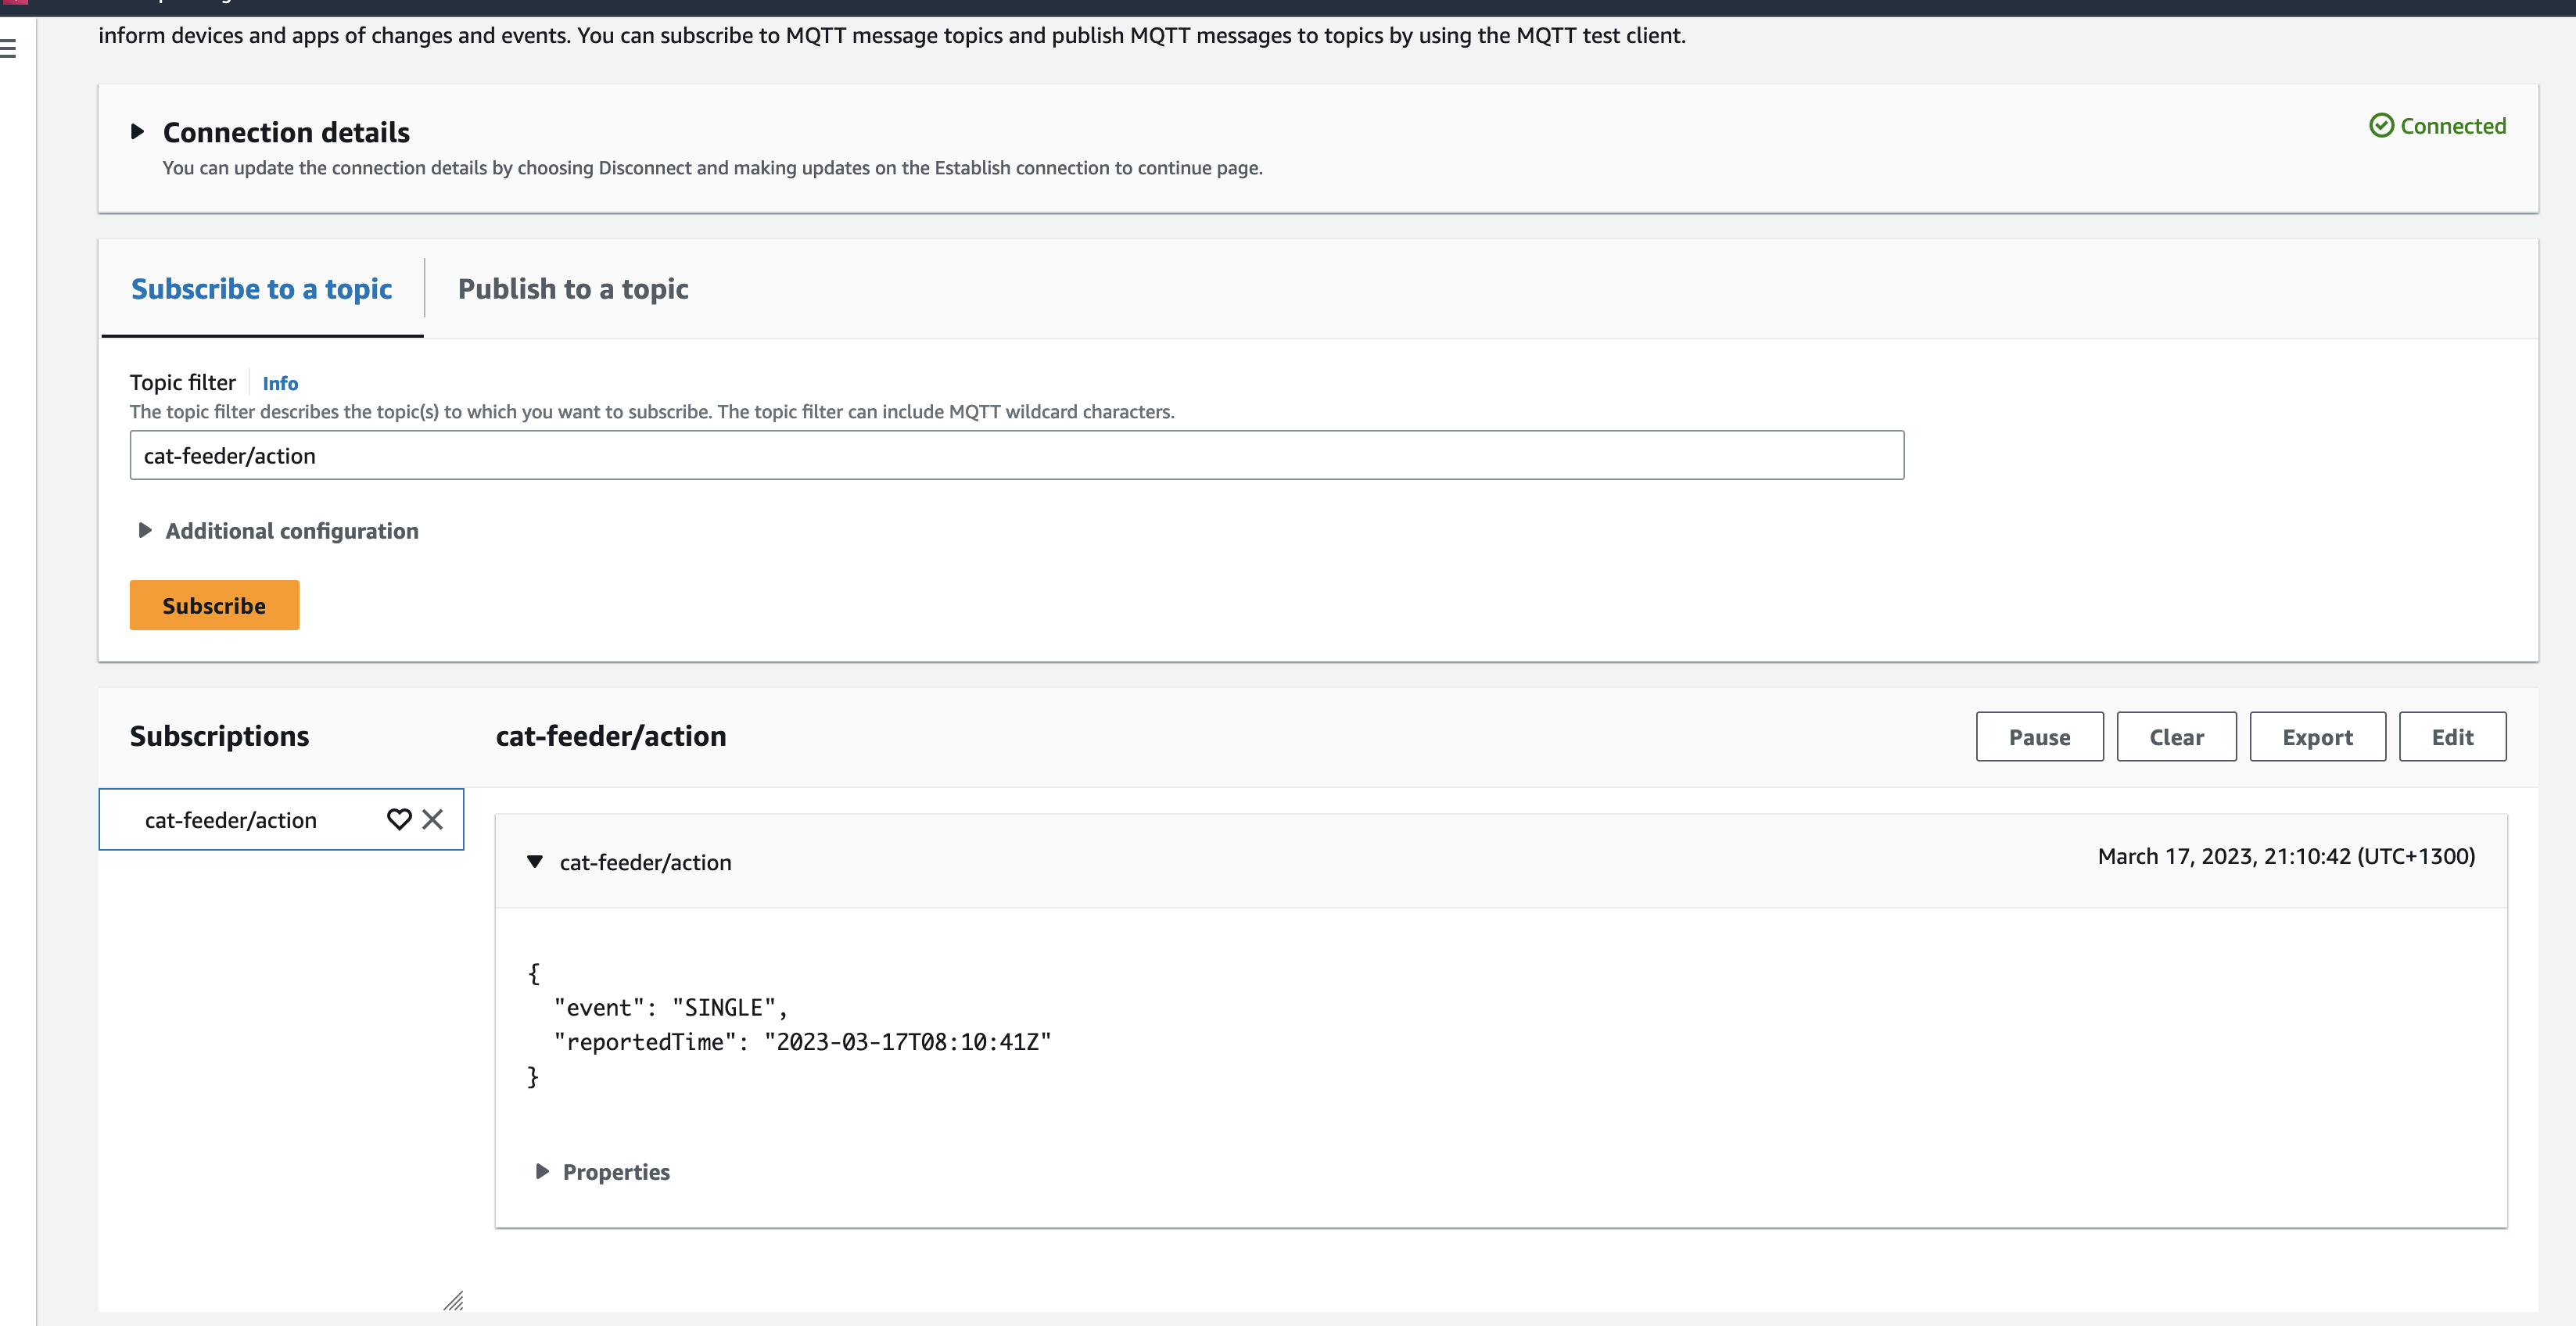
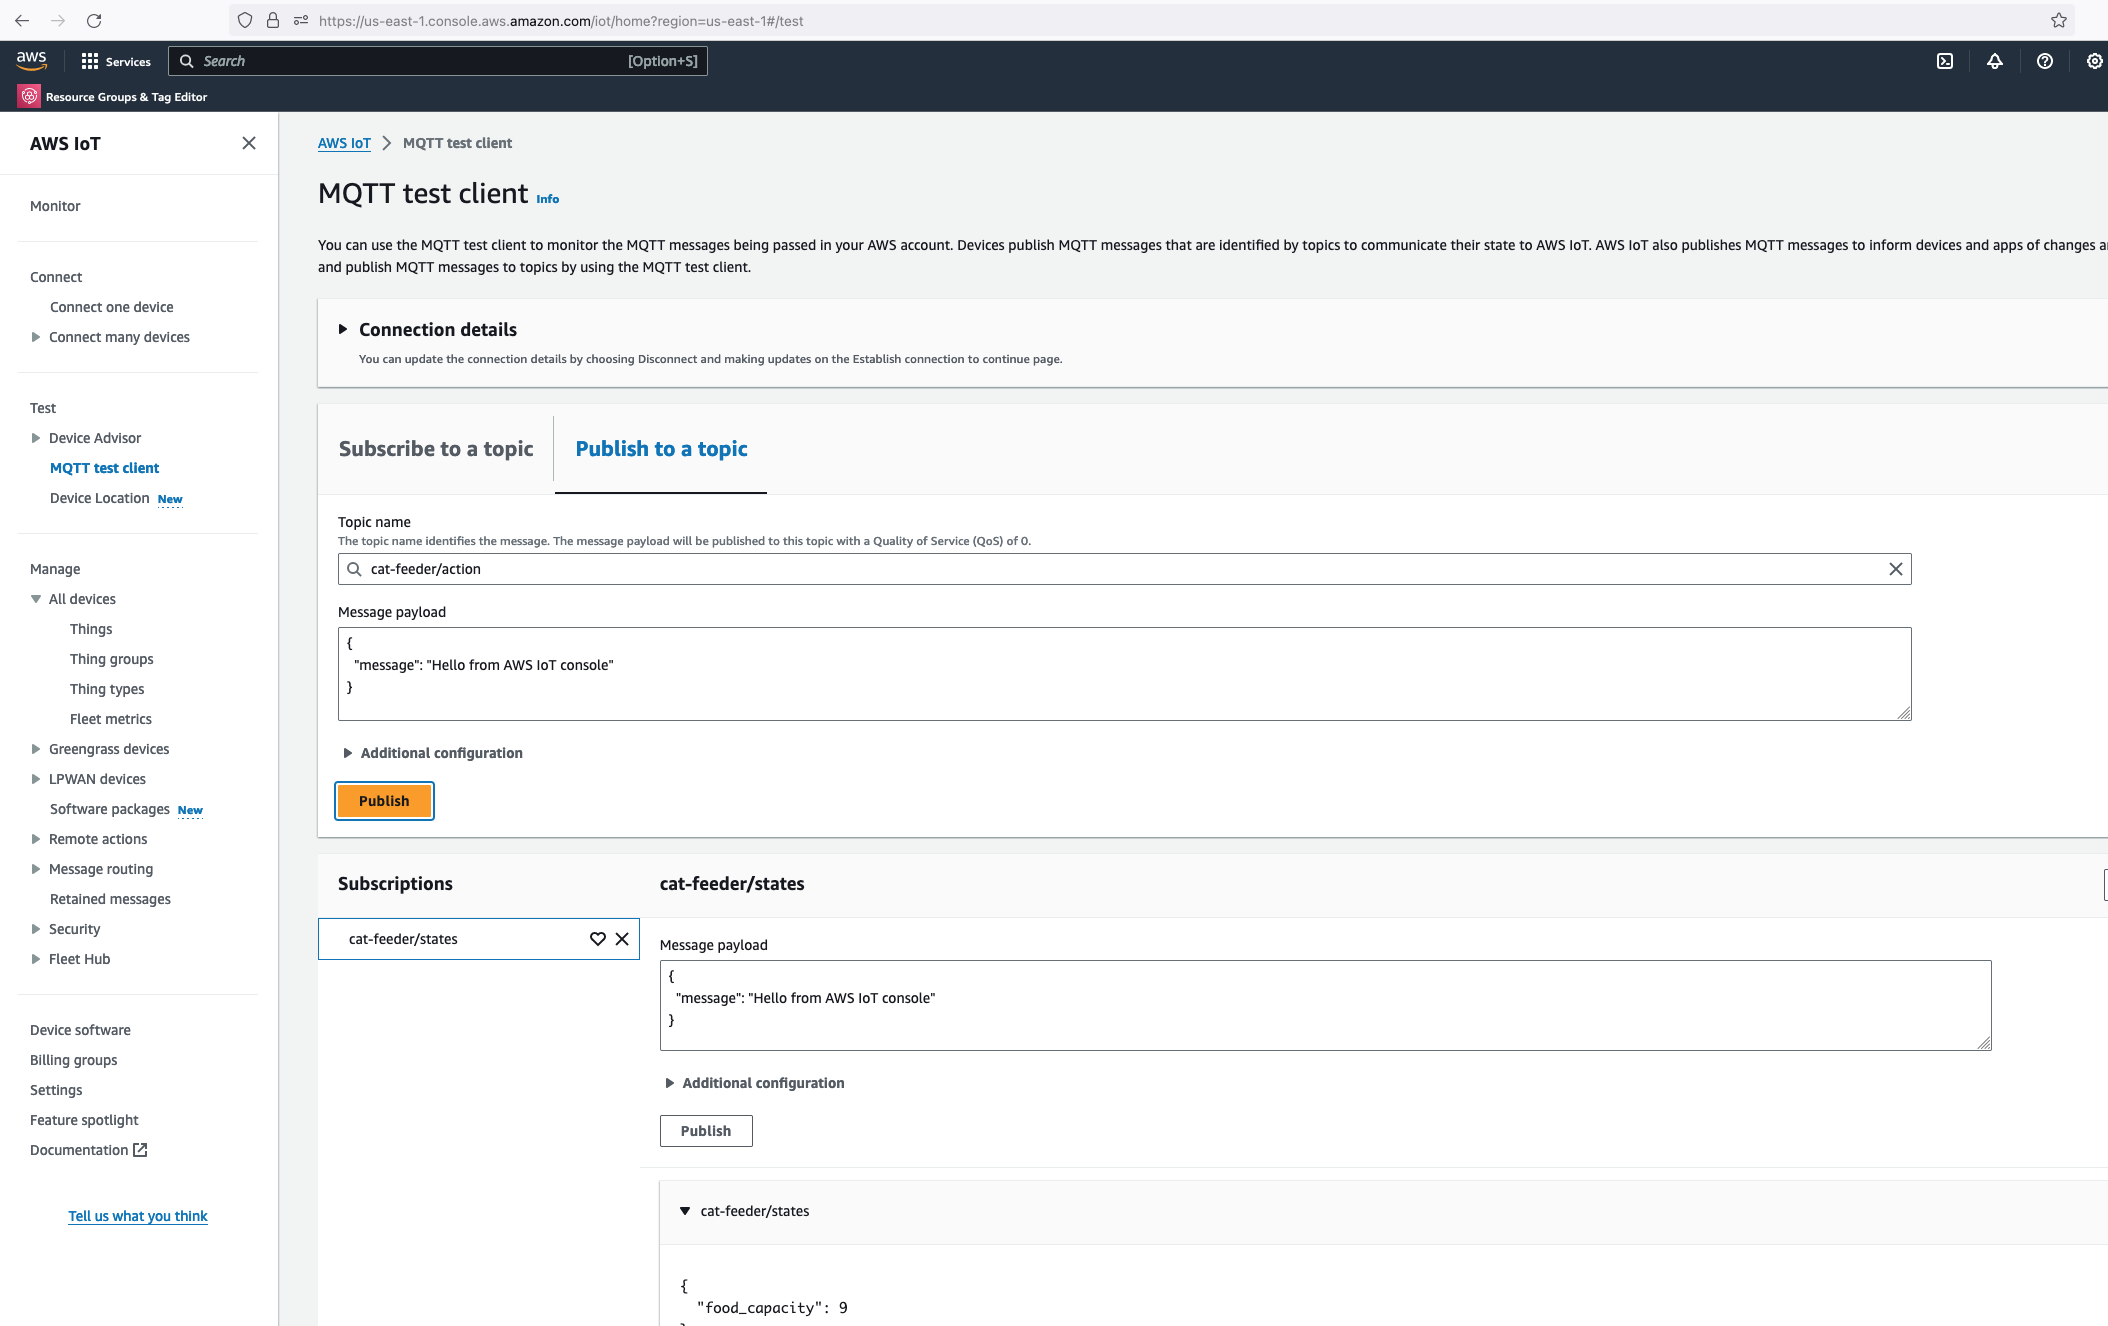
Alright, lets go the other way and see if we can receive MQTT messages from AWS IoT Core using the other Topic called "cat-feeder/action" we subscribed to in the MicroPython code.
Lets go back the AWS Console and use the MQTT test client to publish a message.
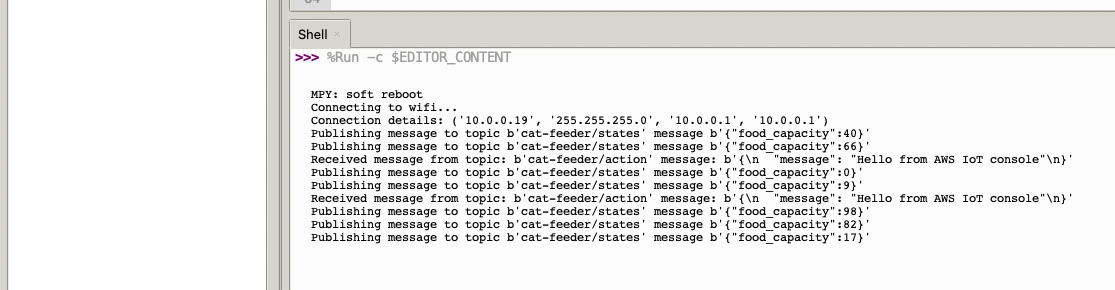
In the Thonny Shell we can see the message "Hello from AWS IoT console" sent from the AWS IoT Core side and it being received by the micro-controller.