The source code for this blog can be found in my Github repository: https://github.com/chiwaichan/aws-iot-cat-feeder. This repository only includes the source code for the solution implemented up to this stage/blog in the project.
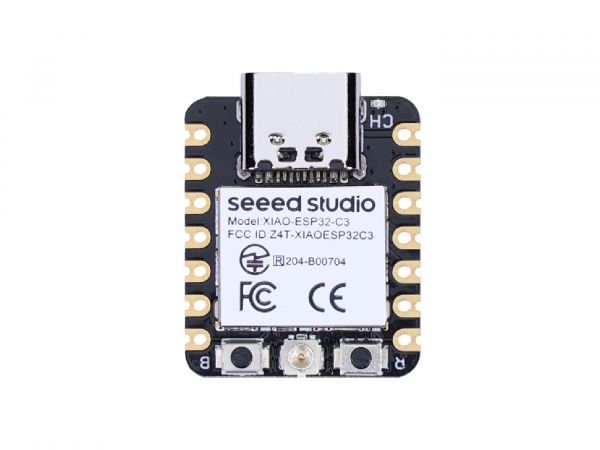
In the end I decided to go with the Seeed Studio XIAO ESP32C3 implementation of the ESP32 micro-controller for $4.99 (USD). I also ordered some other bits and pieces from AliExpress that's going to take some time to arrive.
In this Part 2 of the blog series I will demonstrate the exchange of messages (JSON payload) using the MQTT protocol between the ESP32 and the AWS IoT Core Service, as well as the exchange of messages between a Lambda Function and the ESP32 - this Lambda is written in Python which is intended to replace the Lambda triggered by the IoT button event found in Part 1.
Prerequisites if you like to try out the solution using the source code
- An AWS account.
- An IoT button. Follow Part 1 of this blog series to onboard your IoT button into the AWS IoT 1-Click Service.
- Create 2 Certificates in the AWS IoT Core Service. One certificate is for the ESP32 to publish and subscribe to Topics to IoT Core, and the other is used by the IoT button's Lambda to publish a message to a Topic subscribed by the ESP32.
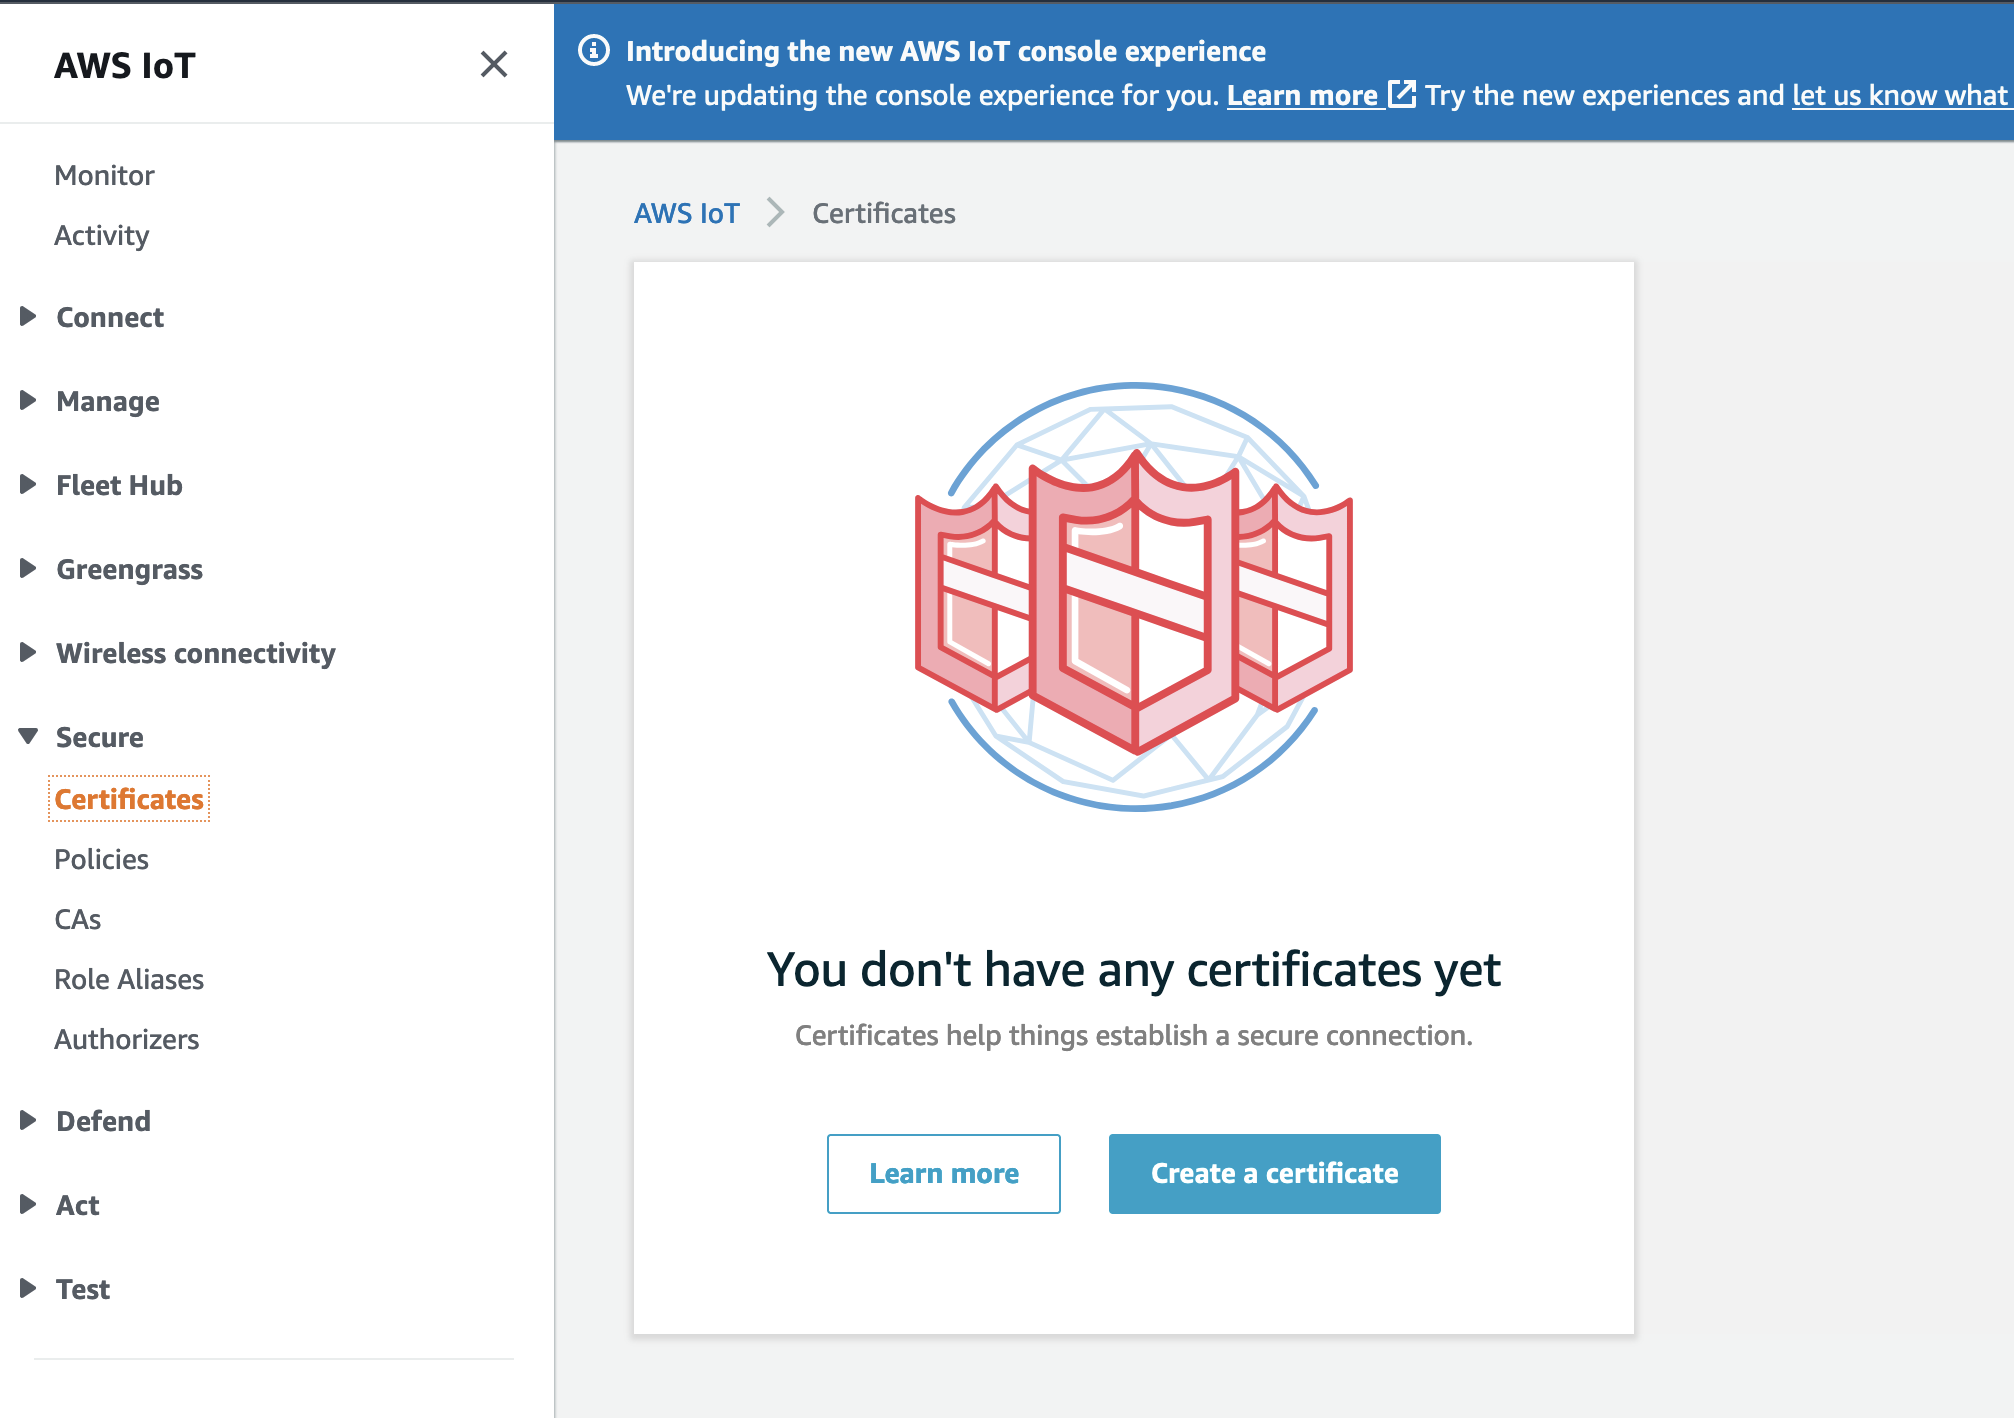
Create a Certificate using the recommended One-Click option.
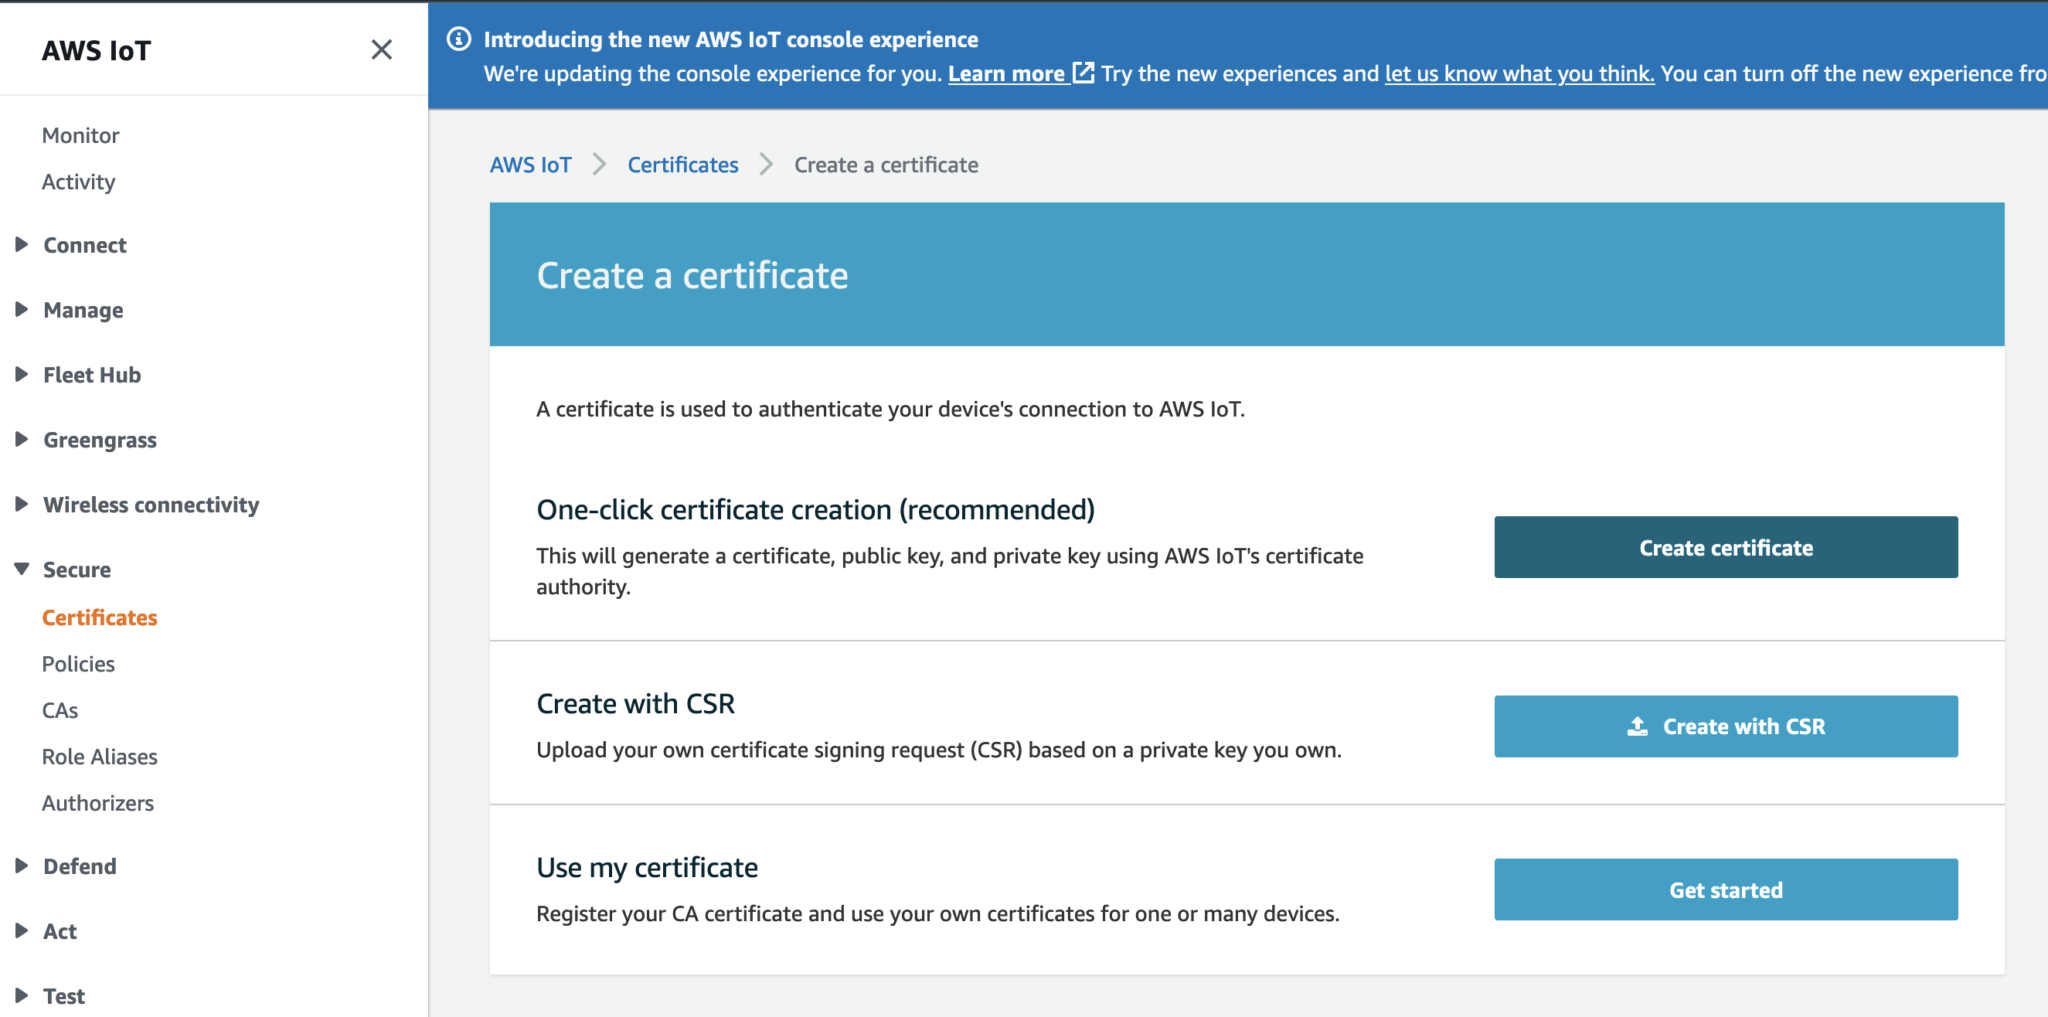
Download the following files and take note of which device (the ESP32 or the IoT Lambda) you like to use this certificate for:
- xxxxx.cert.pem
- xxxxx.private.key
- Amazon Root CA 1: https://www.amazontrust.com/repository/AmazonRootCA1.pem
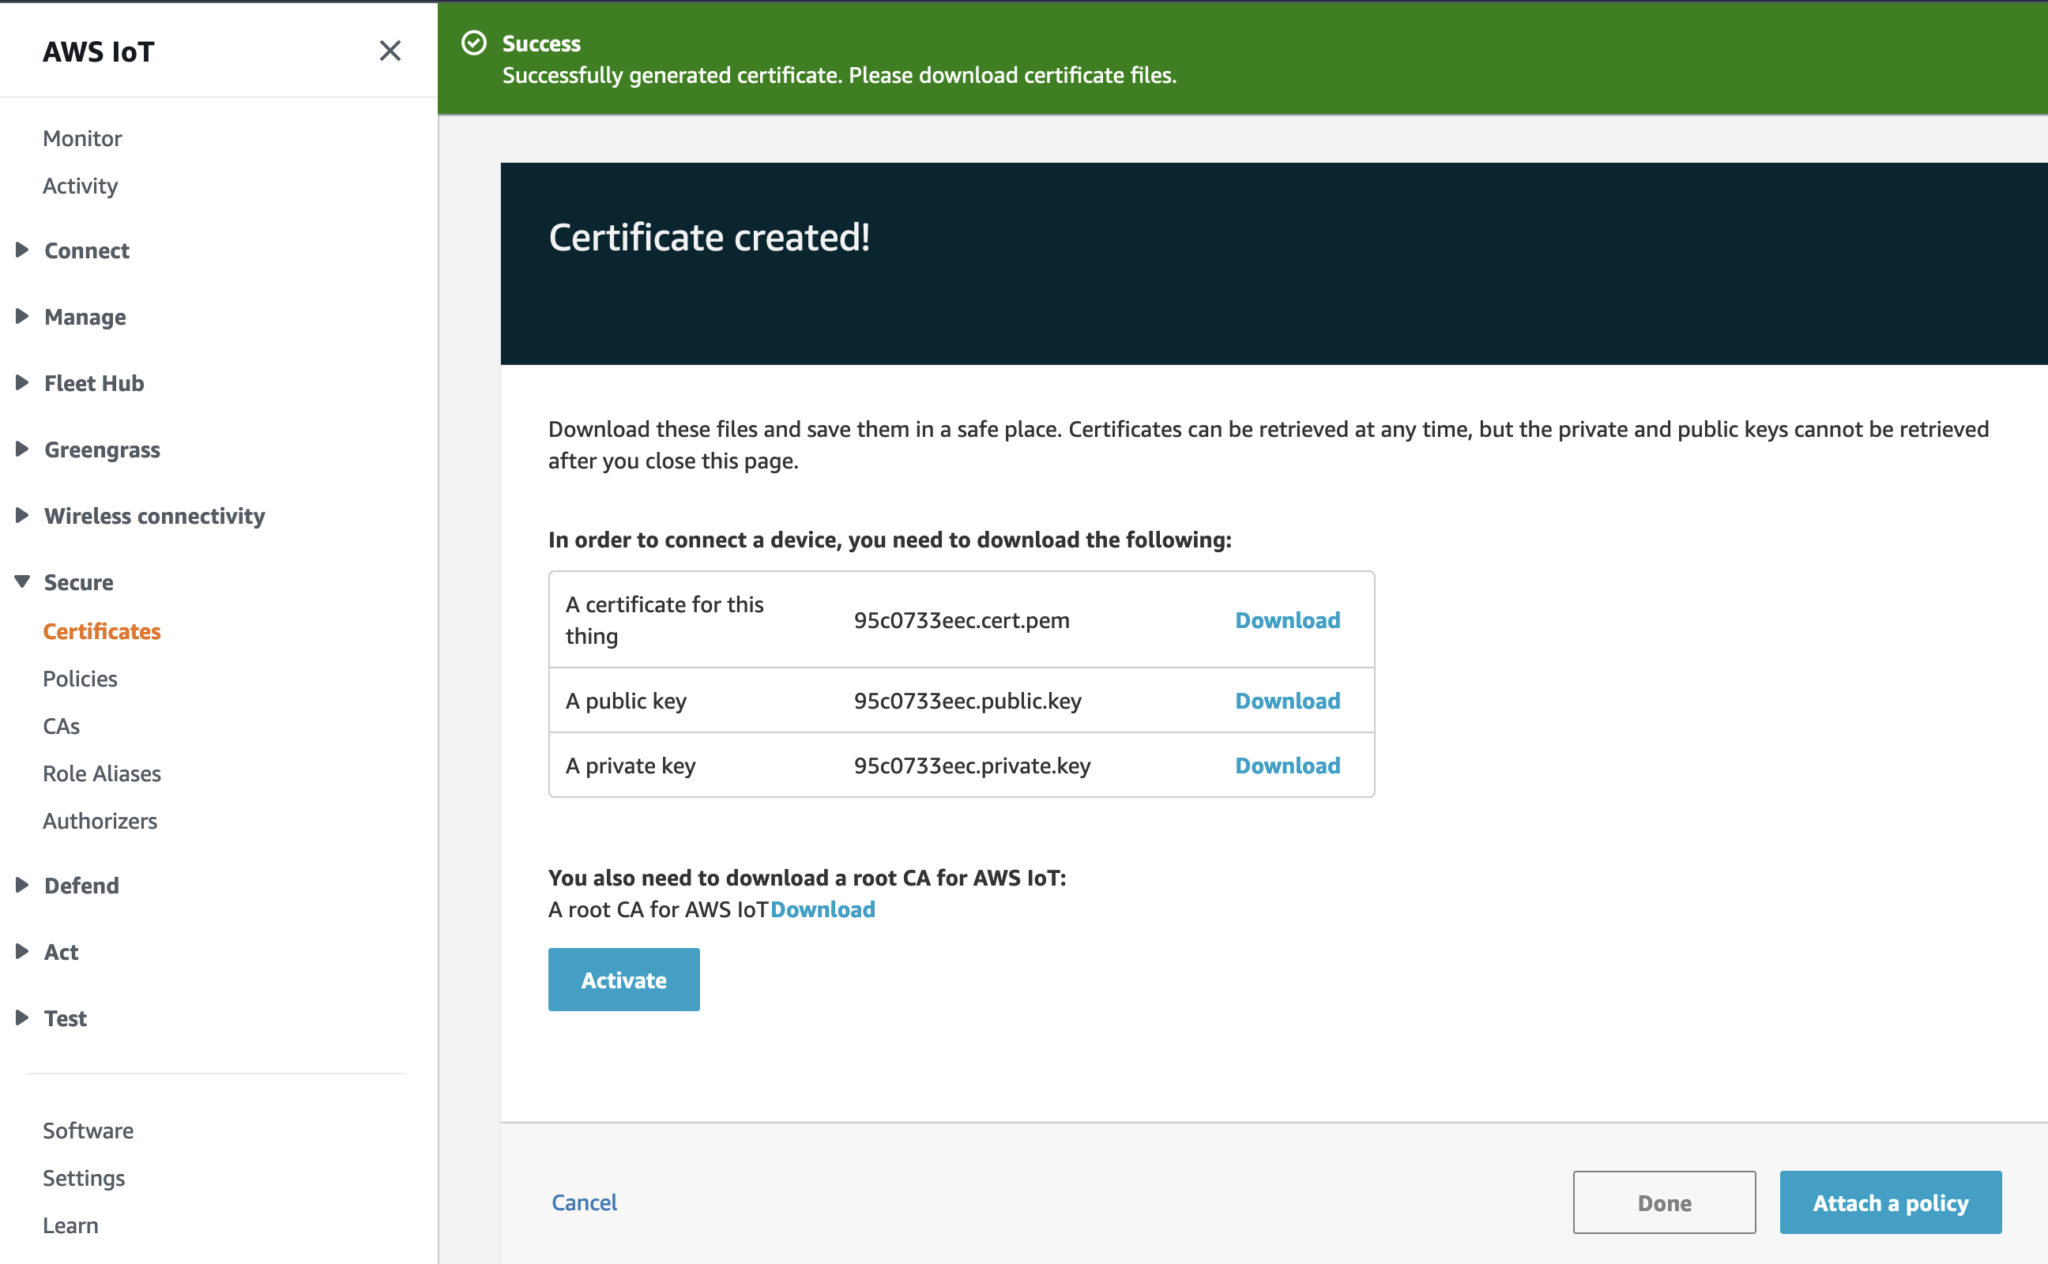
Activate the Certificate.
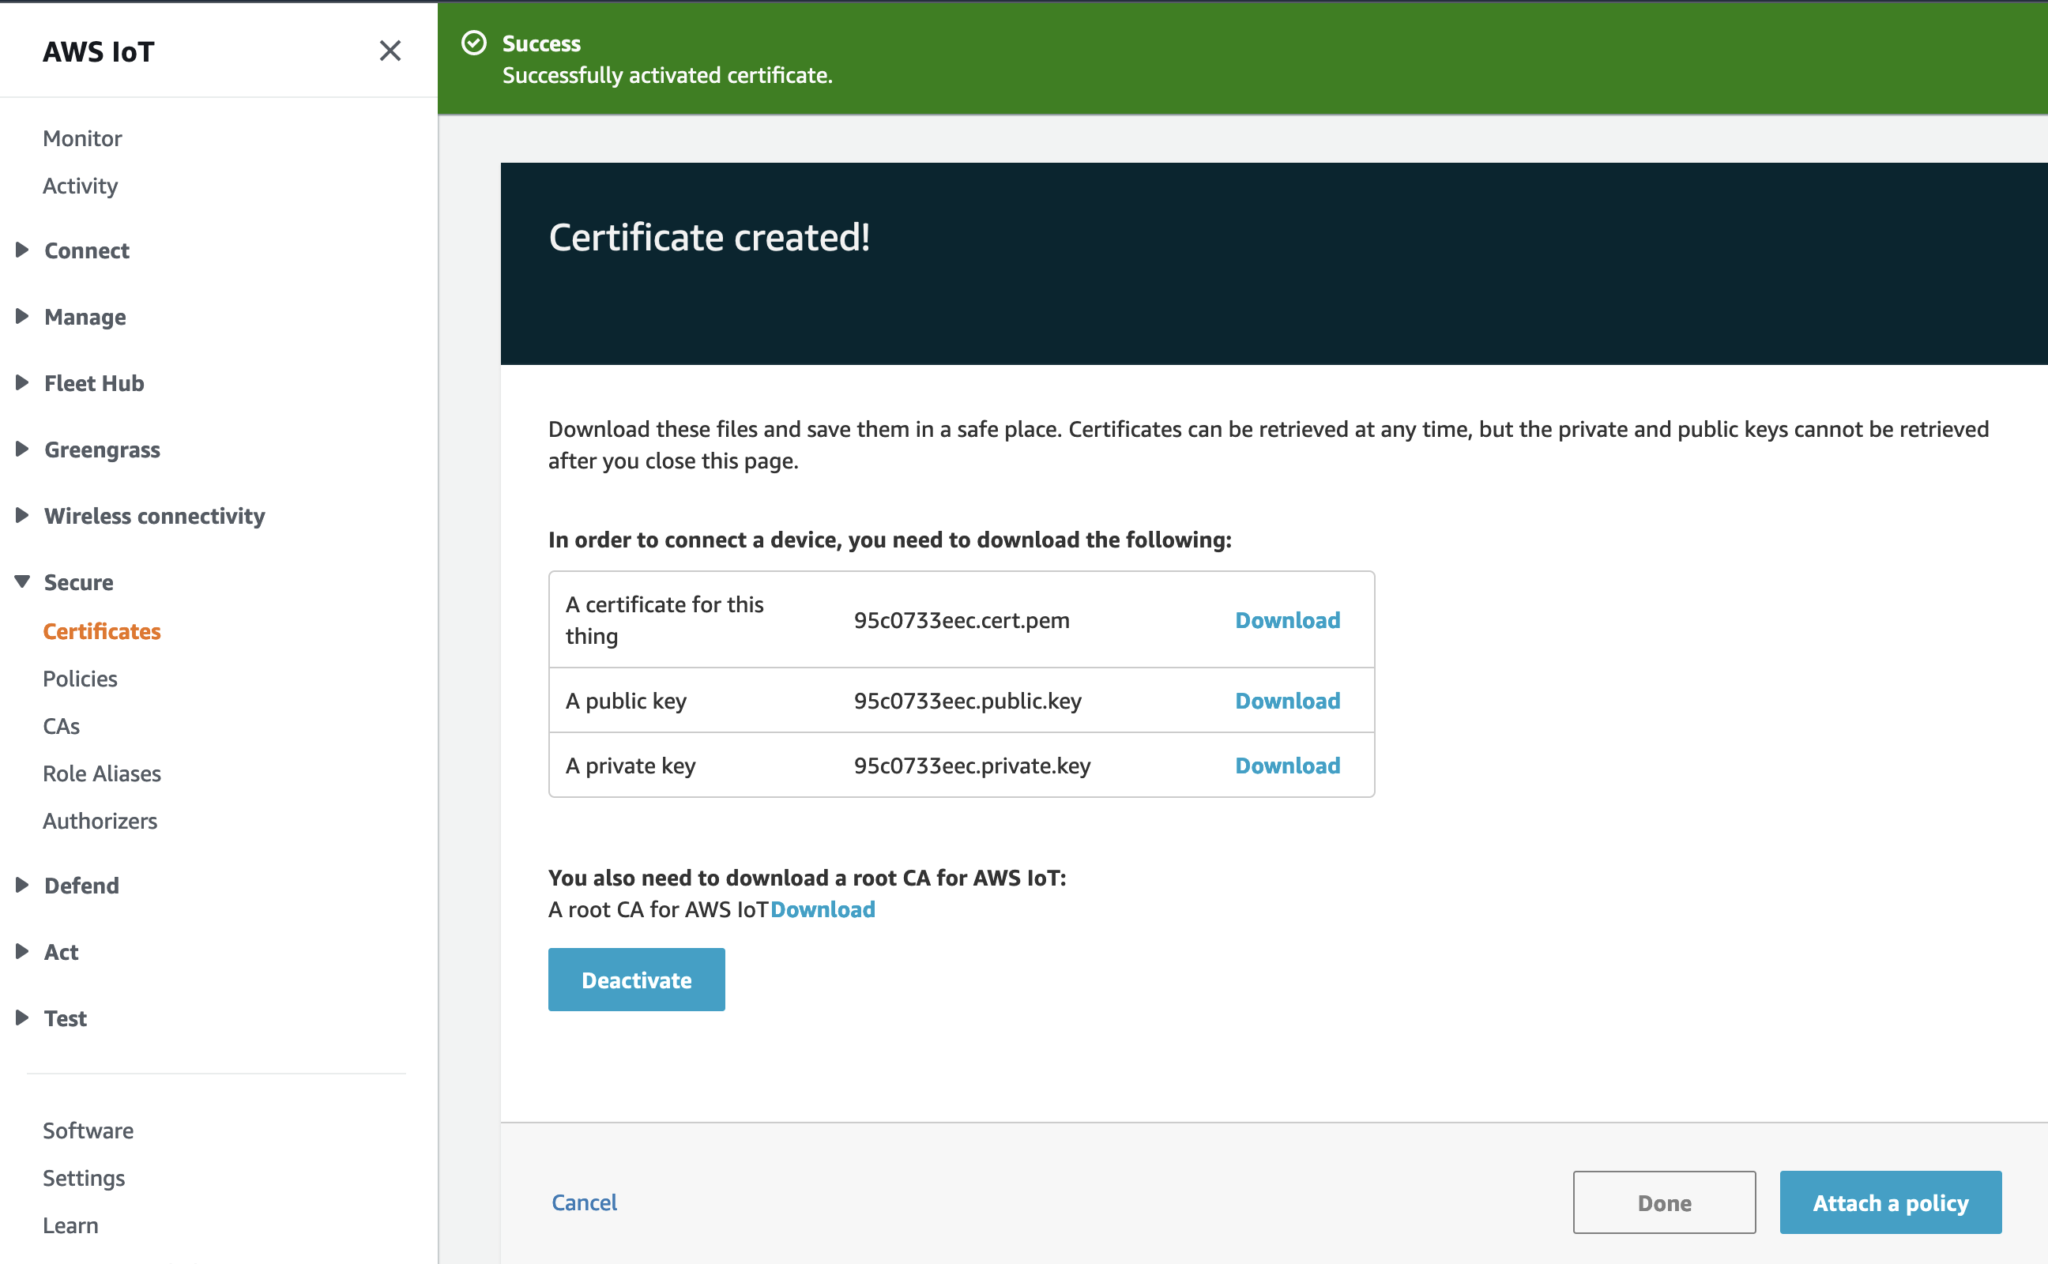
Click on Done. Then repeat the steps to create the second Certificate.
Publish ESP32 States to AWS IoT Core
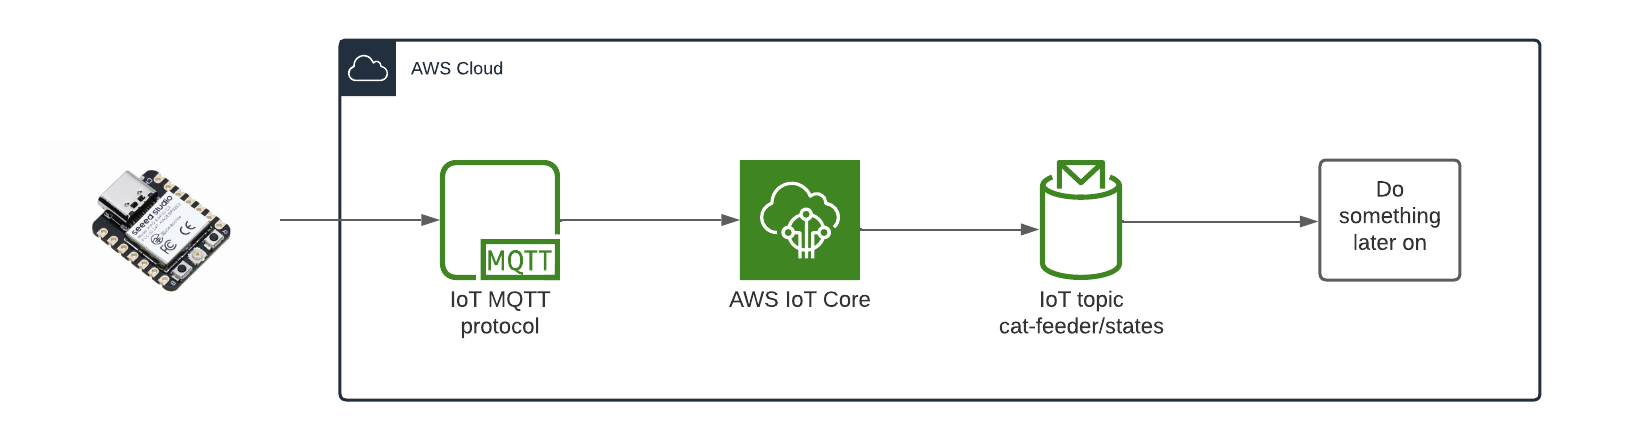
The diagram above depicts the components used that is required in order for the ESP32 to send the States of the Cat Feeder, I've yet to decide what to send but examples could be 1.) battery level 2.) Cat weight (based on a Cat's RFID chip and some how weighing them while they eat) 3.) or how much food is remaining in the feeder. So many options.
- ESP32: This is the micro-controller that will eventually have a bunch of hardware components that we will take States from, then publish to a Topic.
- MQTT: This is the lightweight pub/sub protocol used to send IoT messages over TCP/IP to AWS IoT Core.
- AWS IoT Core: This is the service that will forward message to the ESP32 micro-controller that are subscribed to Topics.
- IoT Topic: The Lambda will publish a message along with the type of button event (One click, long click or double click) to the Topic "cat-feeder/action", the value of the event is subject to what is supported by the IoT button you use.
- Do something later on: I'll decide later on what to do downstream with the State values. This could be anything really, e.g. save a time series of the data into a database or bunch of DynamoDB tables, or get an alert to remind me to charge the Cat Feeder's battery with a customizable threshold?
Instructions to try out the Arduino/ESP32 part of the solution for yourself
- Install the Arduino IDE.
- Follow this AWS blog on setting up an IoT device, start from "Installing and configuring the Arduino IDE" to including "Configuring and flashing an ESP32 IoT device". Their blog walks us through on preparing the Arduino IDE and on how to flash the ESP32 with a Sketch.
- Clone the Arduino source code from my Github repository: https://github.com/chiwaichan/aws-iot-cat-feeder
- Go to the "secrets.h" tab and replace the following variables:
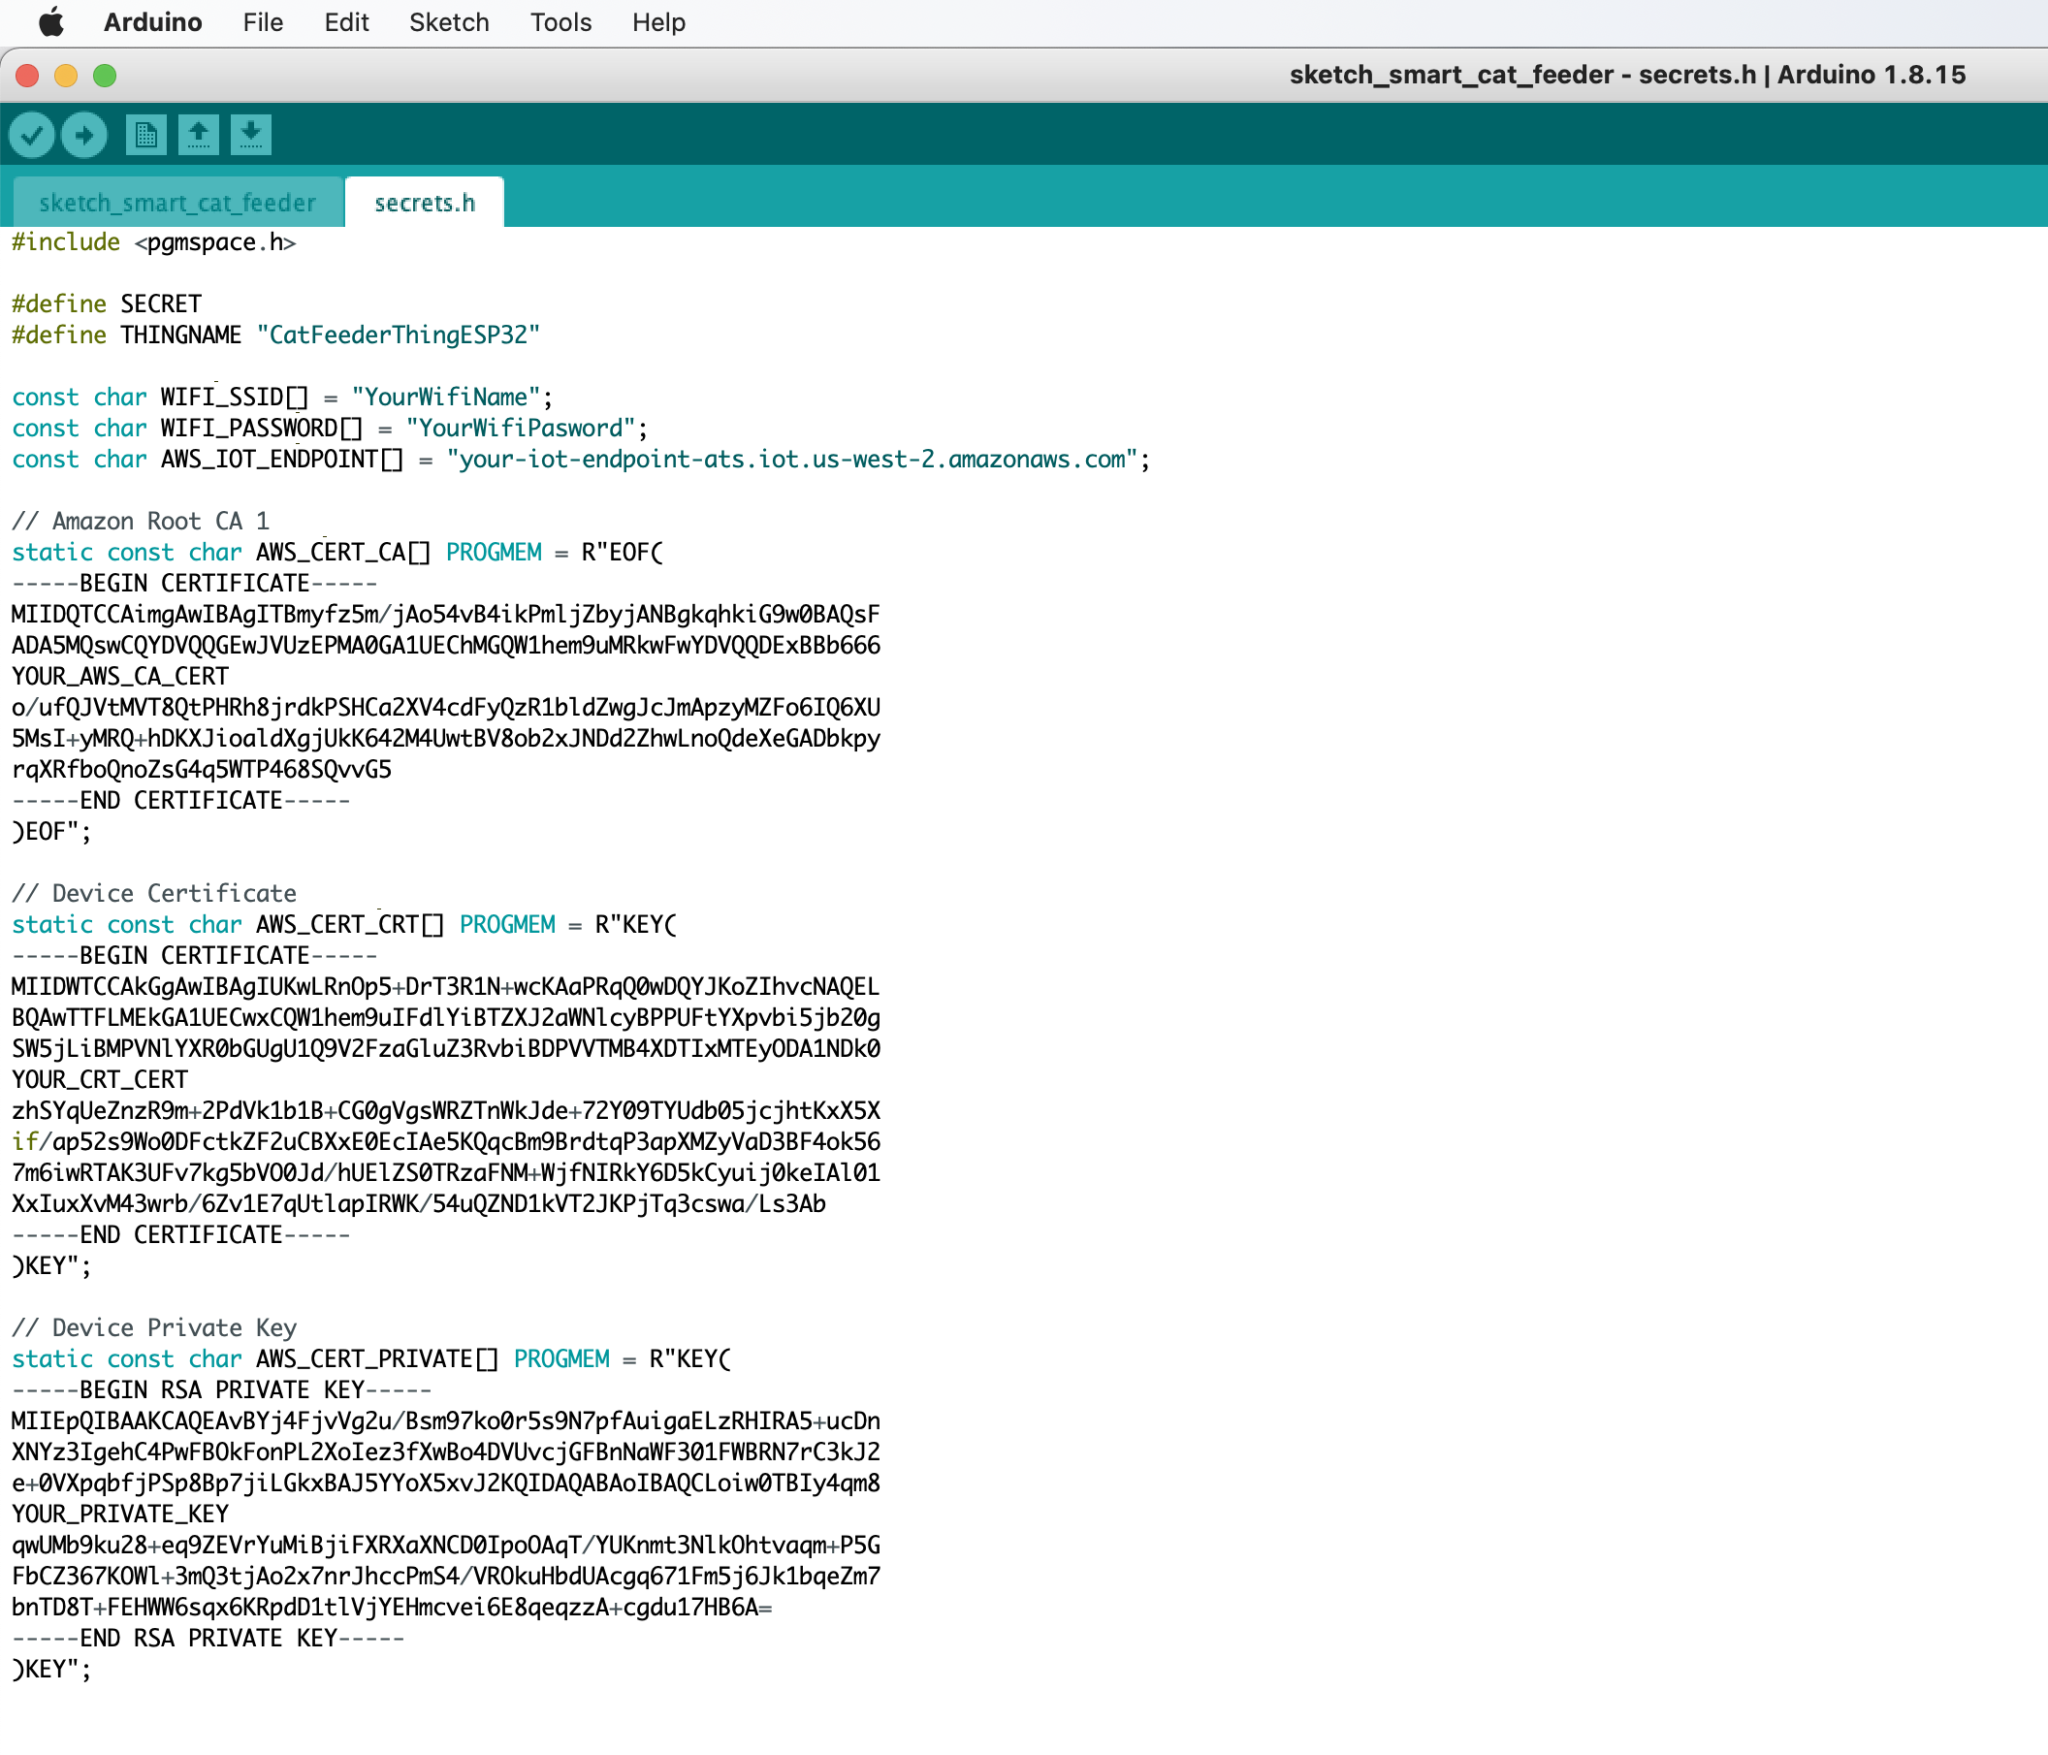
- WIFI_SSID: This is the name of your Wifi Access Point
- WIFI_PASSWORD: The password for your Wifi.
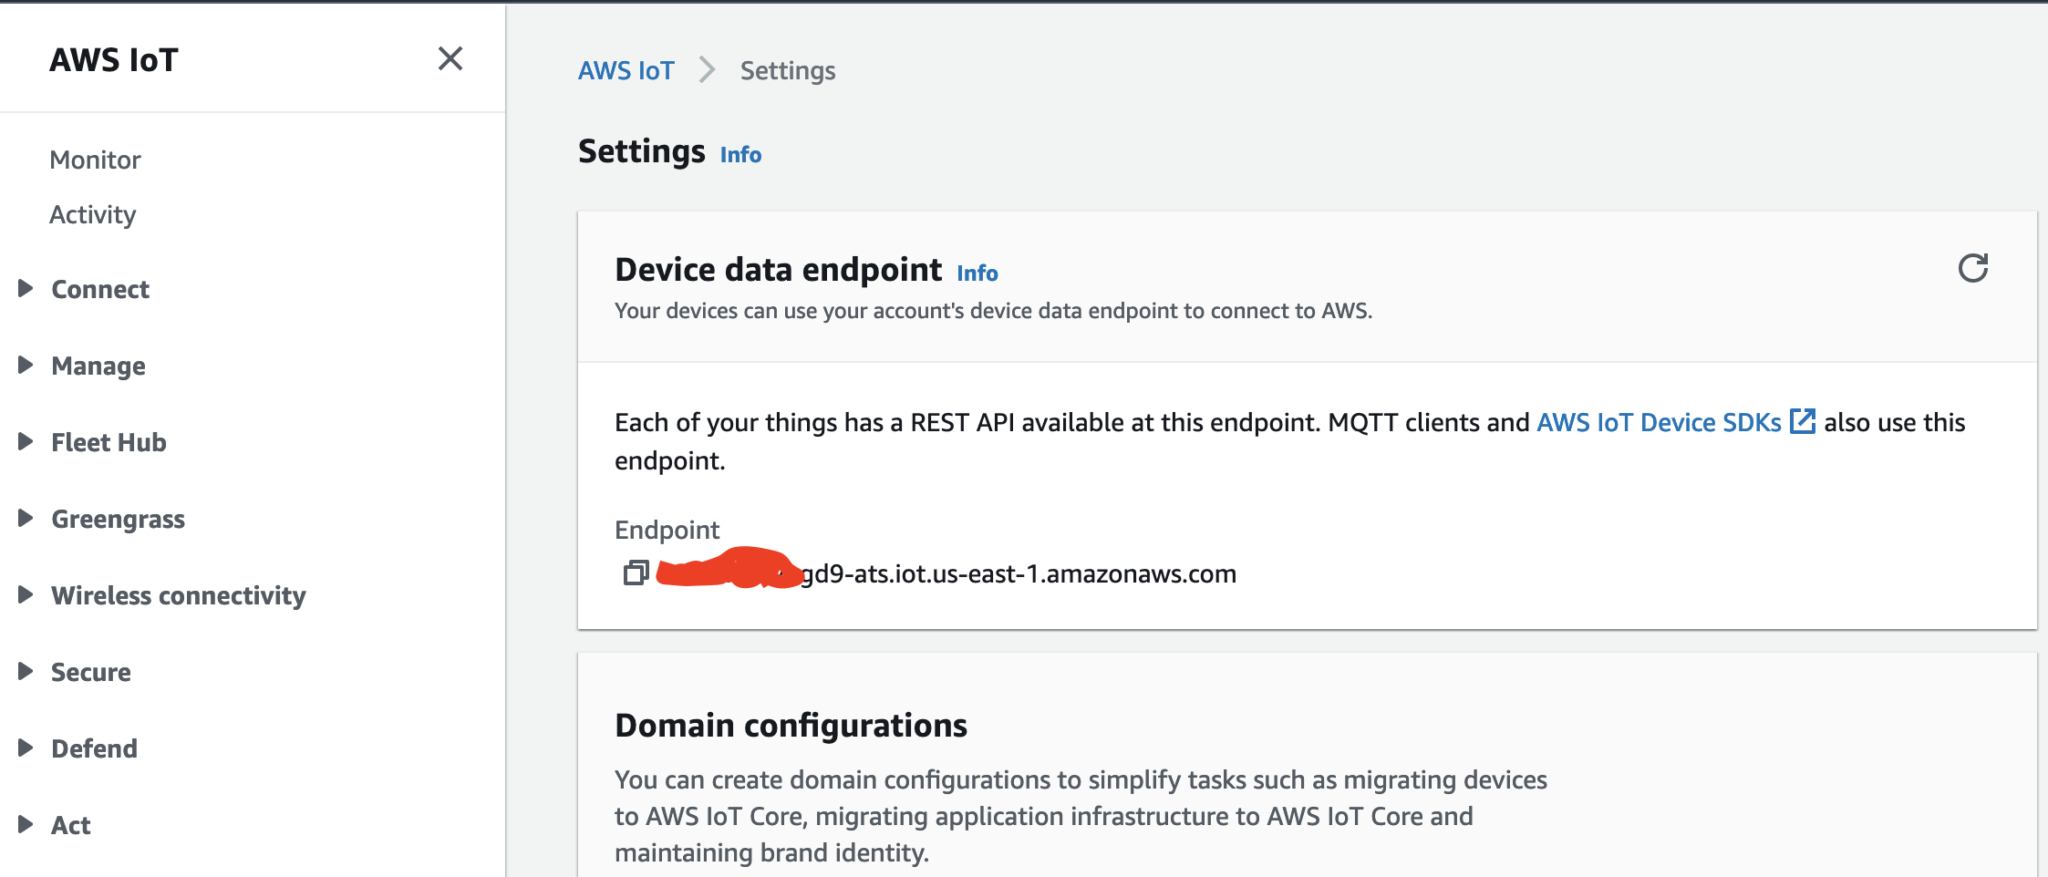
- AWS_IOT_ENDPOINT: This is the regional endpoint of your AWS Iot Core Service.
- AWS_CERT_CA: The content of the Amazon Root CA 1 file created in the prerequisites for the first certificate.
- AWS_CERT_CRT: The content of the xxxxx.cert.pem file created in the prerequisites for the first certificate.
- AWS_CERT_PRIVATE: The content of the xxxxx.private.key file created in the prerequisites for the first certificate.
- Flash the code onto the ESP32
You might need to push a button on the micro-controller during the flashing process depending on the your ESP32 micro-controller
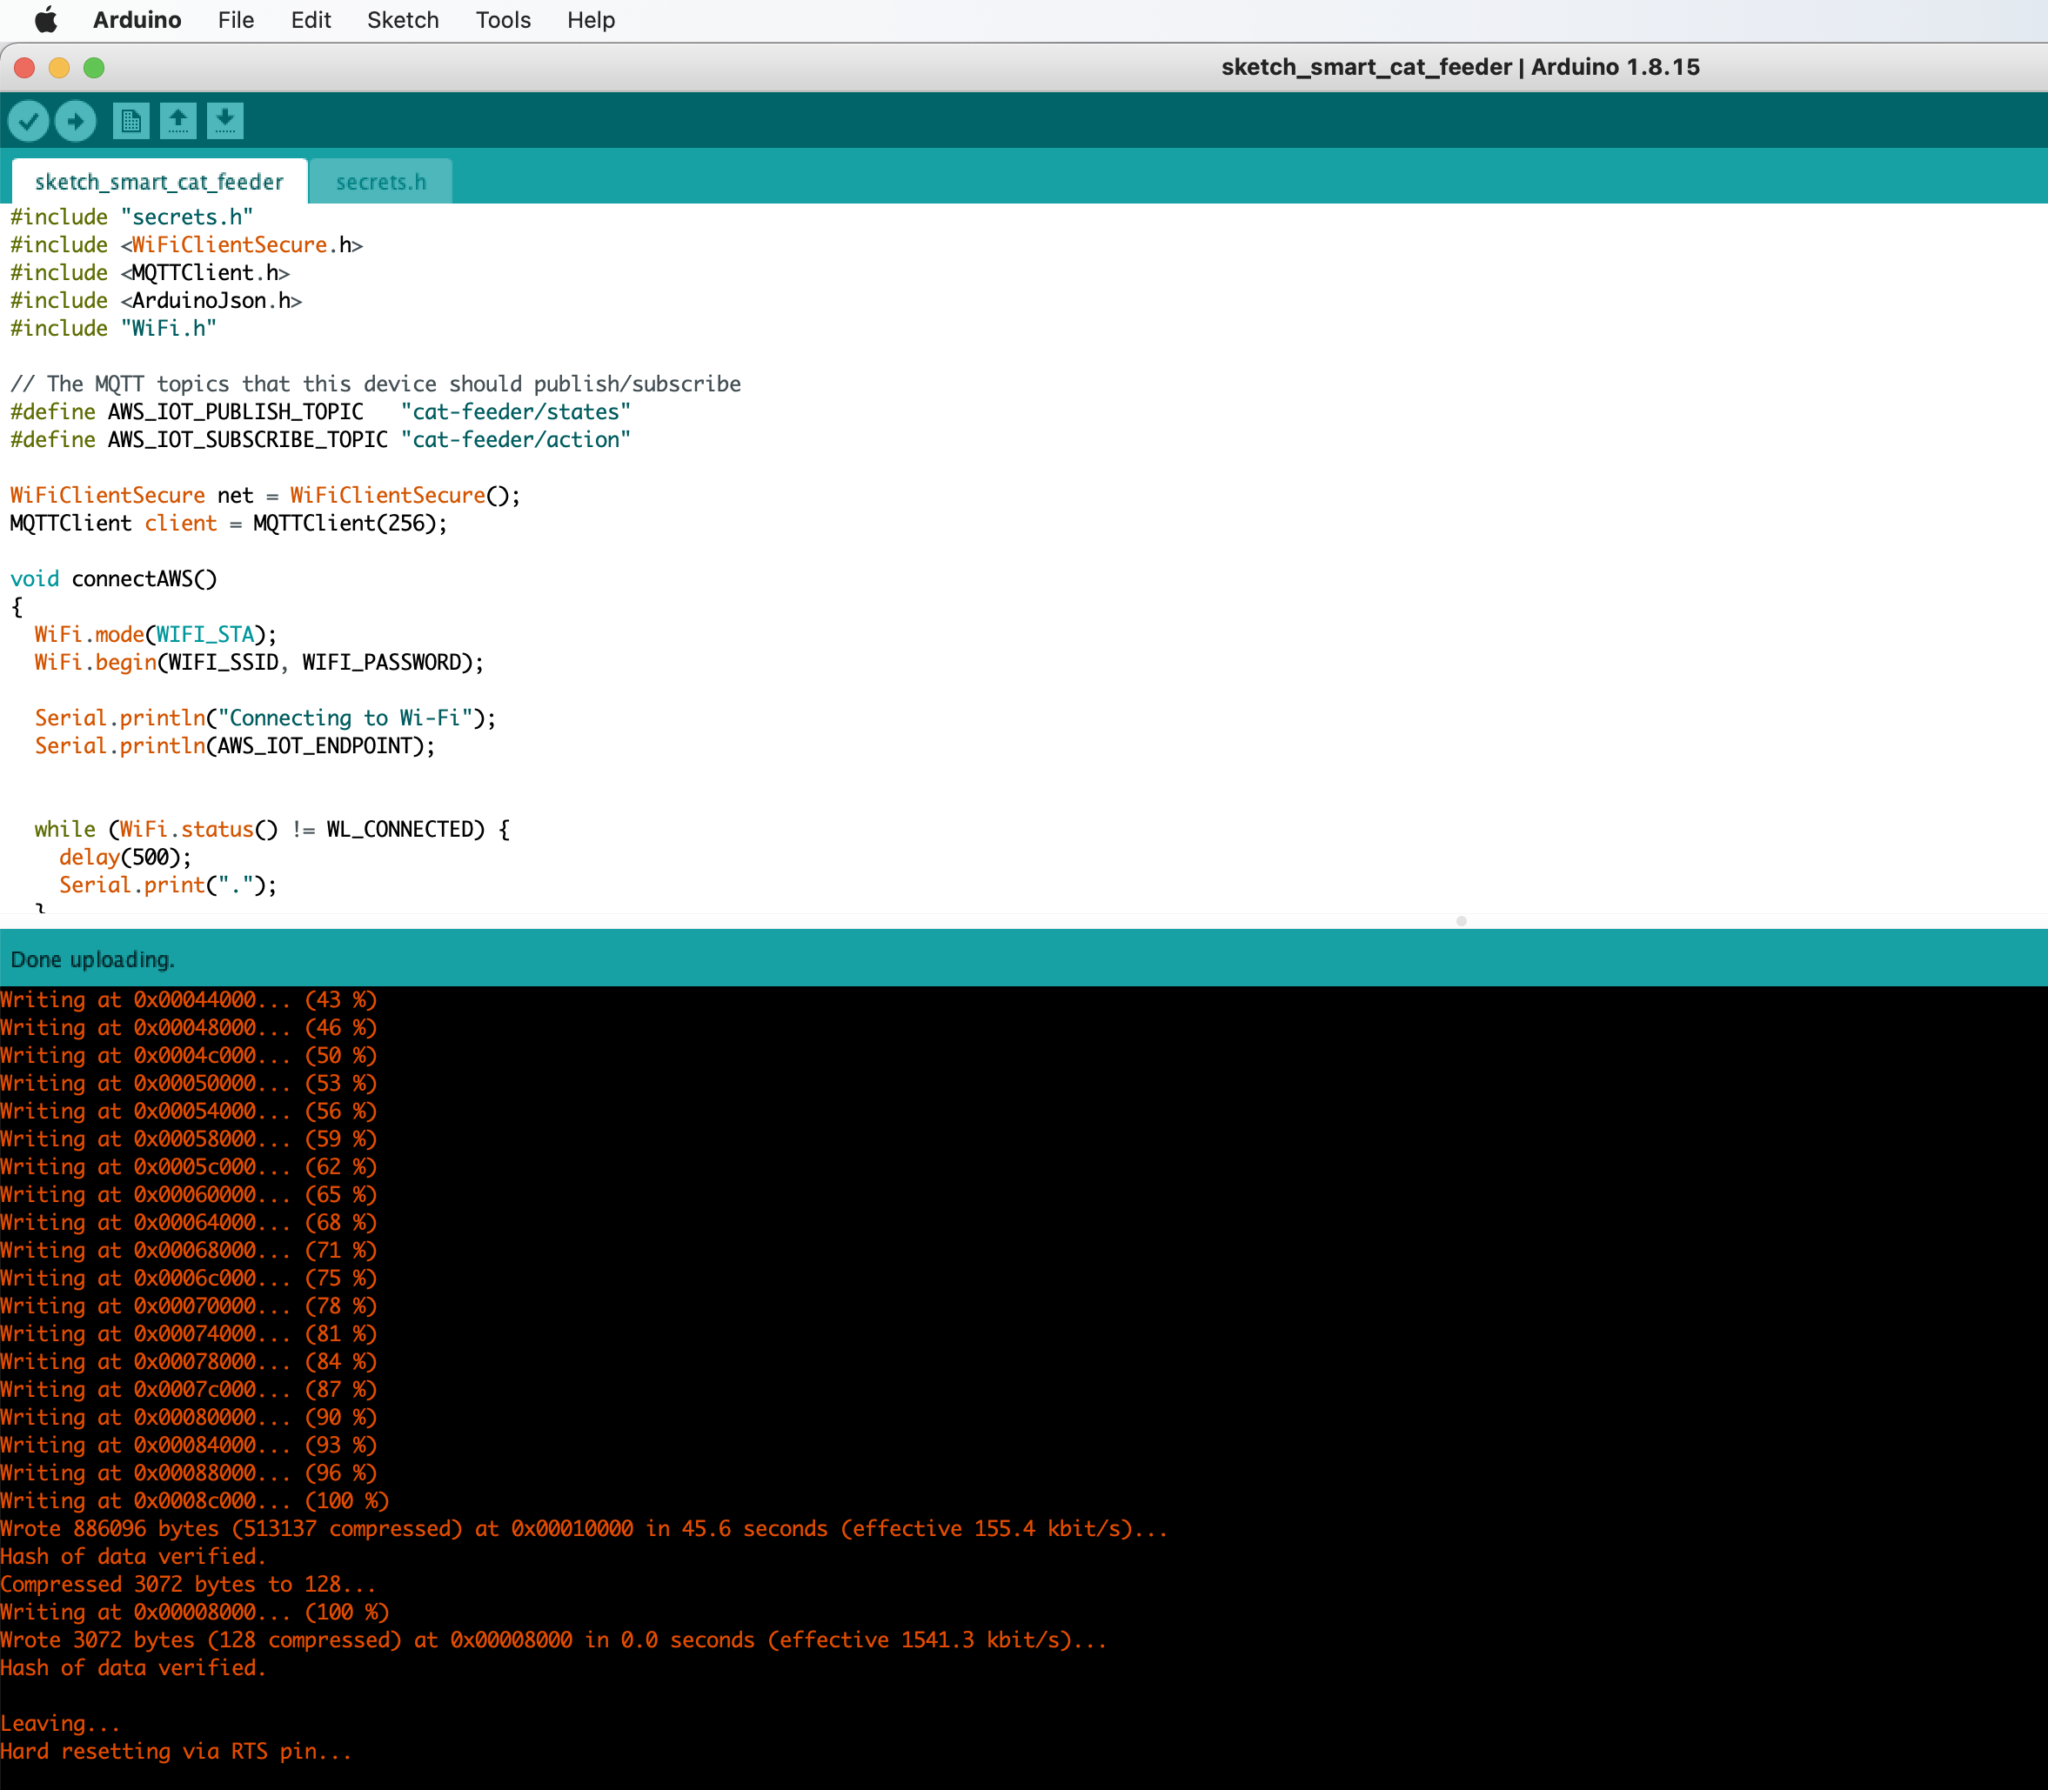
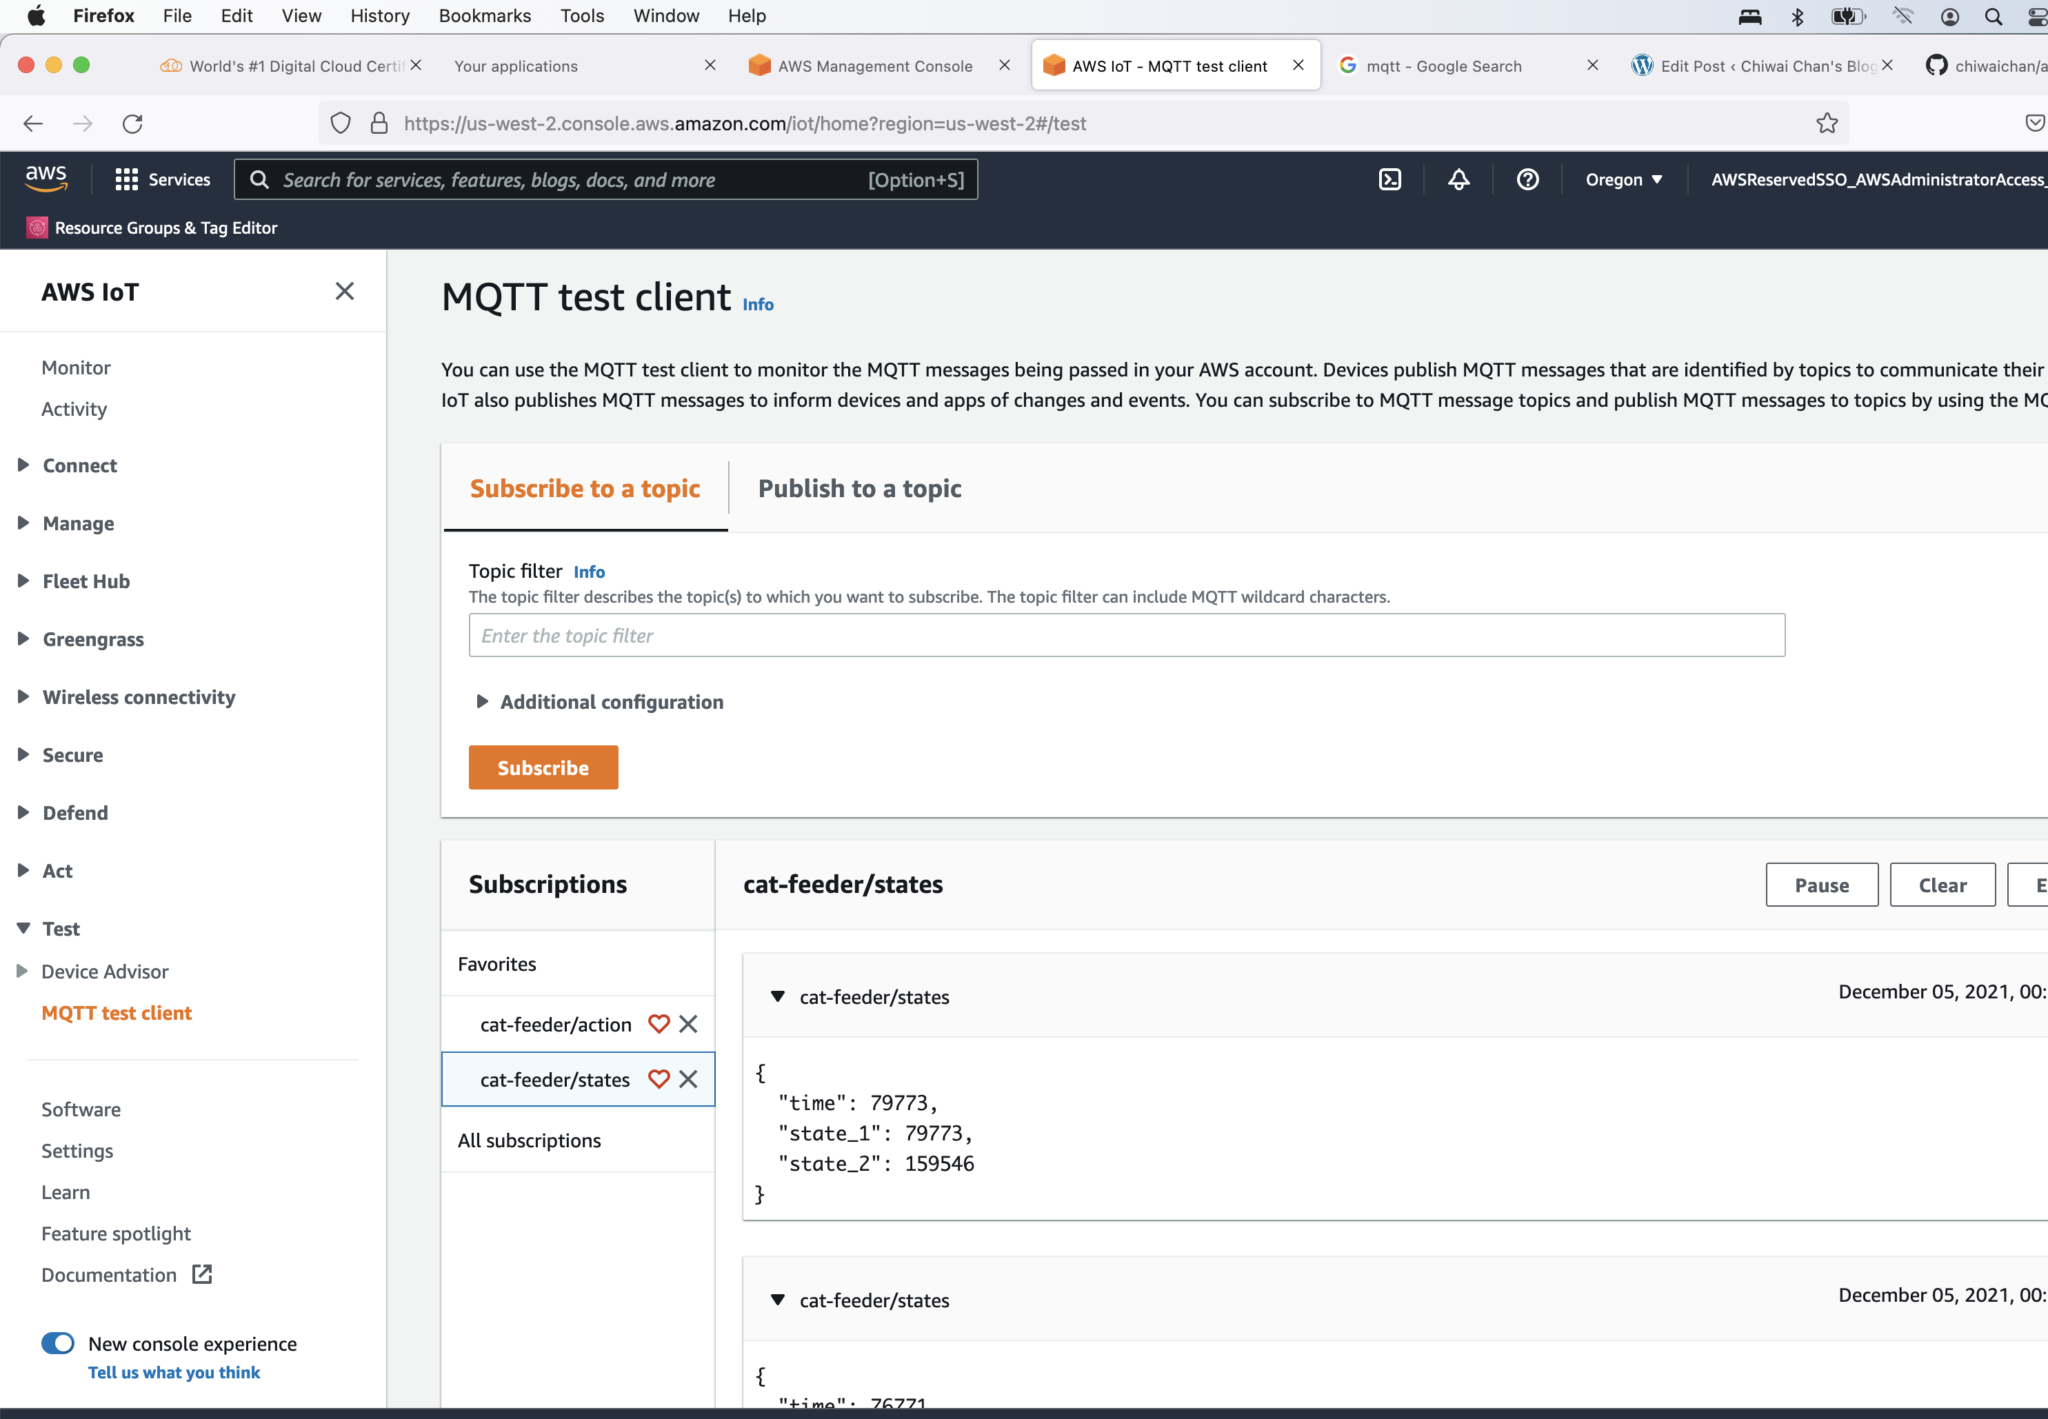
- Check the Arduino console to ensure the ESP32 can connect to AWS IoT and publish messages.

- Verify the MQTT messages is received by AWS IoT Core
Sending a message to the ESP32 when the IoT button is pressed
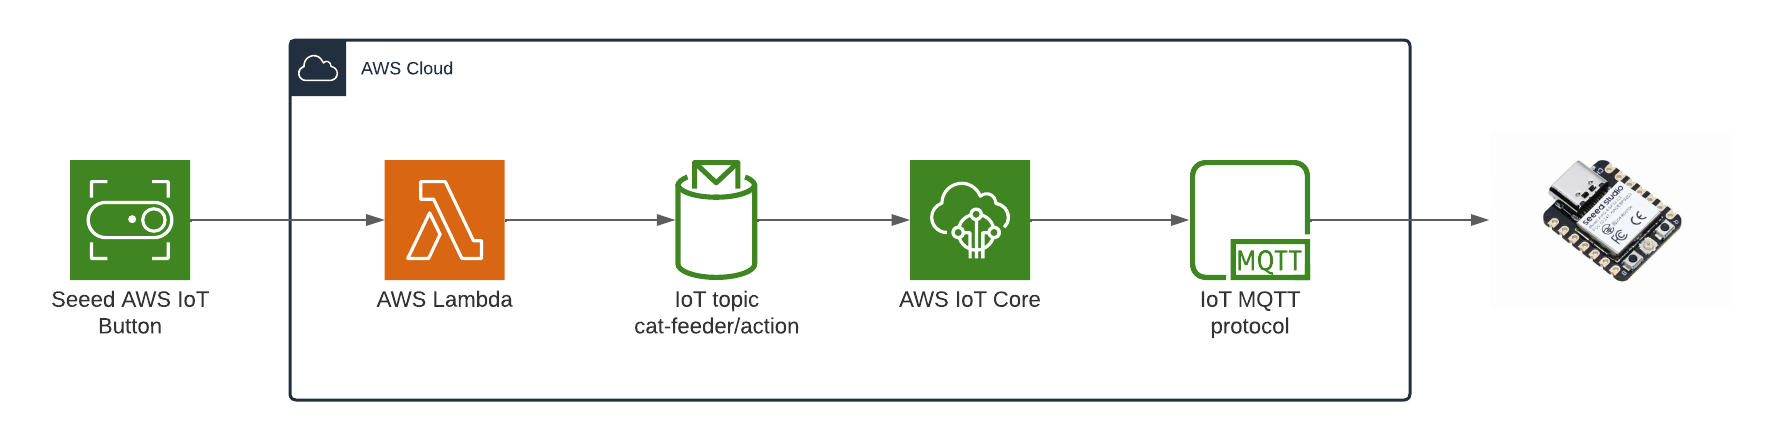
The diagram above depicts the components used to send a message to the ESP32 each time the Seeed AWS IoT button is pressed.
- AWS IoT button: this is the IoT button I detail in Part 1; it's a physical button that can be anywhere in the world where I can press to feed the fur babies once the final solution is built.
- AWS Lambda: This will replace the Lambda from the previous blog with the one shown in the diagram.
- IoT Topic: The Lambda will publish a message along with the type of button event (One click, long click or double click) to the Topic "cat-feeder/action", the value of the event is subject to what is supported by the IoT button you use.
- AWS IoT Core: This is the service that will forward message to the ESP32 micro-controller that are subscribed to Topics.
- ESP32: We will see details of the button event from each click in the Arduino console once this part is set up.
Instructions to set up the AWS IoT button part of the solution
- Take the 3 files create in the second set of Certificate created in the AWS IoT Core Service in the prerequisites, then create 3 AWS Secrets Manager "Other type of secret: Plaintext" values. We need a Secret value for each file. This is to provide the Lambda Function the Certificate to call AWS IoT Core.

-
Get a copy of the AWS code from my Github repository: https://github.com/chiwaichan/aws-iot-cat-feeder
-
In a terminal go into the aws folder and run the commands found in the "sam-commands.text" file, be sure to replace the following values in the commands to reflect the values for your AWS account. This will create a CloudFormation Stack of the AWS IoT Services used by this entire solution.
- YOUR_BUCKET_NAME
- Value for IoTEndpoint
- Value for CatFeederThingLambdaCertName, this is the name of the long certificate value found in Iot Core created in the prerequisites for the second certificate.
- Value for CatFeederThingLambdaSecretNameCertCA, e.g. "cat-feeder-lambda-cert-ca-aaVaa2", check the name in Secrets Manager.
- Value for CatFeederThingLambdaSecretNameCertCRT
- Value for CatFeederThingLambdaSecretNameCertPrivate
- Value for CatFeederThingControllerCertName, this is the name of the long certificate value found in Iot Core created in the prerequisites for the second certificate used by the ESP32.
- Find the Lambda created in the CloudFormation stack and Test the Lambda to manually trigger the event.
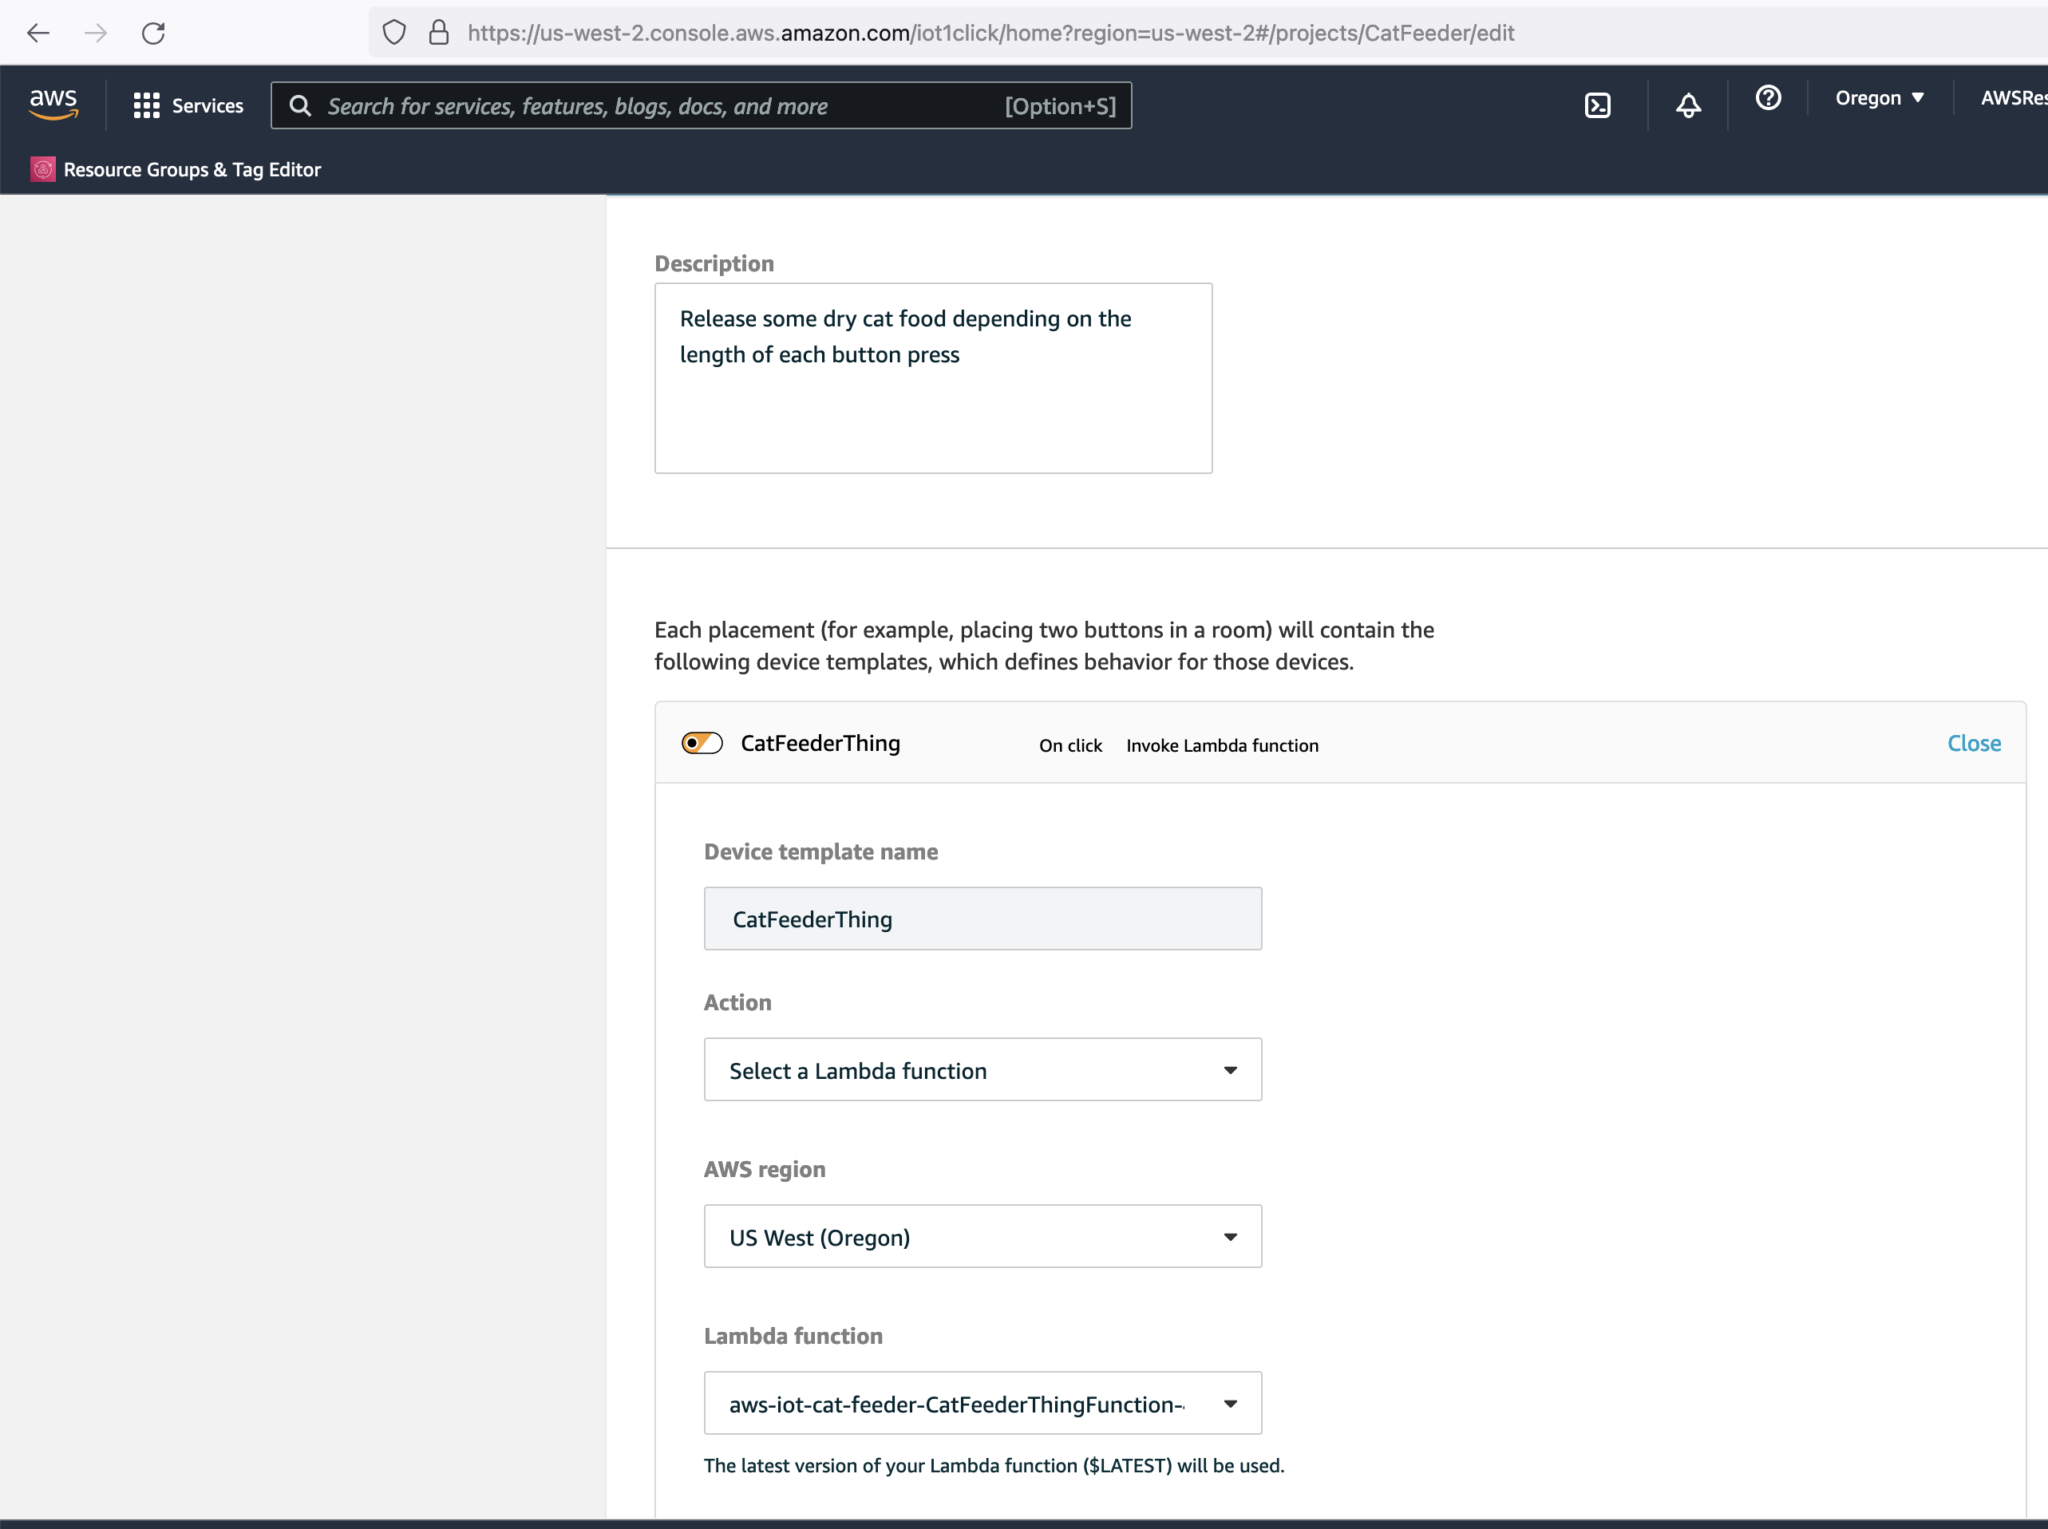
- If you have setup an IoT 1-Click Button found in Part 1, you can replace that Lambda with the one created by the CloudFormation Stack. Go to the "AWS IoT 1-Click" Service and edit the "template" for the CatFeeder project.
-
Let's press the Iot Button in the following way:
- Single Click
- Double Click
- Long Click
-
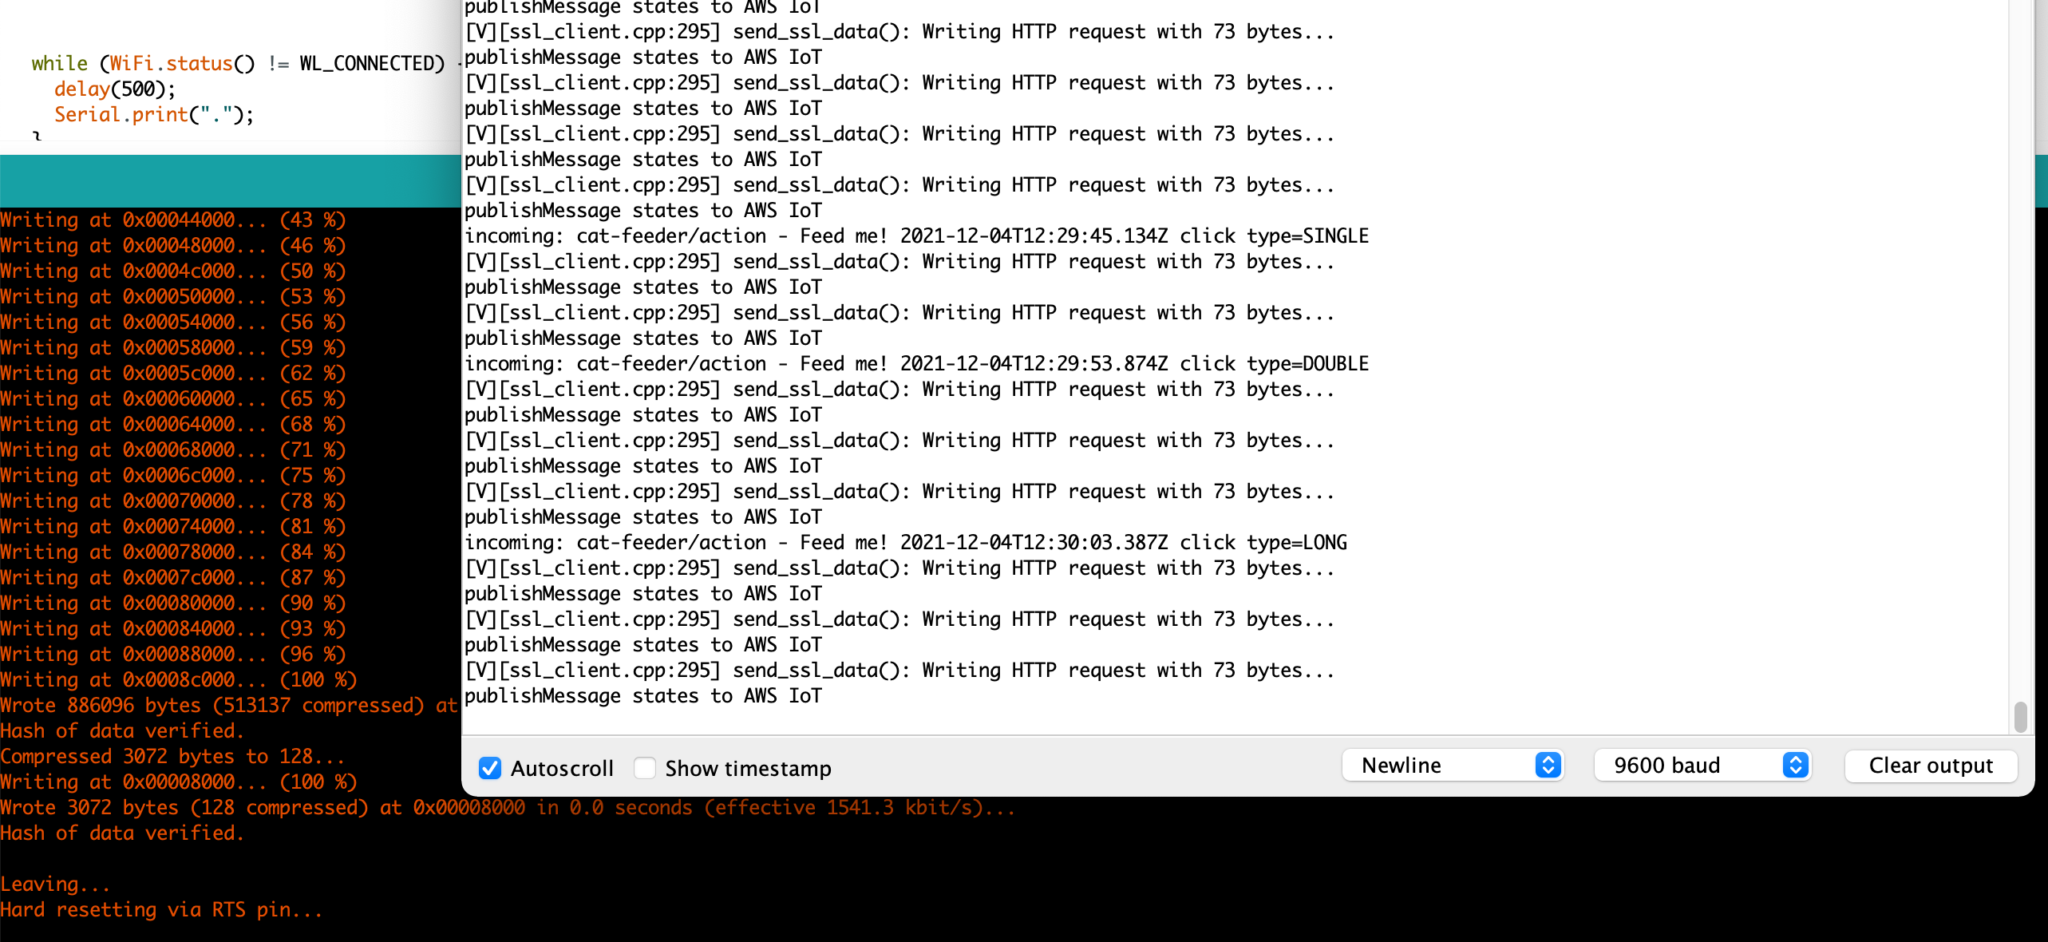
Verify the button events are received by the ESP32 by going to the Arduino console and you should see something like this:
What's next?
I recently got a Creality3D Ender-3 V2 printer, I've got many known unknowns I know I need to get up to speed with in regards to fundamentals of 3D printing and all the tools, techniques and software associated with it. I'll attempt to print an enclosure to house the ESP32 controller, the wires, power supply/battery (if I can source a battery that lasts for more than a month on a single charge) and most importantly the dry cat food; I like to use some mechanical components to dispense food each time we press the IoT button described in Part 1. I'll talk in depth on the progress made on the 3D printing in Part 3.